That dreaded, endlessly spinning loading circle on Twitch—we’ve all been there. When your stream starts buffering, it’s easy to get frustrated, but the cause is usually one of a few usual suspects: a shaky internet connection, a conflict within your browser, or sometimes, an issue on the streamer’s end. Your device is basically telling you it can’t download the video data fast enough to keep up, and finding out why is the key to getting back to the action.
Diagnosing the Real Reasons Your Twitch Stream Is Buffering
Before you start unplugging routers or clearing your browser cache in a panic, let’s take a beat and figure out what’s really going on. The buffering could be happening on your end, it could be the streamer’s broadcast settings, or it could even be Twitch’s servers getting hammered during a big event.
Guessing won’t get you anywhere. Instead, let’s walk through the most common culprits. Think of this as your diagnostic roadmap, helping you understand how your internet speed, the stream’s video quality, and your own computer’s setup all play together. Once you have a better idea of the problem, you can jump straight to the right fix.
Before we get into the nitty-gritty, here’s a quick checklist of common symptoms and the first things you should try. Often, one of these simple actions can solve the problem without a deep dive.
Quick Fix Checklist for Twitch Buffering
| Symptom | Potential Cause | First Action to Try |
|---|---|---|
| Buffering starts on all streams | Your local network | Restart your router and modem. |
| Buffering only happens at high quality | Internet speed bottleneck | Manually lower the stream quality (e.g., from 1080p to 720p). |
| Stream is choppy, not just loading | Browser or device issue | Close other browser tabs and background applications. |
| Chat works fine, but video freezes | Twitch player conflict | Refresh the page (Ctrl+F5) to do a hard refresh. |
Give those a shot first. If the buffering persists, it’s time to investigate further.
Your Local Network and Device Performance
More often than not, the problem is sitting right in your own home. A slow or unstable internet connection is the number one reason Twitch keeps buffering. You might have a connection that feels plenty fast for browsing websites, but it can easily buckle under the pressure of the constant data required for a live video feed.
Your device’s performance is another huge piece of the puzzle. An older computer, or even a powerful one with a browser bogged down by dozens of extensions, can struggle to decode and display the video. In those cases, you’ll see stuttering and buffering even with a lightning-fast internet connection.
Here’s a quick rundown of what might be happening on your end:
- Not Enough Internet Speed: Live streams, especially at a crisp 1080p, are bandwidth-hungry. You need a stable connection to keep up.
- Wi-Fi Woes: Wireless signals are notoriously fickle. They can be weakened by walls, microwaves, or interference from your neighbor’s network, causing data to drop.
- Bandwidth Hogs: Are you downloading a huge game in the background? Is someone else in the house streaming 4K movies? Other applications can steal the bandwidth Twitch needs.
- Browser Troubles: An outdated browser, a mountain of cached data, or a misbehaving extension can wreak havoc on the Twitch player.
Issues Beyond Your Control
Sometimes, you can have a perfect setup—a brand-new PC, a fiber connection, and an ethernet cable—and still get hit with buffering. When that happens, the problem is likely somewhere else. The streamer you’re watching might be pushing a broadcast bitrate that’s too high for most viewers, or Twitch’s own servers could be overloaded.
It’s important to remember that not every buffering issue is fixable from your couch. Knowing when the problem is out of your hands can save you a ton of time and frustration.
As one of the world’s top live streaming platforms, Twitch is always dealing with these kinds of challenges. With over 140 million monthly active users tuning in as of 2025, the sheer scale of the operation means occasional hiccups are just part of the deal. Buffering is incredibly common for viewers with unstable internet, where speeds dipping below 5 Mbps will almost always cause a 1080p stream to pause. If you’re interested in learning more about the technical hurdles of streaming, you can find more insights about Twitch performance issues on Tenorshare.
Fine-Tuning Your Home Network for Flawless Streaming
Before you point the finger at Twitch, let’s look closer to home. Your local network is the first and most common culprit when it comes to buffering problems. I’ve learned from years of troubleshooting that for live video, a stable connection beats a fast one every single time. A speed test might look impressive, but if that connection is prone to dips and spikes, you’re going to get stuck in that dreaded buffering loop.
So, let’s roll up our sleeves. These are the practical, real-world steps I take to build a rock-solid network foundation and stop local issues from ruining a stream.
Ditch the Wi-Fi and Go Wired
Wi-Fi is amazing for convenience, but it’s often the weakest link for something as demanding as high-quality live video. Wireless signals are notoriously flaky, falling victim to all sorts of interference that causes packet loss and latency spikes—the sworn enemies of a smooth stream.
Do yourself a favor and plug in an Ethernet cable. It creates a direct, physical link between your device and router, delivering a faster, more reliable connection that isn’t bothered by a chaotic wireless environment. If Twitch keeps buffering on Wi-Fi, this is the single most effective fix you can make. Period.
Think about it: your microwave, your neighbor’s router, even your cordless phone can disrupt your Wi-Fi signal. An Ethernet cable just sidesteps all that noise.
The Underestimated Power of a Reboot
It sounds almost too simple, but there’s a reason “turn it off and on again” is the first rule of IT. Your modem and router are essentially tiny computers, and just like any computer, they can get bogged down over time as their memory gets cluttered with errors.
A proper power cycle forces them to dump that junk memory, clear their cache, and establish a completely fresh connection to your Internet Service Provider (ISP). You’d be shocked how often this solves persistent performance issues.
How to Do It Right
- First, unplug the power cords from both your modem and your router.
- Walk away for at least 60 seconds. Don’t rush this part; it lets the internal components fully discharge and reset.
- Plug the modem back in first. Wait for its lights to go solid (usually green or blue), indicating it’s fully online.
- Then, plug your router back in and wait for its lights to stabilize as well.
Following this exact sequence gives each device the time it needs to boot up cleanly and shake hands properly.
Router Placement and Keeping It Updated
If you absolutely must use Wi-Fi, your router’s physical location is a huge deal. You want it in a central, elevated spot, far from thick concrete walls, big metal objects (like a refrigerator), and other electronics.
I always tell people to think of their router’s signal like a bare lightbulb. The fewer obstacles between the bulb and your eyes, the brighter the light. Placing it out in the open instead of hiding it in a cabinet can make a world of difference for signal strength.
Also, don’t forget about firmware. Router manufacturers constantly release updates that patch security flaws, fix bugs, and improve overall performance. If you’re running on ancient firmware, you could be dealing with problems that were solved ages ago. Just log into your router’s admin panel from a web browser and check for an update—it’s usually a one-click process.
Taming Bandwidth Hogs with QoS
In a busy house, your Twitch stream is fighting for bandwidth. If your roommate starts downloading a massive game update or your parents start streaming a 4K movie, your connection can get shoved to the back of the line, and—you guessed it—buffering begins.
This is where Quality of Service (QoS) becomes your secret weapon. Most modern routers have this feature, which lets you tell it which devices or apps get priority.
By setting a QoS rule, you’re essentially telling your router, “Hey, see my PC? The traffic going to it is top priority. Always give it the bandwidth it needs, no matter what else is happening.” This is a game-changer if Twitch keeps buffering because your connection is being gobbled up by others.
While the exact steps differ between router brands, the process is generally the same:
- Log into your router’s settings via its web interface.
- Look for the QoS settings, often under an “Advanced” or “Traffic Management” tab.
- Create a rule that gives your main streaming device the highest priority. You’ll usually identify it by its MAC or IP address.
Think of QoS as creating a dedicated express lane on your home’s internet highway, just for your Twitch traffic. For anyone in a shared living space, it’s an incredibly powerful tool.
Fine-Tuning Your Browser and Device for Peak Performance
If your network checks out but Twitch keeps buffering, it’s time to look closer to home. The problem might not be the data getting to your computer, but how your machine is handling it once it arrives. Your browser and device are bustling environments where a single rogue extension or an overloaded processor can bring a high-action stream to a grinding halt.
These client-side issues are often the sneakiest culprits behind buffering. The good news? They’re usually the easiest to fix once you know where to look. Let’s walk through the most common device-level hiccups and how to resolve them for good.
Investigate Your Browser Extensions
Browser extensions are a double-edged sword. They can be incredibly helpful, but at the end of the day, they’re third-party code running on top of every site you visit—including Twitch. Ad-blockers, privacy tools, or even shopping extensions can sometimes get a little too aggressive and interfere with Twitch’s video player, mistaking parts of the video stream for ads or trackers.
Before you tear your hair out, try this simple test: open Twitch in your browser’s incognito or private mode. This almost always disables extensions by default. If the stream suddenly plays perfectly, you’ve pinpointed the source of your problem.
Now for the detective work:
- Head back to a normal browser window and open your extensions manager.
- Turn everything off.
- Start re-enabling them one by one, giving the Twitch stream a refresh each time.
- As soon as the buffering returns, you’ve found your culprit. You can then decide whether to disable it just for Twitch’s website or remove it completely.
Clear Out Your Browser Cache
Your browser’s cache is meant to speed things up by storing bits and pieces of websites locally. Over time, though, this data can get stale or corrupted, leading to bizarre playback issues where Twitch keeps buffering for no obvious reason.
Clearing the cache is a surprisingly powerful fix. It essentially forces your browser to download a fresh, clean copy of the Twitch player and all its parts, wiping out any conflicts from old data. The steps vary a bit by browser, but you’ll typically find the option under “Settings,” “Privacy,” or “History.” For a full reset, make sure you set the time range to “All time.”
Think of your browser’s cache like a pantry. It’s great for quickly grabbing things you use often. But every now and then, something spoils and ruins the whole recipe. Clearing the cache is just cleaning out the pantry to start fresh.
Demystifying Hardware Acceleration
Hardware acceleration is a setting that lets your browser offload demanding tasks, like decoding video, to your dedicated graphics card (GPU) instead of the main processor (CPU). In theory, this should make everything smoother. But in practice, it can sometimes cause more problems than it solves.
If your GPU is already busy—maybe you’re running a game in the background or your drivers are out of date—this handoff can create a conflict that results in stuttering and buffering. The interaction between a video stream and your hardware isn’t always perfect, and a heavily tasked GPU can lead to playback conflicts. If you want to get into the nitty-gritty of why this happens, you can explore more about video player performance on YouTube.
Toggling this one setting is a crucial troubleshooting step.
How to Toggle Hardware Acceleration
- In Chrome: Go to
Settings > Systemand find “Use graphics acceleration when available.” - In Firefox: Go to
Settings > General, scroll to “Performance,” uncheck “Use recommended performance settings,” and then you can flip the switch for “Use hardware acceleration when available.”
If it’s on, try turning it off. If it’s already off, try turning it on. All it takes is a quick browser restart to see if this solves your buffering woes. The process of decoding a video stream is complex, and knowing what a video codec is and how it interacts with your hardware can shed some light on why these settings matter so much.
Hunt Down Resource-Hogging Background Apps
Your computer is a master multitasker, but its resources are finite. Hidden in the background, apps are constantly updating, syncing files, and eating up precious processing power. If your CPU or RAM is already stretched thin, your browser simply won’t have enough muscle to handle a high-definition stream without choking.
Some of the usual suspects include:
- Cloud services like Dropbox or Google Drive syncing large files.
- Antivirus software in the middle of a full system scan.
- Game launchers like Steam downloading massive updates.
- Even other browser tabs, especially those with auto-playing videos or ads.
Pop open your system’s activity monitor (Task Manager on Windows, Activity Monitor on macOS) to see what’s really going on. Sort by CPU and Memory usage to identify the top offenders. Simply closing these resource-hungry programs can often free up exactly what your browser needs to stop the buffering for good.
What to Do When the Usual Twitch Buffering Fixes Don’t Work
You’ve done it all. You rebooted the router, plugged in the Ethernet cable, and cleared your browser cache, but that dreaded loading circle just keeps spinning. It’s frustrating, I know. When the standard playbook fails, it’s time to look beyond the basics and dig into the network-level reasons why Twitch keeps buffering.
These next steps involve tweaking how your computer actually connects to Twitch’s servers, letting you sidestep the bottlenecks that cause those endless pauses.
First, let’s make sure you’ve covered the fundamentals. The process below outlines the essential first checks. If you haven’t done these, start here.
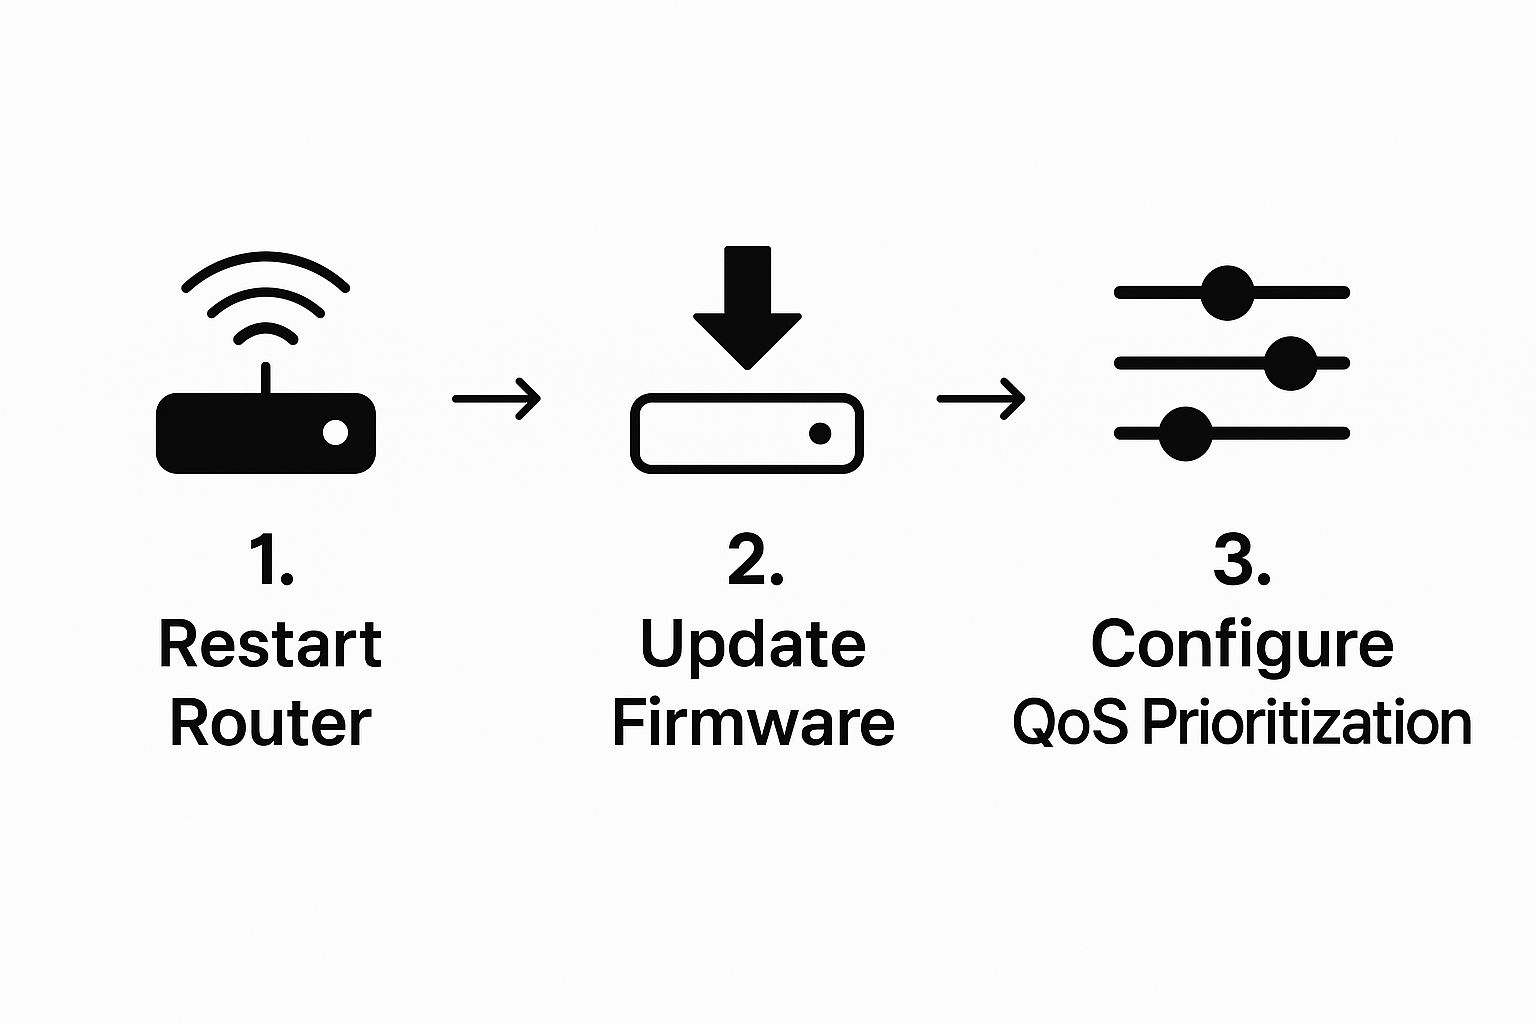
Think of it as ruling out the easy stuff first. Once you’ve confirmed your local setup is solid, we can move on to the more complex culprits.
Reroute Your Traffic with a Different DNS Server
Think of a DNS (Domain Name System) as the internet’s GPS. When you type “twitch.tv,” your computer asks a DNS server for the IP address, which is the actual destination. By default, you’re using whatever DNS your Internet Service Provider (ISP) gives you, and frankly, it’s not always the fastest route.
Switching to a well-known public DNS like Google DNS or Cloudflare DNS can often give you a much more direct and less congested path to Twitch. These services are built for speed and reliability, which can translate into faster stream loading and a much more stable connection.
Use a VPN to Get Around ISP Throttling
This might sound counterintuitive, but a VPN (Virtual Private Network) can be a secret weapon against buffering. Sometimes, ISPs deliberately slow down—or “throttle”—high-bandwidth activities like video streaming, especially during peak hours. It’s their way of managing network traffic.
A VPN encrypts your connection and sends it through a different server, effectively hiding your activity from your ISP. If they can’t see you’re streaming, they can’t single you out for a slowdown.
But there’s a catch. A VPN adds an extra hop to your connection, which can introduce its own lag. To make it work for you:
- Choose a fast, reputable VPN service.
- Connect to a server located as close to you as possible to keep latency low.
- Test it out. It might fix everything, or it might make things worse. It really depends on why you’re buffering.
A VPN isn’t a silver bullet. But if ISP throttling is the root of your problem, it’s often the perfect solution. You just have to experiment to find out.
Play Detective with Twitch’s Video Stats
Instead of just guessing what’s wrong, you can get concrete evidence directly from Twitch itself. Hidden in the player settings is a powerful diagnostic tool called “Video Stats,” which gives you a real-time dashboard of your stream’s health.
To turn it on, just click the gear icon on the video player, go to Advanced, and toggle on Video Stats. An overlay will pop up with a bunch of data that looks intimidating at first, but it’s pure gold for troubleshooting.
What to Watch For in the Stats
Here’s what I look for when I’m trying to diagnose a problem:
- Buffer Size: This is how many seconds of video your computer has downloaded ahead of time. If this number is consistently at or near 0, your connection just can’t keep up. This is a classic network problem.
- Playback Bitrate: This shows the video quality you’re receiving. If this number is jumping all over the place, it’s a sign of an unstable connection. The player is constantly trying to adjust, which is a key reason why Twitch keeps buffering. This is the system of adaptive bitrate streaming in action, and wild fluctuations mean it’s struggling.
- Dropped Frames: If this number is steadily climbing, the problem is likely on your end. It means your computer’s hardware (your CPU or GPU) can’t keep up with decoding the video fast enough. That’s a performance issue, not a network one.
- Latency to Broadcaster: This is the time delay between the streamer and you. A high latency (more than a few seconds) can point to a really inefficient route between you and the Twitch servers.
By keeping an eye on these stats, you can finally stop guessing. A low buffer points to your network, while dropped frames point to your PC. This data gives you the clues you need to solve the problem for good.
When the Buffering Problem Isn’t on Your End
So you’ve done everything right. You rebooted the router, plugged in the Ethernet cable, and shut down every background app imaginable. But that dreaded spinning circle on Twitch just won’t go away. It’s incredibly frustrating, but at this point, you have to consider a hard truth: sometimes, the problem has absolutely nothing to do with you.
The journey a live stream takes is a long and complicated one. It goes from the streamer’s PC, to Twitch’s ingest servers, through a massive web of global networks, and finally onto your screen. A hiccup anywhere along that chain can cause buffering, even if your own setup is flawless.
Learning to recognize these external issues can save you a ton of time and sanity. It’s about shifting your mindset from “What’s wrong with my PC?” to “Is there something bigger going on?”
When the Streamer’s Settings Are Too High
One of the most frequent culprits is something you can’t control at all: the streamer’s broadcast settings. A streamer with a beast of a PC and super-fast internet might be pushing out their stream at an extremely high bitrate to get the best possible visual quality.
While that looks amazing for viewers with equally fast connections, it can completely overwhelm an average home internet plan. Think of it as trying to drink from a firehose. If the streamer is sending out more data than your connection can download in real-time, your video player has to pause and catch up. That’s buffering.
This problem is especially common with smaller, non-partnered streamers who might not have transcoding enabled. Transcoding is the magic that gives viewers those familiar quality options (1080p, 720p, 480p, etc.). Without it, you’re stuck with the “Source” quality. If that source is too much for your internet to handle, you’re out of luck.
Twitch Server Overload During Peak Events
Twitch is a massive platform, but even it has its limits. During huge esports finals, major game launches, or other big community events, millions of people jump online at the same time. This flood of traffic can put a serious strain on Twitch’s servers.
It’s like trying to get on the freeway at 5 PM on a Friday. It doesn’t matter how fast your car is; you’re going to get stuck in traffic. When the servers in your region get overloaded, you’ll likely see buffering on multiple streams, not just the one you’re trying to watch.
Recognizing that the platform itself can be the bottleneck is key. If you notice buffering during a major event like a TwitchCon keynote or a “League of Legends” world final, the issue is almost certainly widespread server congestion.
This is a huge deal for viewer retention. With over 6.5 billion live streaming hours watched in a single quarter in 2025, a smooth experience is critical. Yet, persistent buffering can cut a viewer’s watch time by 20-30% out of sheer frustration. Managing this for the nearly 2.5 million concurrent watchers at peak times is a monumental task.
How Content Delivery Networks Play a Role
Twitch doesn’t just rely on a central bank of servers. It uses a global network of Content Delivery Networks (CDNs) to get streams to viewers more efficiently. A CDN basically keeps a copy of the stream in data centers all over the world, so the video has a much shorter distance to travel to get to you.
But sometimes, the route your internet service provider (ISP) takes to the nearest CDN server isn’t the best one. It might be congested, or the CDN node itself could be having a bad day. The end result is buffering, even when your connection is solid and the streamer’s broadcast is perfectly stable.
For those interested in the tech behind it all, understanding the role a CDN for video streaming plays can really help clarify why these server-side slowdowns happen. It’s a reminder that there are many moving parts between the streamer and you.
Frequently Asked Questions About Twitch Buffering
We’ve walked through everything from network checks to tweaking your browser, but sometimes the buffering issue is just… weird. If you’re still stuck wondering why Twitch keeps buffering in a very specific way, you’re not alone. Let’s tackle some of the most common head-scratchers I hear about all the time.
Why Does Twitch Only Buffer on My Computer but Not My Phone?
This is a classic. When your phone plays a stream perfectly on the same Wi-Fi that’s giving your PC fits, you can pretty much rule out your internet connection. The problem is almost always isolated to your computer.
More often than not, the culprit is the browser itself. Think of all the junk it accumulates: a bloated cache, a problematic extension hogging resources, or other software in the background eating up your CPU and RAM. Your phone, by contrast, is a much cleaner environment.
Here’s a quick sanity check: try watching the stream in an incognito or private window. This mode usually disables extensions by default. If the buffering magically disappears, you’ve found your problem—it’s time to start disabling your browser extensions one by one until you find the one causing the conflict.
Can a Streamer’s Settings Cause Buffering for Me?
Oh, absolutely. This happens all the time, and it’s completely out of your hands as a viewer. A streamer might be pushing a super high bitrate to get that crisp, beautiful image quality, but your internet connection might not be able to keep up with the firehose of data.
This is especially common with smaller or non-partnered streamers who don’t have access to transcoding. Transcoding is the magic that gives you those quality options in the player (like 1080p, 720p, 480p). Without it, you’re stuck trying to watch the stream at its original “Source” quality. If their bitrate is too high for you, you’re doomed to buffer.
It doesn’t matter if you have a fast connection. If a streamer is blasting out a 9,000 Kbps bitrate, your computer has to download that much data every single second. If it falls behind for even a moment, the player has to pause to catch up—and that’s your buffer.
Is There a Best Browser for Watching Twitch?
Honestly, there’s no single “best” browser. While modern options like Chrome, Firefox, and Edge are all well-equipped to handle Twitch streams, performance can be a real wild card. It all depends on your computer’s hardware, your OS, and what extensions you’ve got running.
I’ve seen some people swear by Firefox for its smoother playback, while others find Chrome is the only thing that works reliably on their machine. The best browser is really just the one that’s up-to-date and not weighed down by a dozen extensions. If Twitch keeps buffering on your go-to browser, the easiest first step is to just try a different one.
Does Using a VPN Help with Twitch Buffering?
This one is tricky—it can be a miracle fix or make things much, much worse.
A VPN can sometimes help by creating a new, more direct route for your traffic, bypassing a congested network hub your Internet Service Provider (ISP) might be using. It can also be a solution if your ISP is actively throttling video streams (which they sometimes do).
On the flip side, a VPN adds an extra stop for your data, which can introduce latency and even slow your connection down. If you’re going to try it, make sure you’re using a high-quality, paid VPN and connect to a server that’s geographically close to you. Think of it as a last resort when you suspect the problem is with your ISP, not with you.
Are you a developer aiming to build your own streaming platform without the nightmare of managing infrastructure? LiveAPI offers a powerful set of tools for live and on-demand video, complete with adaptive bitrate streaming and top-tier CDN partnerships to deliver a buffer-free experience. Build your video application with LiveAPI today.
