When you hear “live RTMP stream,” you’re talking about using the Real-Time Messaging Protocol to push your video and audio from an encoder to a streaming platform. It’s the go-to standard for that first crucial step, known as ingest, and for good reason—it creates a super stable, always-on connection. Platforms like Twitch and YouTube have built their empires on its reliability, largely because it keeps the delay between you and your audience incredibly low.
Why RTMP Still Runs the Show for Live Stream Ingest
Before we get into the nuts and bolts of setting things up, it’s worth understanding why RTMP is still the undisputed champ for professional broadcasters. While newer, shinier protocols have come along for delivering video to viewers, RTMP dominates that critical first mile: getting your stream from your gear to the server.
The protocol’s longevity isn’t an accident. It was designed from the ground up for real-time, two-way communication. Unlike HTTP-based protocols that chop video into small pieces, RTMP opens a dedicated, stateful connection between your encoder (like OBS or ffmpeg) and the streaming server. Think of it as a direct, private pipeline for your video feed, and that changes everything.
The Power of a Persistent Connection
This “always-on” connection is RTMP’s secret sauce for live stream ingest, offering a few key advantages that any serious broadcaster needs:
- Rock-Solid Stability: An open connection is far less bothered by the minor network blips that can throw chunk-based delivery off track. It’s this reliability that major platforms count on for events with millions of viewers.
- Inherently Low Latency: A direct line from your encoder to the server is the fastest path. This is non-negotiable for creating interactive experiences where you can react to viewer comments in near real-time.
- Universal Encoder Support: Good luck finding a piece of streaming software or hardware that doesn’t support RTMP. From free tools like OBS Studio to six-figure hardware encoders, native support is a given, which simplifies any setup.
RTMP was built on a simple but powerful idea: create a stable, low-delay path for video. That singular focus on reliability is why it has been the workhorse ingest protocol for over two decades, even as the tech for video playback has completely changed.
Even in 2025, RTMP remains one of the most trusted protocols out there. That’s why it’s still the primary ingest method for giants like Twitch and YouTube Live. Its design is laser-focused on minimizing delay, keeping latency in that sweet spot of 2-3 seconds—perfect for most live events.
What About Other Protocols for Ingest?
You’ve probably heard about modern protocols like HLS and DASH, and they are fantastic for delivering video to massive audiences (playback). But for ingest? Not so much.
They work by breaking video into segments and delivering them over standard web servers, a process that inherently adds a lot of latency right at the start. That initial delay is a deal-breaker for live interaction, which is why RTMP keeps its job of getting your stream off the ground. If you want to dive deeper into the technical side, our guide on what the RTMP protocol is breaks it all down.
RTMP vs Other Ingest Protocols Quick Comparison
Here’s a high-level look at how RTMP stacks up against other protocols for the specific job of stream ingest.
| Protocol | Primary Use Case | Typical Latency | Encoder Support |
|---|---|---|---|
| RTMP | Ingest | 1-5 Seconds | Universal |
| SRT | Ingest (high-quality, unreliable networks) | 1-5 Seconds | Growing |
| WebRTC | Real-time communication (sub-second) | < 1 Second | Browser-based, some apps |
| HLS/DASH | Playback/Delivery | 15-45 Seconds | Limited for ingest |
As you can see, each protocol has its strengths, but for reliable, low-latency ingest with broad hardware and software support, RTMP remains the industry’s go-to solution.
Securing Your Ingest URL and Stream Key
Okay, you’ve got the basics of RTMP down. Now for the fun part: generating the credentials that actually bring your live rtmp stream to life. For any broadcast, you’re going to need two critical pieces of information: an RTMP ingest URL and a stream key. I like to think of them as a mailing address and the specific key to your mailbox—you absolutely need both to get your content delivered to the right place.
The ingest URL is the public server address your encoder sends the video to. It’s often the same for many users on a platform. The stream key, on the other hand, is your secret sauce—a unique, random string of characters that’s your private password. It’s what tells the server, “Hey, this stream belongs to this specific account.”
https://www.youtube.com/embed/wOcePzprvLk
Getting Your Credentials from LiveAPI
Let’s run through how this works in the real world with a platform like LiveAPI. Their whole process is designed to be quick and painless, getting you ready to stream in just a few clicks.
- First, you’ll log into your LiveAPI account and head over to the “Live Streams” or “Assets” area.
- Next, you’ll create a new live stream asset. This single action is what generates the dedicated endpoint for your broadcast.
- Once that’s done, the platform will immediately show you the goods: your RTMP Server URL (something like
rtmp://ingest.liveapi.com/live) and your Stream Key (a long string likelive_293847_skjdfh2398hsdfl).
You simply copy those two values and paste them right into your encoder—whether you’re using OBS, vMix, or a custom ffmpeg command. That simple pairing is the handshake that connects your local production to a global audience.
Your stream key is the most critical piece of security for your live broadcast. Treat it like a bank password. Never share it publicly, don’t embed it in client-side code, and definitely don’t leave it visible in screenshots.
If you ever think your key has been compromised, your very first move should be to reset it. Platforms like LiveAPI have a “Reset” or “Regenerate” button that instantly kills the old key and gives you a new one. This is your kill switch to stop anyone from hijacking your live rtmp stream.
Best Practices for Managing Your Keys
Seriously, protecting your stream key is non-negotiable. If it gets leaked, you open yourself up to “stream sniping,” where someone else broadcasts whatever they want to your channel. That can get you banned, damage your reputation, and cause a major headache.
Here are a few pro tips I always follow:
- Use a Password Manager: Don’t just save your stream key in a text file on your desktop. Store it in a secure password manager where it’s encrypted and safe.
- Rotate Your Keys: For important or regular events, I make it a habit to regenerate the stream key before each major broadcast. It’s a simple step that adds a ton of security.
- Go with RTMPS: Whenever you have the option, use the RTMPS protocol (
rtmps://). That little “S” means the connection is encrypted with SSL/TLS. This adds a powerful layer of security, protecting both your credentials and your content while they’re in transit.
Nailing this initial setup is fundamental. A secure ingest point means your stream is protected from the very second you hit that “Go Live” button.
Getting Your Encoder Settings Just Right
Your encoder is the heart of your broadcast. It’s the piece of the puzzle that takes your pristine camera feed and audio, compresses it all down, and packages it into a live rtmp stream that’s ready to send out to the world. Nailing your encoder settings is what separates a sharp, professional-looking stream from a blocky, buffering nightmare.
Honestly, it’s a bit of a balancing act. You’re constantly juggling video quality, the stability of your stream, and what your computer can actually handle. If you push one of these too hard, the others will suffer. That’s why there’s no magic “one-size-fits-all” configuration—the best settings really depend on what you’re streaming and the gear you’re using. If you want to get deeper into the mechanics, we have a great article on what a video encoder actually does.
A Practical Guide to OBS Studio
For countless streamers, OBS Studio is the first and last word in software encoders. It’s powerful, free, and gives you an incredible amount of control. After you’ve plugged in your RTMP server URL and stream key, you’ll be spending most of your time in the “Output” and “Video” settings tabs.
These are the settings I always tell people to focus on first:
- Encoder: You’ll likely see two main options:
x264for CPU encoding andNVENCfor encoding with an NVIDIA graphics card. If you have a modern NVIDIA GPU, NVENC is almost always the way to go. It takes the heavy lifting off your main processor, freeing it up for other things, which is a lifesaver if you’re streaming something demanding like a video game. - Bitrate: This is all about how much data you’re sending every second. More data means better quality, but it also demands a faster, more stable internet connection. For a solid 1080p stream at 60 frames per second, a bitrate of 6000 Kbps is a fantastic starting point.
- Keyframe Interval: This setting tells the server how often you’re sending a complete video frame. Almost every major platform, from Twitch to YouTube, requires this to be 2 seconds. Get this wrong, and you’ll run into all sorts of errors and playback issues for your viewers.
Here’s a pro tip I’ve learned the hard way: don’t set your bitrate higher than what your internet upload speed can consistently handle. Run a speed test, find your stable upload speed, and then set your bitrate to about 75-80% of that number. This leaves you a safety cushion for any network hiccups.
Getting this right is more critical than ever. The live streaming market has exploded, hitting an estimated value of around $100 billion in 2024—that’s a four-fold jump in just five years. With viewership nearly doubling since 2019, delivering a stable, high-quality stream isn’t just a nice-to-have; it’s what keeps you competitive. You can dig into more of this data and discover more insights about live streaming’s growth.
Real-World Bitrate Scenarios
Let’s make this more concrete. The content you stream should directly inform your bitrate. A fast-paced gaming stream is full of constant motion and detail, so it needs a lot of data to stay looking crisp. A simple talking-head show, on the other hand, can look fantastic with a much lower bitrate.
| Stream Content | Recommended Resolution | Recommended Bitrate (Kbps) | Why It Works |
|---|---|---|---|
| High-Action Gaming | 1080p @ 60fps | 6000 – 8000 | Captures fast motion without pixelation or “blockiness.” |
| Live Sports | 1080p @ 60fps | 5000 – 7000 | Similar to gaming, needs a high bitrate for fluid motion. |
| “Just Chatting” or Interviews | 1080p @ 30fps | 3500 – 4500 | Less motion means you can lower the bitrate without losing quality. |
| Static Presentations | 720p @ 30fps | 1500 – 2500 | Ideal for simple screen shares where text clarity is key. |
As you can see, you can tailor your settings to match your specific needs, which helps conserve bandwidth without sacrificing the visual quality your audience expects.
For the Power Users: Streaming with FFmpeg
If you’re a developer or just love working from the command line, ffmpeg is an incredibly powerful tool. It lets you take virtually any video source and push it out as a live RTMP stream, making it perfect for automated workflows or streaming directly from a server.
Let’s say you have a pre-recorded video file called my-event.mp4 and you want to stream it on a continuous loop. You can do it all with one command.
Here’s a sample ffmpeg command you can start with:
ffmpeg -re -stream_loop -1 -i my-event.mp4
-c:v libx264 -preset veryfast -b:v 4000k -maxrate 4000k -bufsize 8000k
-c:a aac -b:a 128k
-f flv rtmp://your-ingest-url/your-stream-key
Let’s quickly break down what that does:
-re: Tells ffmpeg to read the input file at its natural framerate, which mimics a live feed.-stream_loop -1: This is the command that loops your video file forever.-c:v libx264 -preset veryfast -b:v 4000k: This sets your video codec tolibx264, uses a CPU-friendly preset, and targets a video bitrate of 4000 Kbps.-c:a aac -b:a 128k: This sets your audio codec and a standard bitrate of 128 Kbps.-f flv: Finally, this formats the output into the FLV container that RTMP requires.
This kind of control is why technical professionals love ffmpeg—it’s all power, no graphical fluff.
When to Go with a Hardware Encoder
While software encoders like OBS are incredibly flexible, dedicated hardware encoders have one major trump card: rock-solid reliability. These are specialized boxes built to do one thing and do it exceptionally well—encode video. Because they use dedicated processing chips, they take the entire encoding load off your computer’s CPU and GPU.
This means they are far less likely to crash because of a software bug or an overloaded system. For any broadcast you simply can’t afford to have fail—like a corporate town hall, a professional sporting event, or a paid virtual conference—the stability of a hardware encoder is well worth the investment. They’re the workhorses of the professional broadcasting world for a very good reason.
Expanding Your Reach with Transcoding and Multistreaming
You’ve done the hard work of getting a high-quality live rtmp stream up and running. That’s a huge win. But what happens when that stream hits the real world? The truth is, your audience is watching on a wild mix of devices and internet connections. That beautiful 1080p, 60fps feed that looks perfect on your fiber connection can quickly become a stuttering, buffering nightmare for someone on a shaky mobile network.
This is where you graduate from just streaming to professional streaming. By using transcoding and multistreaming, you can tackle this diversity head-on. These aren’t just fancy features; they are the tools that let you deliver a flawless, buffer-free experience to every single viewer, no matter how they’re watching.
The Magic of Adaptive Bitrate Streaming
The first piece of the puzzle is transcoding. Think of it as a real-time conversion process. Your single, high-bitrate RTMP ingest hits our servers, and we instantly create multiple versions of it, called renditions, each at a different resolution and bitrate. This whole set of renditions is often called an ABR ladder.
If you want to dive deep into the technical side, we’ve got a full guide on what video transcoding is.
So why do this? Because it enables Adaptive Bitrate (ABR) streaming. When someone tunes in, their video player is smart enough to detect their network speed and device power. It then automatically grabs the best-quality rendition they can handle without interruption.
If their connection suddenly dips—maybe they move to a room with poor Wi-Fi—the player seamlessly switches to a lower-quality version. The viewer might see a brief dip in resolution, but crucially, the stream doesn’t stop. That’s a thousand times better than the dreaded buffering wheel that makes viewers leave.
Transcoding your live RTMP stream for ABR isn’t just a nice-to-have; it’s a core part of delivering a professional viewing experience. It’s what makes your content accessible and enjoyable for the widest possible audience.
Building a Sample ABR Ladder
So, what does a typical ABR ladder look like in practice? Let’s say you’re sending us a solid 1080p stream for a live event. We can transcode that on the fly into a few different options to make sure every viewer gets a great experience.
Sample Adaptive Bitrate (ABR) Ladder
Here’s a common profile you might set up to cover all your bases, from high-speed fiber connections to spotty 4G.
| Resolution | Video Bitrate (kbps) | Audio Bitrate (kbps) | Target Use Case |
|---|---|---|---|
| 1080p | 4500 | 128 | Viewers on fast, stable connections like desktop fiber or 5G. |
| 720p | 2500 | 128 | The default for many viewers, great for mobile on Wi-Fi or laptops. |
| 480p | 1200 | 96 | Perfect for viewers on slower DSL or congested cellular networks. |
| 360p | 800 | 64 | Ensures a stable experience on poor network connections. |
This kind of setup is your insurance policy against audience drop-off. It guarantees your stream remains watchable even under tough network conditions, keeping viewers engaged when they would otherwise click away.
Multiplying Your Audience with Multistreaming
Once you’ve nailed the viewing experience with ABR, it’s time to get that stream in front of as many eyes as possible. This is where multistreaming shines. Instead of being forced to choose between YouTube, Twitch, or Facebook, why not go live on all of them at the same time?
Multistreaming lets you send your single live RTMP stream to a central hub (like LiveAPI), which then duplicates and pushes it out to multiple destinations for you.
The biggest benefit here is protecting your own internet connection. Trying to push three separate 1080p streams from your local encoder would demand a massive amount of upload bandwidth and put a serious strain on your computer. With multistreaming, you only send one. The cloud does all the heavy lifting.
Setting it up is usually straightforward:
- Send your primary live rtmp stream to your main streaming provider.
- Find the “Multistreaming” or “Destinations” area in your dashboard.
- Add each new platform by plugging in its RTMP URL and stream key (e.g., from YouTube, Twitch, LinkedIn Live).
After that, clicking “Go Live” in your encoder automatically sends your feed to every connected platform. No extra work, no extra bandwidth. It’s one of the simplest and most powerful ways to multiply your potential audience, meeting different communities right where they are.
How to Monitor and Troubleshoot Your Live Stream
Getting your stream live is one thing, but keeping it stable and professional is a whole different ballgame. Even the most carefully configured setup can run into trouble. That’s why learning to monitor your stream’s health and troubleshoot on the fly is a non-negotiable skill. This isn’t about hitting the panic button; it’s about having a game plan.
Your first line of defense is right inside your broadcasting software. Tools like OBS Studio have a real-time stats window that acts as the dashboard for your stream’s engine. Don’t ignore it. Learning to read these numbers is like a pilot learning their instruments—it tells you exactly what you need to know to avoid turbulence and keep the broadcast smooth.
Reading the Vital Signs of Your Stream
While you’re live, keep a close watch on a few key metrics. Think of them as your early warning system, flagging issues before your viewers start complaining about buffering or a pixelated mess.
- Dropped Frames (Network): This is the big one. It tracks the frames your encoder couldn’t send to the server because of a shaky internet connection. If this number climbs above 0%, you’ve got a network problem. Your upload speed simply can’t keep up with your chosen bitrate.
- Dropped Frames (Rendering/Encoding Lag): When this metric starts ticking up, the problem is your machine, not your internet. Your CPU or GPU is getting slammed and can’t render the video frames fast enough. It’s a dead giveaway that you need to dial back your game’s graphics settings or close some resource-hungry applications.
- Bitrate Fluctuations: A healthy bitrate looks like a relatively flat line, not an EKG during a heart attack. If you see wild swings up and down, your network connection is unstable, even if you aren’t dropping frames just yet. Consider it a yellow flag.
I can’t tell you how many times I’ve seen streamers blame the platform for quality issues. From my experience, over 90% of these problems start on the broadcaster’s end—either with their local network or their PC’s performance. Always check your own stats first.
This decision tree helps visualize how your stream gets out to your audience, whether you’re hitting a single platform or going wide with multistreaming.
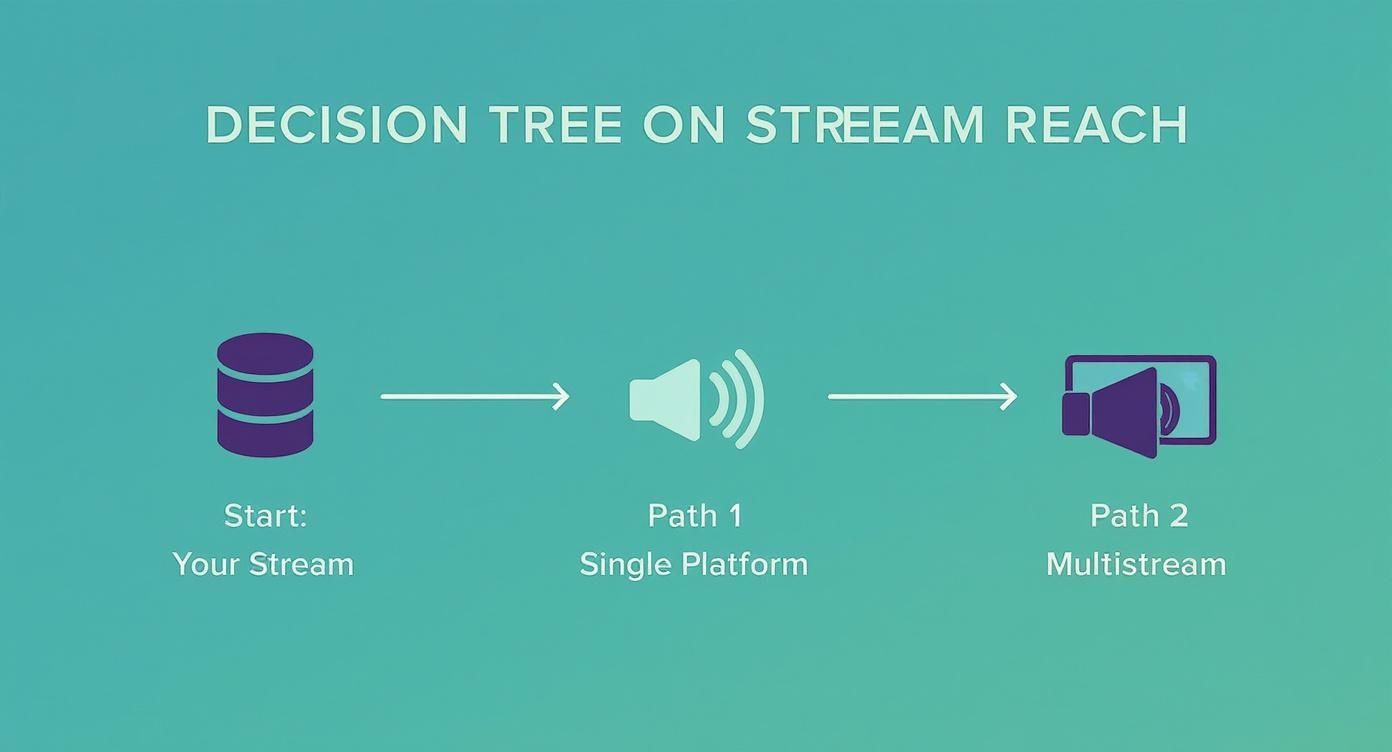
As you can see, no matter the path you choose, the stability of your initial live rtmp stream is the bedrock of the entire operation.
A Practical Troubleshooting Checklist
When things start to go sideways, resist the urge to change settings randomly. You need a methodical approach to figure out what’s really happening. Is it your PC, your internet, or something else?
If You See Dropped Frames (Network):
- Slash Your Bitrate: This is your fastest fix. Drop the bitrate in your encoder by 1000-1500 Kbps and watch if the dropped frames stop.
- Hunt Down Network Hogs: Is someone else on the network streaming 4K movies or downloading a massive game? Pause any non-essential internet traffic.
- Get Wired: Wi-Fi is great for browsing, but it’s often too unstable for the constant upload required for streaming. Plug an Ethernet cable directly into your router. Always.
If You See Dropped Frames (Encoding Lag):
- Ease Up on In-Game Settings: Turn down demanding settings like shadows and textures. This frees up precious GPU resources for the encoding process.
- Lower the Output Resolution: If you’re pushing for 1080p, try scaling back to 720p. It dramatically reduces the workload on your system.
- Shut Down Background Apps: Close out of everything that isn’t absolutely essential for the stream—extra browser tabs, Discord, you name it.
By using the data from your encoder to diagnose the problem, you can resolve issues quickly, keep your audience happy, and make sure your broadcast looks as good as you want it to.
Common Questions About Live RTMP Streaming
No matter how clear the instructions are, you’ll always hit a few snags when you’re in the thick of a new setup. Getting a live rtmp stream up and running involves a lot of moving pieces, from nailing your encoder settings to making sure your network is stable. We’ve pulled together the questions we see pop up most often from streamers to give you direct answers that solve problems fast.
Consider this your quick reference guide for those “wait, what does that mean?” moments. These are the real-world questions we get from both newcomers and seasoned pros alike.
Can I Stream to Multiple Platforms at Once with a Single RTMP Feed?
You absolutely can, and it’s one of the best ways to expand your reach. This is called multistreaming. The whole idea is to send your single RTMP feed to a service that then turns around and sends it out to multiple places at once—think YouTube, Twitch, and LinkedIn Live, all from one source.
If you tried to push several high-quality streams directly from your computer, you’d need an incredible amount of upload bandwidth and processing power. A good multistreaming service does all the hard work in the cloud, so you just have to focus on maintaining one solid upload.
Pro Tip: When you’re multistreaming, always set your encoder to meet the specs of the strictest platform on your list. For instance, if one destination has a hard cap of a 6000 Kbps bitrate, keep your stream at or below that to make sure it gets accepted everywhere without a hitch.
What’s the Difference Between RTMPS and RTMP?
In a word: security. That “S” in RTMPS stands for “secure.” It means the connection from your encoder to the server is fully encrypted with SSL/TLS, the same tech that keeps your information safe on banking websites.
- RTMP: Your video data travels over a standard, unencrypted connection.
- RTMPS: Wraps the entire connection in encryption, shielding your stream’s content and login details from anyone trying to snoop.
It’s simple: if RTMPS is an option, you should always use it. It adds a critical layer of security without any real impact on performance or latency, making it the standard for any professional broadcast today.
How Does Audience Growth Impact My RTMP Stream?
The RTMP stream itself—the one going from your encoder to the server—doesn’t change based on your audience size. Whether ten people are watching or ten thousand, your upload needs stay exactly the same. The massive task of delivering that stream to every viewer is handled by the Content Delivery Network (CDN).
What audience growth does change is the need for features like transcoding for Adaptive Bitrate (ABR) streaming. A bigger audience means more people watching on different devices with varying internet speeds. If you want to keep them, a smooth viewing experience is non-negotiable.
This is where things get interesting commercially. Data shows that 60% of TikTok users have bought something after watching a live stream. And with about 28.5% of internet users globally tuning into live streams weekly, you can’t afford to deliver a choppy feed. You can dive deeper into the future of live streaming and its commercial impact.
Ready to build a powerful, scalable, and professional live streaming experience? With LiveAPI, you can launch a high-quality live rtmp stream with transcoding, multistreaming, and robust CDN delivery in minutes. Get started with our developer-friendly APIs today!