Building a home server is a fantastic project that blends the fun of a PC build with the practicalities of network management. At its core, you’re piecing together compatible hardware, picking a server-friendly OS like TrueNAS or Ubuntu Server, and then setting up services for everything from file storage to media streaming. The end result? A powerful, centralized hub for your entire digital life.
First Things First: What’s This Server For?
Before you even glance at a motherboard or a hard drive, stop and ask yourself the most critical question: “What do I actually want this server to do?” A home server is a blank slate. Your answer to that question will shape every single decision you make, from the CPU you pick to the software you end up installing.
Without a clear goal, it’s incredibly easy to get carried away, overspending on components you’ll never use or, worse, building a machine that can’t quite handle the projects you’re dreaming of.
Thinking through your main goals is the bedrock of a successful build. Are you a movie buff aiming to build a personal streaming empire, or a photographer who needs a rock-solid vault for a lifetime of work? Each of these paths has very different hardware and software needs.
What Can a Home Server Actually Do?
To get the ideas flowing, let’s look at some of the most common jobs people give their home servers. Keep in mind, you don’t have to choose just one; a properly planned server can often juggle several of these roles at once.
- Your Personal Netflix: This is the classic gateway project for a reason. With software like Plex or Jellyfin, you can organize all your movies, shows, and music into a slick, beautiful library you can access from any device, anywhere.
- A Private Cloud for Your Files: Sick of paying monthly fees for cloud storage? By turning your server into a Network Attached Storage (NAS) device, you take back full control of your data. It becomes the central, secure spot for family photos, important documents, and system backups.
- The Brains of Your Smart Home: If you’re into home automation, your server can run powerful applications like Home Assistant. This transforms it into a central command center, orchestrating your lights, thermostat, security cameras, and more, all without relying on a dozen different corporate cloud services.
- A Playground for Hobbies and Gaming: Feeling more ambitious? You can host your own websites, fire up a dedicated server for games like Minecraft, or create a sandboxed environment to experiment with coding projects.
Deciding on a clear purpose from day one is the best way to avoid scope creep. It ensures you build a server that’s not only cost-effective but also perfectly matched to what you’ll actually use it for. A focused plan is your most valuable tool.
This surge in self-hosting is part of a much bigger picture. The global home media server market is already valued at around USD 4.5 billion and is expected to more than double by 2032. This boom is fueled by the explosion of 4K content and the sheer volume of data our smart homes produce, making a central storage solution more of a necessity than a luxury. You can find more insights on this market growth over on dataintelo.com.
Choosing the Right Hardware for Your Build
Picking out components for a home server can feel like a daunting task, but it really just comes down to what you want it to do. You don’t need a beast of a machine to just serve up some movies, but a tiny, low-power box will choke if you try to run a bunch of virtual machines on it. Let’s walk through the hardware choices based on real-world goals.
This image gives you a great visual overview of a typical server build, laying out the core parts you’ll be looking at.
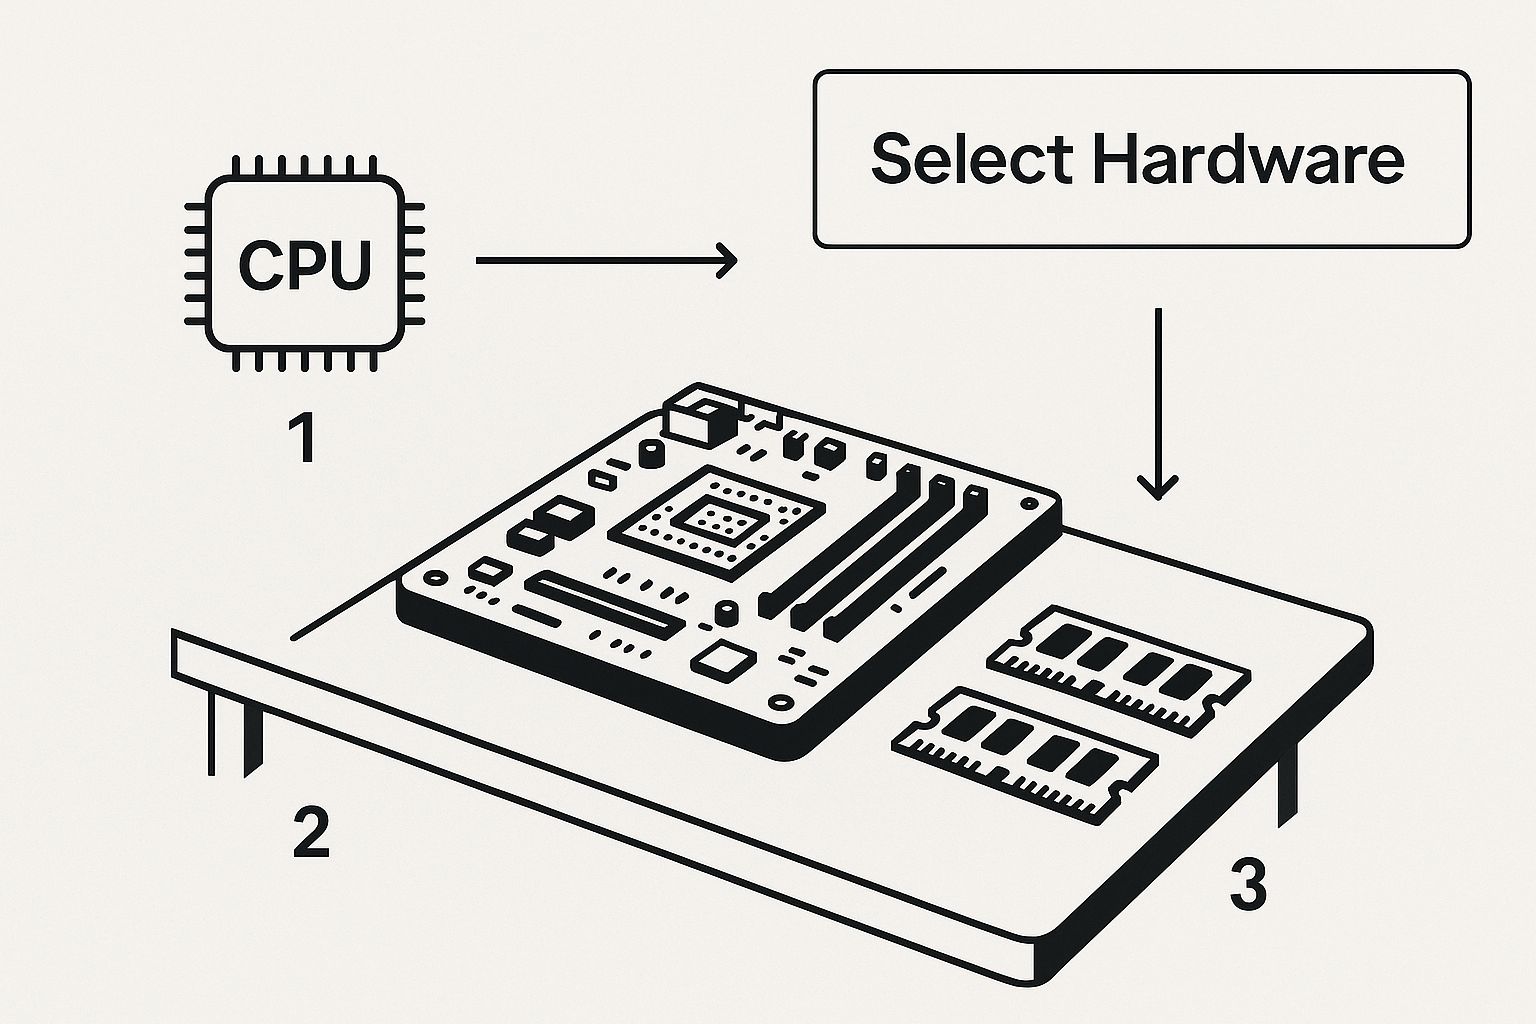
At its heart, every server is built on a foundation of three key components: the CPU, motherboard, and RAM. These choices will dictate not only your server’s immediate performance but also how much you can expand it down the road.
The CPU: Your Server’s Engine
The Central Processing Unit (CPU) is where all the processing happens, and your choice here is a balancing act between performance, power draw, and price. If you’re building a simple file server or a dedicated media streamer, something like a modern Intel Celeron or Pentium is more than enough. They sip power, which is great for your electricity bill.
But what if you want to do more? If your plans involve running several apps in Docker or transcoding 4K video on the fly, you’ll need more horsepower. An Intel Core i3 or an AMD Ryzen 3 hits that sweet spot of performance and efficiency. For anyone serious about virtualization or running a whole suite of services at once, stepping up to a Core i5 or Ryzen 5 is a smart move.
One pro tip for media servers: pick a CPU with a good integrated GPU. Having hardware transcoding support is a game-changer, as it takes a huge load off the CPU during intensive streaming tasks.
RAM: How Much Memory Do You Really Need?
Think of Random Access Memory (RAM) as your server’s short-term workspace. The more RAM you have, the more things it can juggle at once without getting bogged down. You can scrape by with 8GB of RAM for basic file sharing, but honestly, it’s a tight squeeze.
I always recommend starting with 16GB. It gives you plenty of breathing room for a solid NAS setup using an OS like TrueNAS, which cleverly uses extra RAM for caching to make file access lightning-fast. If you’re planning on diving into virtual machines or running a dozen Docker containers, 32GB or more isn’t overkill—it’s essential.
The Storage Strategy: SSDs vs. HDDs
Your storage setup is absolutely critical. The old debate of Solid-State Drives (SSDs) versus traditional Hard Disk Drives (HDDs) isn’t about which is “better,” but what each is best for.
- SSDs for Speed: Your server’s operating system absolutely must live on an SSD. The zippy boot times and overall responsiveness make managing everything a far more pleasant experience. A small 120GB or 250GB SSD is cheap and gets the job done perfectly.
- HDDs for Capacity: When it comes to hoarding large files—movies, music, backups—HDDs still offer unbeatable value. For a media server or NAS, make sure you get drives specifically designed for 24/7 operation, like models from the Seagate IronWolf or Toshiba N300 series.
The best setup is almost always a hybrid. Use a small SSD for the OS and your most-used apps, then build a massive storage pool with multiple HDDs for all your data.
Home Server Hardware Component Comparison
Choosing the right components depends heavily on your goals. A server built for streaming media to a single TV has very different needs from one running multiple virtual machines for development. Here’s a quick comparison to help you align your hardware choices with your intended use.
| Component | Budget (Media/File Server) | Mid-Range (NAS/Automation) | High-Performance (Virtualization) |
|---|---|---|---|
| CPU | Intel Celeron/Pentium or AMD Athlon (with integrated graphics) | Intel Core i3 or AMD Ryzen 3 | Intel Core i5/i7 or AMD Ryzen 5/7 |
| RAM | 8-16GB DDR4 | 16-32GB DDR4 (ECC recommended if supported) | 32GB+ DDR4/DDR5 (ECC is a must) |
| Storage (OS) | 120-250GB SATA SSD | 250-500GB NVMe SSD | 500GB-1TB NVMe SSD (or mirrored pair) |
| Storage (Data) | 1-2x HDDs (e.g., 4-8TB NAS drives) | 4+ HDDs in RAID/ZFS (e.g., 8-16TB NAS drives) | Multiple high-capacity HDDs and/or SSDs in a robust array |
| Motherboard | Basic Micro-ATX/Mini-ITX with enough SATA ports | Board with 4-6+ SATA ports, maybe a 2.5GbE LAN port | Server-grade or prosumer board with ample PCIe slots, dual LAN, and IPMI |
This table provides a solid starting point. Remember to think about future growth—it’s often cheaper to spend a little more now on a better motherboard or power supply than to have to replace them a year down the line.
Sourcing Your Parts Without Breaking the Bank
Good news: you don’t have to buy everything new. There are a few clever ways to source components for your build.
- Recycle an Old PC: That old office desktop gathering dust? It might be the perfect candidate. As long as the CPU is reasonably modern and it has space for a few hard drives, you’ve got a great starting point.
- Hunt for Used Enterprise Gear: Sites like eBay are gold mines for decommissioned servers and parts from data centers. You can get incredibly powerful hardware for pennies on the dollar, but be warned—it can be noisy and power-hungry.
- Build It Fresh: For total control over performance, noise, and power efficiency, nothing beats building from scratch. This lets you pick a quiet case, an efficient power supply, and components perfectly suited to your needs. This is especially true for demanding tasks like video encoding; if you want to learn more, check out this excellent breakdown of the HEVC video format and the hardware it requires.
Choosing the Right Operating System for Your Server
Okay, you’ve picked out all the hardware. Now for the fun part: choosing the brain of your new machine. The operating system (OS) you install will define absolutely everything about how you interact with your server, from setup and maintenance to troubleshooting down the road.
This isn’t a minor decision. The right OS can make building and running your server a genuinely enjoyable project. The wrong one? It can lead to a ton of frustration.
The biggest question you need to ask yourself is this: how comfortable are you with a command line? Your answer will point you in one of two clear directions. There’s no right or wrong choice here, just what’s best for your skills and what you want to achieve.
The Polished Web Interface Approach
If you’re just starting out or simply prefer a more visual way of managing things, a specialized server OS with a web dashboard is the way to go. These are purpose-built to take complex server tasks and wrap them in a user-friendly interface that you can access from any web browser on your network.
Two of the biggest names in this space are TrueNAS SCALE and Unraid.
- TrueNAS SCALE: This is a powerhouse built on Debian Linux. Its claim to fame is the ZFS filesystem, which is legendary for its data protection capabilities. Think automatic data correction and super-efficient snapshots. If your main goal is to build a bulletproof Network Attached Storage (NAS) for data you can’t afford to lose, TrueNAS is hard to beat.
- Unraid: Where Unraid really shines is its flexibility. Unlike a traditional RAID setup that requires identical drives, Unraid lets you mix and match hard drives of different sizes. This makes expanding your storage over time incredibly simple. Plus, it has a massive community and a fantastic “app store” that makes deploying Docker containers and VMs a one-click affair.
Here’s a peek at the TrueNAS SCALE dashboard. It gives you a clean, at-a-glance view of your server’s health and resources without ever needing to open a terminal.
You can instantly see things like CPU load, memory usage, and the status of your storage pools. It’s all right there.
The Lean Command-Line Path
On the other hand, if you’re comfortable in a terminal or are eager to learn, a standard Linux distribution gives you the ultimate in control and efficiency. By ditching the graphical overhead, you free up more of your server’s precious CPU cycles and RAM to run the services you actually care about.
For this route, Ubuntu Server is a fantastic pick. The community is huge, meaning you can find a guide or a forum post for pretty much any project you can dream up. The installation is also famously straightforward. This path gives you a completely blank canvas to build exactly the server you want, piece by piece.
Your OS choice really is one of the most important you’ll make. GUI-based systems like TrueNAS and Unraid are all about ease of use and simple storage management. A command-line OS like Ubuntu Server offers a lightweight, super-customizable foundation for your project.
Getting the OS Installed
No matter which OS you land on, the first step is the same: you’ll need to create a bootable USB drive.
First, head to the official website for TrueNAS, Unraid, or Ubuntu Server and grab the latest installation image. This file will usually have a .iso extension.
Next, you need a tool to “flash” that ISO file onto a USB drive. A great, free option that works on pretty much any computer is BalenaEtcher.
Grab a spare USB stick—8GB is usually more than enough—and use BalenaEtcher to write the ISO file to it. Just be aware that this will completely wipe the USB drive.
Finally, pop the USB drive into your new server, power it on, and get ready to jump into the BIOS/UEFI settings. You can typically access this by pressing a key like DEL, F2, or F12 right after you turn the machine on. Find the boot menu, tell it to boot from your USB drive first, save your changes, and you’re off! The server will restart and launch right into the OS installer to guide you the rest of the way.
Essential Network and Security Configurations
Okay, so your server’s operating system is installed and humming along. It’s officially alive. But before you get excited and start dumping your media library onto it, we need to handle the foundational network and security stuff. This is all about making your server a stable, secure, and reliable citizen on your home network.
Trust me, skipping these basics can lead to a world of frustration with connection drops and, worse, leave your shiny new server wide open to problems. Let’s focus on the absolute non-negotiables that form the bedrock of any solid server setup.
Assigning a Static IP Address
Right now, your router is probably handing your server a temporary IP address using DHCP (Dynamic Host Configuration Protocol). This is fine for your laptop or phone, but for a server, it’s a recipe for disaster. That address can change any time the server or router reboots, and suddenly, none of your other devices can find it.
To fix this, we’re giving the server a static IP address. Think of it as a permanent, reserved parking spot on your network. Your other devices will always know exactly where to connect, whether it’s for a file share or a movie stream.
You’ll do this from your router’s admin page. Just log in, hunt down the DHCP or LAN settings, and find an option like “DHCP Reservation” or “Address Reservation.” From there, you’ll pair your server’s unique MAC address with a specific IP address that you choose, ensuring it never changes again.
Setting Up a Basic Firewall
Your server is now on the network, but that also means it’s visible to every other device connected to it. A firewall is your digital bouncer, controlling precisely what traffic gets in and out. It’s your first and most important line of defense.
Most server operating systems come with a powerful firewall already built-in. Ubuntu Server, for example, uses UFW (Uncomplicated Firewall). The game plan is simple: start by blocking everything, then carefully poke holes only for the specific services you need.
Here are a few common examples:
- SSH (for remote command-line access): You’ll need to allow traffic on port 22.
- Plex Media Server: This typically requires opening port 32400.
- SMB (for Windows file sharing): You’d open ports 139 and 445.
By only opening the exact ports you need, you dramatically shrink the server’s “attack surface.” Anything you don’t explicitly allow is automatically denied, keeping your system buttoned up. Properly configuring your network is also key to a smooth media experience; you can learn more about how to fix buffering when streaming in our detailed guide.
A properly configured firewall isn’t just a good idea—it’s essential. Get into the habit of thinking with a security-first mindset: assume all traffic is untrusted and only allow what you absolutely need.
Securing Remote Access with a VPN
Sooner or later, you’ll want to access your files from outside your house. The temptation is to use port forwarding, which directly exposes a service on your server to the open internet. This is a huge mistake. It’s the digital equivalent of leaving your front door unlocked.
A much, much smarter approach is to set up a VPN (Virtual Private Network). A VPN creates an encrypted, private tunnel from your phone or laptop straight back into your home network. Once connected, your remote device acts like it’s on your local Wi-Fi, giving you secure access to everything without exposing a single port to the internet.
Modern tools like WireGuard are incredibly fast and surprisingly easy to set up. In fact, many server apps and even some operating systems have simple scripts that can walk you through the entire process. Spending an hour setting up a VPN is hands-down one of the best security investments you can make for your home server.
Bringing Your Server to Life with Core Services
With the OS installed and the network secure, the real fun begins. This is the moment your box of carefully chosen components starts its transformation into the functional heart of your digital life. Installing services is what gives your server a purpose, whether that’s becoming a media powerhouse, a central file vault, or the brains behind your smart home.
The best part about building your own server is the freedom. You’re not stuck in a pre-built NAS’s limited app ecosystem. Instead, you can install and fine-tune just about any service imaginable, creating a machine that’s a perfect fit for you. Let’s dig into some of the most popular and useful services you can get up and running.
Your Personal Media Streaming Empire
For many, this is the gateway project into the world of home servers, and for good reason—it’s incredibly satisfying. Media server software like Plex or its open-source cousin Jellyfin will scan your entire collection of movies, shows, and music. It then automatically pulls in artwork and organizes everything into a slick, user-friendly library.
The real magic, though, is how these services stream your media to nearly any device you own—your TV, tablet, phone, or laptop—whether you’re at home or on the road. They handle the heavy lifting of adjusting the video quality on the fly to match your device and internet speed. This process, called transcoding, is what ensures a smooth, buffer-free experience. If you’re curious about the nuts and bolts, we have a great guide on what video transcoding is and how it works.
Getting one of these running is a huge first win. You’ll finally have one central, beautifully organized place for your entire media library, all completely under your control. This is a massive driver in the home server space. In fact, the home media server market is projected to grow at a CAGR of roughly 12.5% to hit USD 4.5 billion by 2033. You can read more about this market’s impressive expansion over at Business Research Insights.
Creating Centralized Network File Shares
One of the most practical jobs for any server is to act as a central hub for all your files. By setting up a network file share, you create a folder on the server that shows up just like a local drive on every other computer on your network.
This is typically done using the SMB (Server Message Block) protocol, which is built right into Windows, macOS, and Linux. It’s perfect for things like:
- Centralized Documents: Keep all your important files in one spot, accessible from any machine. No more emailing files to yourself.
- Shared Photo Libraries: Create a single folder for the whole family’s photos that everyone can access and add to.
- PC Backups: Set up your computers to automatically back up crucial data to the server, giving you peace of mind against hard drive failure.
Setting up an SMB share is usually a simple process inside your server OS’s control panel. You just point it to a folder, set permissions for who can access it, and you’re good to go. Suddenly, dragging and dropping files between computers is a breeze.
Embracing Docker for Limitless Possibilities
Once you’ve got the basics down, it’s time to meet Docker. Think of Docker as a way to run applications in their own tidy, self-contained boxes called “containers.” This approach is a total game-changer because it keeps your main server OS clean and stops different apps from messing with each other’s settings.
The Docker community is enormous, which means there’s a pre-built container for almost anything you can think of. This unlocks a whole new universe of services you can run with just a few simple commands.
Docker is the key to unlocking your server’s true potential. It simplifies installing and managing complex software, letting you experiment with new services without ever risking the stability of your core system.
Here are just a few powerhouse applications you can easily run using Docker:
- Pi-hole: A network-wide ad-blocker. It acts as a DNS sinkhole, blocking ads on every single device connected to your Wi-Fi—no browser extensions needed.
- Home Assistant: The ultimate open-source platform for home automation. It ties together thousands of smart devices, letting you build powerful automations and a unified dashboard to control your entire home.
- Nextcloud: Your own private cloud. It gives you file syncing (like Dropbox), calendars, contacts, and even video chat, all hosted on your own hardware.
Learning Docker is the step that takes your project from a simple file server to a true multi-purpose machine. It’s the platform that will support your home server journey for years to come.
Common Home Server Questions Answered
Diving into your first home server build is exciting, but it’s bound to bring up a few questions. It’s totally normal to wonder about the real-world costs, the actual difficulty, and the security you’ll need before you start buying parts. Let’s walk through some of the most common things people ask when they’re just getting started.
Getting a handle on these key areas from the get-go gives you the confidence to move forward. Knowing what to expect financially and technically makes the whole process a lot less intimidating and far more rewarding.
How Much Does It Cost to Build and Run a Home Server?
The honest answer? It can range from practically free to well over a thousand dollars. If you’ve got an old desktop PC gathering dust, your starting cost might just be a couple of new hard drives. This is a fantastic, low-risk way to get your feet wet.
If you’re building from scratch, a solid, budget-friendly setup for media streaming and file storage will likely land somewhere between $200 and $400. That’ll get you a capable, energy-efficient machine that can handle most common tasks. On the other end, if you’re planning a beast of a machine with a high-end CPU and a massive storage array, it’s easy to push past the $1,000 mark.
As for running costs, it really comes down to your electricity bill. A lean, low-power server might only add $5 to $15 per month. A more powerful machine chewing through tasks 24/7 will, of course, draw more power. The trick is to find that sweet spot between the performance you need and the energy efficiency you want for the long haul.
Is Building a Home Server Too Hard for a Beginner?
There’s a learning curve, no doubt, but modern software has made this hobby more accessible than ever. You absolutely do not need to be a command-line guru to get a server up and running. The days of needing a computer science degree for a simple file server are long gone.
My best advice for a beginner is to start with one clear, simple goal. Don’t try to build a machine that does twenty different things on day one. Just focus on a single win, like setting up a central file share, and grow from there.
Operating systems like Unraid and TrueNAS SCALE are built around user-friendly web interfaces. They take complex configurations and turn them into point-and-click actions. If you can follow a good online tutorial and have a specific goal in mind, you have what it takes. Plus, the community support behind these platforms is massive—help is usually just a forum post away.
What Is the Difference Between a NAS and a Home Server?
This question pops up all the time, and it’s a great one. Think of a NAS (Network Attached Storage)—like the ones from Synology or QNAP—as a specialized, pre-built appliance. Its main job is storing files, and it does that job incredibly well with polished, easy-to-use software right out of the box.
A home server, on the other hand, is a blank canvas. It can do everything a NAS can and so much more because you have total control. You pick the hardware, you choose the operating system, and you decide exactly what services to run. This gives you the freedom to host a media server, run home automation software, spin up virtual machines, or tinker with countless other projects.
Essentially, a NAS is a user-friendly appliance, while a home server is a powerful, customizable toolkit.
How Do I Securely Access My Server from Anywhere?
The best and most secure way to get to your files from outside your home is by setting up a VPN (Virtual Private Network). A VPN creates an encrypted, private tunnel from your laptop or phone directly to your home network. Once connected, your device acts just like it’s on your local Wi-Fi, giving you safe and complete access to your server.
This is a much, much better approach than “port forwarding,” which is like punching a hole in your firewall to expose a service directly to the internet. Port forwarding can be risky, as it makes your server an easy target for automated bots scanning for vulnerabilities.
Tools like WireGuard and OpenVPN have become the gold standard for personal VPNs. Many server operating systems even have simple wizards to get a VPN running, making one of the most critical security steps easier than ever before.
At LiveAPI, we understand the power of controlling your own media infrastructure. While you build your ultimate home media server, discover how our robust APIs can take your video projects to the next level, offering seamless live streaming, on-demand hosting, and powerful transcoding capabilities for developers. Explore the possibilities at https://liveapi.com.


![Best Live Streaming APIs: The Developer’s Guide to Choosing the Right Video Streaming Infrastructure [2026]](https://liveapi.com/blog/wp-content/uploads/2026/01/Video-API.jpg)