So, you’re ready to dive into encoding HD video with LiveAPI. Before we get into the nitty-gritty of API calls, let’s lay a solid foundation. Getting this part right is the secret to delivering that smooth, buffer-free stream your audience expects.
At its core, encoding is all about finding that sweet spot between stunning visual quality, a manageable file size, and broad device compatibility. It’s a balancing act, for sure, but one that’s totally achievable once you understand the key players involved.
Decoding the Essentials of HD Video Encoding
Think of the whole process in two parts: the “language” used to shrink your video file, and the “box” that holds it all together. In technical terms, we call these codecs and containers.
A codec is the algorithm that compresses your video, while the container is the file format that bundles the compressed video, audio, and metadata into a single, playable package. Let’s break down what that really means for you.
The Role of Video Codecs
Ever wonder how a massive, raw video file gets small enough to stream over the internet? That’s the magic of a video codec (short for coder-decoder). Without one, just a minute of uncompressed 1080p footage could eat up several gigabytes. A codec intelligently discards visual data the human eye won’t miss, drastically reducing the file size.
Video compression has come a long way since the early days. It all started with the H.261 standard back in 1988, which introduced foundational concepts like motion compensation that we still rely on. Fast-forward to today, and a few key codecs run the show.
To help you choose the right one, here’s a quick rundown of the most common options you’ll encounter when encoding HD video.
Modern Video Codec Comparison
| Codec | Compression Efficiency | Device Compatibility | Best For |
|---|---|---|---|
| H.264 (AVC) | Good | Excellent (Universal) | Maximum audience reach and compatibility with older devices. |
| H.265 (HEVC) | Excellent | Good (Modern Devices) | 4K streaming and saving bandwidth with high-resolution video. |
| AV1 | Superior | Growing | Future-proofing content and cutting-edge, low-bitrate streaming. |
As you can see, the choice isn’t always obvious. H.264 is your go-to for reliability and reaching everyone. H.265, on the other hand, can deliver the same quality at about half the bitrate of H.264, making it a game-changer for 4K. And then there’s AV1, the royalty-free powerhouse offering even better compression, though it’s still finding its footing in terms of hardware support.
My two cents: Your codec choice is a direct trade-off between streaming costs and audience reach. H.265 is brilliant for saving on bandwidth, but H.264 is the safe bet for making sure everyone can watch your content.
Understanding Container Formats
If the codec is the language, the container is the book it’s written in. The container format doesn’t touch the video quality, but it does define how the data is organized and what streaming protocols can use it.
The MP4 container is a household name, and for good reason. It’s perfect for video-on-demand and simple downloads. But for modern adaptive bitrate streaming (think HLS and DASH), you need something more specialized.
This is where segmented formats like Transport Stream (TS) and Fragmented MP4 (fMP4) come into play. They chop the video into small, bite-sized chunks. This simple trick is what allows a video player to switch quality levels on the fly—say, from 1080p down to 720p—if a viewer’s Wi-Fi signal drops. It’s the secret behind a smooth, uninterrupted viewing experience.
Grasping what is encoding a video at this level is what separates an amateur setup from a professional-grade one. With these fundamentals in place, you’re ready to start building a truly robust streaming workflow.
Putting Your LiveAPI Encoding Workflow Together
The official docs give you a good look at the API’s clean, endpoint-based design. Now, let’s move from theory to practice. It’s time to get your environment set up and make that first crucial API call to create a live stream. This is really the bedrock for any task involving encoding HD video on the platform.
Getting Your API Key
First things first: authentication. You can’t send any requests without an API key, which is your unique credential for talking to the LiveAPI.
You can generate one right from your dashboard. My best advice? Treat this key like a password. Store it securely and whatever you do, don’t expose it in your front-end code. I’ve found that using environment variables is the cleanest way to manage keys—it keeps them out of source control and beefs up your application’s security.
Once you have your key, you’ll pass it in the Authorization header with every request. The format is straightforward: Authorization: Bearer YOUR_API_KEY.
Crafting Your First API Request
With your key in hand, you’re ready to create your first live stream. This is handled with a simple POST request to the /stream endpoint.
Let’s look at a real-world example using cURL, a go-to command-line tool for hitting web endpoints. This command tells the API to spin up a new stream called “My First HD Stream” and sets it to be publicly viewable.
curl -X POST
-H “Content-Type: application/json”
-H “Authorization: Bearer YOUR_API_KEY”
-d ‘{ “name”: “My First HD Stream”, “playbackPolicy”: { “type”: “public” } }’
https://livepeer.studio/api/stream
If everything goes right, the API will send back a JSON object packed with details about your new stream, including the all-important stream_key and id.
The
stream_keyis the secret sauce you’ll plug into your broadcasting software (like OBS) to send your video feed to LiveAPI for encoding. Don’t lose it!
Automating with a Python Script
While cURL is fantastic for a quick test, you’ll eventually want to build stream creation right into your application. Here’s how you can do the same thing with a Python script, which is a much better fit for a scalable video workflow.
You’ll need the requests library. If you don’t have it, a quick pip install requests will sort you out. From there, this script will create a stream for you programmatically.
import requests import os
API_KEY = os.environ.get(“LIVEAPI_KEY”) API_URL = “https://livepeer.studio/api/stream”
headers = { “Content-Type”: “application/json”, “Authorization”: f”Bearer {API_KEY}”, }
data = { “name”: “My Python HD Stream”, “playbackPolicy”: {“type”: “public”}, }
response = requests.post(API_URL, headers=headers, json=data)
if response.status_code == 201: stream_data = response.json() print(“Stream created successfully!”) print(f”Stream ID: {stream_data.get(‘id’)}”) print(f”Stream Key: {stream_data.get(‘streamKey’)}”) else: print(f”Error creating stream: {response.status_code}”) print(response.text)
This script sets up the headers and payload, sends the request, and even has some basic error handling built-in. On success, it prints out the key details you’ll need.
And just like that, you’ve configured your connection to LiveAPI and created your first endpoint for encoding HD video. You now have a solid, reusable blueprint for kicking off any encoding job, ready to be dropped right into your application.
Finding the Right Codec and Container for Your Stream
Alright, now that you’ve got your stream set up, it’s time to make a crucial decision: choosing the right “language” for your video. This is the classic balancing act of encoding HD video. You’re constantly weighing visual quality against device compatibility and, of course, cost. The choices you make here will literally determine who can watch your content and how much you’ll pay in bandwidth to deliver it.
This isn’t just a minor technical setting; it’s a core piece of your streaming strategy. Think about it: a global product launch needs to work on every phone, tablet, and browser imaginable. On the other hand, a premium 4K art film might prioritize absolute visual fidelity over reaching that last 5% of older devices.
The Big Debate: H.264 vs. H.265
In the world of video codecs, two names dominate the conversation: H.264 (AVC) and H.265 (HEVC). H.264 is the undisputed king of compatibility—it just works, everywhere. But H.265 is the clear winner when it comes to pure efficiency.
When High-Efficiency Video Coding (HEVC), or H.265, was standardized back in 2013, it was a huge leap forward. The whole point was to double the compression ratio of H.264. In plain English, that means it can deliver the exact same visual quality at roughly half the bitrate. That 50% reduction in bandwidth became absolutely critical as the world started demanding 4K and even 8K video.
This isn’t just a number on a spec sheet; it has real-world consequences. If you’re streaming a live 4K concert, switching to H.265 could literally cut your data delivery bill in half. The catch? It isn’t supported on some older hardware or certain web browsers, which could mean a frustrating black screen for a chunk of your audience.
My rule of thumb: Stick with H.264 when your number one goal is maximum reach and you can’t afford to leave anyone behind. Go with H.265 when you’re pushing high-resolution content like 4K and want to save on bandwidth, as long as you’re confident your audience has modern devices.
For a much deeper look into how HEVC is changing the game, check out our guide on the HEVC video format and its practical uses.
Don’t Forget About the Audio
Video always seems to steal the spotlight, but I’ve seen countless streams ruined by terrible audio. Your audio codec choice is just as important for delivering crisp, clear sound without adding unnecessary weight to your stream.
Here are the two main players:
- AAC (Advanced Audio Coding): This is the industry’s go-to. It gives you fantastic sound quality at pretty low bitrates and has universal compatibility. It’s the safest, most reliable choice for almost any streaming scenario.
- Opus: This is a more modern, open-source codec that often sounds better than AAC, especially at really low bitrates. It’s a great pick for anything with a lot of talking, like webinars or podcasts, and its support is growing fast.
For most HD streams, you really can’t go wrong with AAC at 128 kbps. It’s the sweet spot for quality and efficiency.
Why Fragmented MP4 is a Must-Have
The final piece of this technical puzzle is the container. A standard MP4 file is fine for a video you download, but it’s not cut out for the demands of modern adaptive bitrate (ABR) streaming. For ABR, you need a container that’s designed to be chopped up into tiny pieces.
That’s where Fragmented MP4 (fMP4) comes in. It’s a specialized version of the MP4 format that neatly organizes video and audio data into small, independent segments.
This segmented structure is what allows a video player to switch quality levels on the fly—say, from 1080p down to 480p—if the viewer’s Wi-Fi starts to struggle. Without fMP4, adaptive bitrate streaming as we know it just wouldn’t be possible. It’s the absolute foundation for delivering a smooth, buffer-free show with modern protocols like HLS and DASH. When you pair a smart codec choice with the right container, you’re building a stream that’s not just efficient but also incredibly resilient.
Optimizing Bitrate for Flawless HD Streaming
Think of bitrate as the lifeblood of your stream. A higher bitrate packs more data into every second of video, giving you that crisp, high-quality image. But here’s the catch: if a viewer’s connection can’t keep up, they’re stuck watching that dreaded buffering wheel spin.
This is where the real craft of encoding HD video comes in. Instead of just picking a single bitrate and crossing your fingers, the professional move is to create a whole menu of options for the video player to choose from. This technique, called adaptive bitrate (ABR) streaming, is the key to delivering a smooth, buffer-free stream to every viewer, no matter what device or network they’re on.
Building Your Adaptive Bitrate Ladder
An ABR ladder is simply a set of different resolution-and-bitrate combinations you generate during the encoding process. When someone presses play, their video player automatically picks the best-quality stream their connection can handle at that moment. If their Wi-Fi drops for a second, the player just grabs a lower-bitrate version on the fly, preventing any interruption in playback.
Honestly, setting up a solid ABR ladder is one of the most important things you can do for viewer satisfaction. You’re building a safety net that all but guarantees a good experience.
To get you started, here’s a battle-tested ABR ladder configuration that I’ve found works great for a standard 1080p HD source. It covers the gamut from viewers on fast fiber connections to someone watching on a shaky 3G network.
Sample Adaptive Bitrate Ladder for 1080p HD Video
This table provides an excellent starting point for creating a versatile ABR ladder. The goal is to provide a smooth experience across a wide range of network conditions.
| Resolution | Video Bitrate (kbps) | Audio Bitrate (kbps) | Recommended Codec |
|---|---|---|---|
| 1920×1080 (1080p) | 6000 | 128 | H.264 / H.265 |
| 1280×720 (720p) | 3000 | 128 | H.264 / H.265 |
| 854×480 (480p) | 1500 | 96 | H.264 |
| 640×360 (360p) | 800 | 96 | H.264 |
| 426×240 (240p) | 400 | 64 | H.264 |
As you can see, the 6000 kbps tier delivers stunning 1080p for those with bandwidth to spare, while the 3000 kbps 720p option is a fantastic HD fallback. The lower tiers are crucial for keeping mobile users engaged without interruption. If you’re looking to dive deeper, we have a complete guide that unpacks the details of adaptive bitrate streaming and how to dial it in perfectly.
CBR vs VBR: The Great Encoding Debate
Once you’ve decided on your ladder, you face another key decision: how to actually spend those bits. You’ll mainly run into two methods: Constant Bitrate (CBR) and Variable Bitrate (VBR).
With Constant Bitrate (CBR), the encoder uses the same amount of data for every single second of video, regardless of what’s happening on screen. It’s predictable and steady, which makes it a common choice for live streaming where you need to maintain a stable, uninterrupted upload.
Variable Bitrate (VBR) is a whole lot smarter. It analyzes the video and allocates more data to complex, action-packed scenes while saving bits on simpler, static shots. This dynamic approach is way more efficient.
For on-demand video, VBR is almost always the superior choice. It achieves a significantly better balance between file size and visual quality because it doesn’t waste data on simple scenes or starve complex ones.
Picture this: you’re encoding an action movie. VBR will throw a higher bitrate at the fast-paced car chase to keep every detail sharp, but it will pull back during a quiet dialogue scene. The final result is a video file that looks just as good as a CBR encode but can be 20-30% smaller. That means faster load times for your viewers and lower storage costs for you. It’s a win-win.
This chart really drives home how modern codecs affect the bitrates you’ll need.
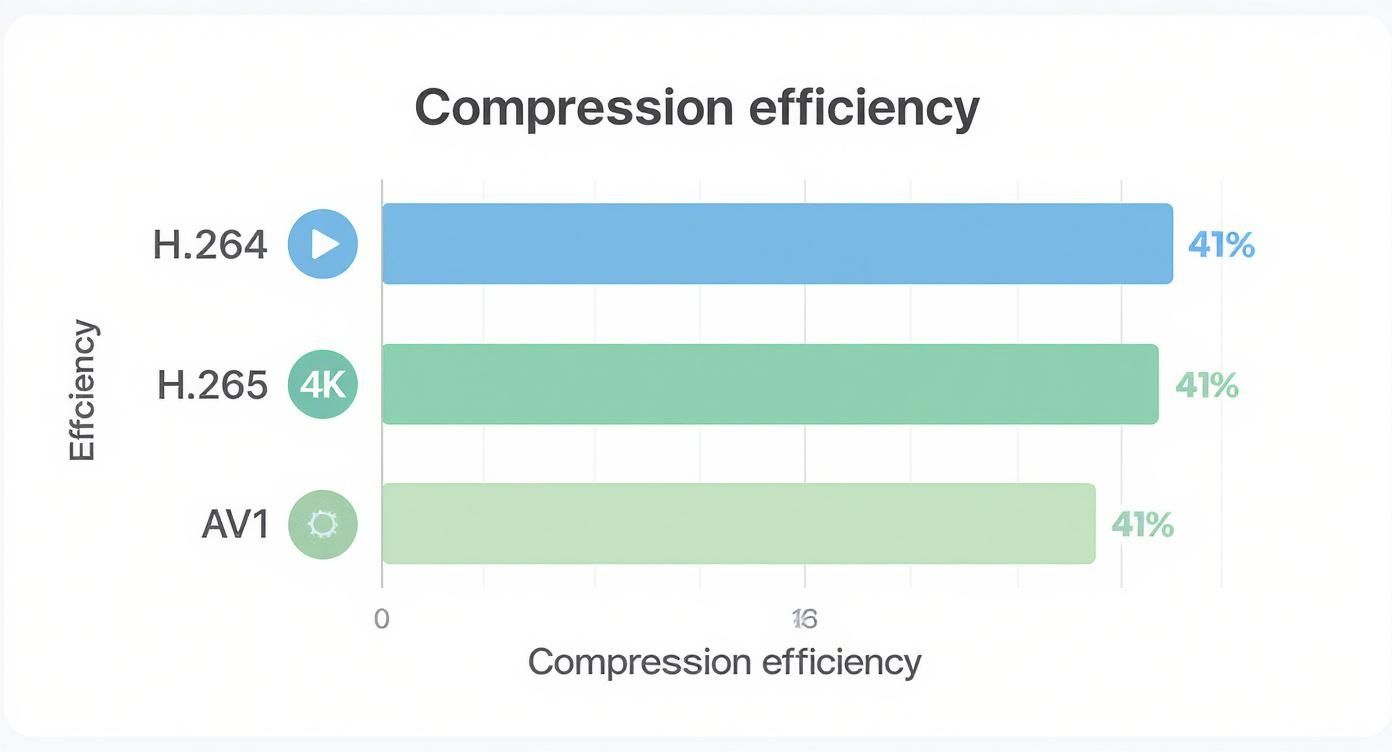
The data makes it clear: newer codecs like H.265 (HEVC) and AV1 deliver the same visual punch at a much lower bitrate. When you pair an efficient codec with a smart VBR strategy and a well-planned ABR ladder, you’ve built the perfect foundation for world-class HD streaming.
Advanced Encoding Techniques and Best Practices
Once you have a solid bitrate ladder in place, it’s time to dig into the settings that really separate a good stream from a great one. These are the details that elevate your entire video workflow, and getting them right is a huge part of encoding HD video like a seasoned pro.
Think of these settings as the small hinges that swing big doors. They might seem minor on the surface, but they have a massive impact on everything from stream stability to how your video looks during a fast-action scene.
Mastering Keyframe Intervals and GOP Size
One of the most critical yet frequently overlooked settings is the keyframe interval, often called the Group of Pictures (GOP) size. A keyframe is a full, complete image in your video stream. All the frames that follow it until the next keyframe just record the changes from that initial picture.
For modern adaptive streaming over HLS or DASH, a 2-second keyframe interval isn’t just a suggestion—it’s the industry standard you need to follow. This is because video segments are usually between 2 and 6 seconds long, and every single segment has to start with a keyframe. Sticking to a 2-second interval guarantees that when a player needs to switch bitrates, it can do so cleanly and immediately at the start of the next available segment.
If you set your keyframe interval too high, say 10 seconds, you’ll introduce frustrating lag and buffering when the player tries to switch quality levels. It forces the player to wait much longer for the next entry point, completely ruining the seamless adaptive experience you’re trying to create.
Choosing the Right Encoding Profile
When you’re setting up an H.264 or H.265 encoder, you’ll run into options for profiles like ‘Baseline’, ‘Main’, and ‘High’. These are essentially preset configurations that tell the encoder which compression tools it’s allowed to use. Your choice here is a direct trade-off between compression efficiency and device compatibility.
- Baseline Profile: This offers the absolute widest compatibility, working on even very old devices, but it uses the least efficient compression methods.
- Main Profile: A great middle ground. It’s supported by most modern devices and strikes a good balance between quality and file size.
- High Profile: This gives you the best compression and visual quality, but you might run into compatibility issues on older hardware.
For almost all HD streaming today, the High profile is the way to go. It unlocks advanced features that significantly boost quality at a given bitrate, and virtually all modern phones, browsers, and set-top boxes can handle it without breaking a sweat.
This whole field is built on a relentless push for better efficiency. The history of video standards is a story of delivering higher quality with less data. When H.264/AVC came out in 2003, it was a game-changer, making HD streaming over the internet a reality. A decade later, HEVC/H.265 showed up, enabling 4K streaming at bitrates H.264 would have needed for 1080p. You can take a deeper dive into the history of video compression to see just how far things have come.
Tailoring Settings to Your Content
Not all video is created equal. The ideal settings for a fast-paced football game are wildly different from what you’d use for a static PowerPoint presentation.
If you’re streaming high-motion content like sports or gaming, you absolutely need to allocate a higher bitrate to handle all the constant changes between frames. On the flip side, for a talking-head interview or a presentation with minimal movement, you can get away with a much lower bitrate without anyone noticing a drop in quality. Using a Variable Bitrate (VBR) setting is especially powerful here, as the encoder will naturally assign more data to the complex, action-packed scenes.
Monitoring and Troubleshooting with Webhooks
Let’s be realistic: even a perfectly configured encoding job can sometimes fail. This is why having real-time monitoring isn’t a luxury; it’s a necessity. With LiveAPI, you can set up webhooks to get instant notifications about the status of your encoding tasks.
You can configure a webhook to ping your server the moment a stream goes live, when transcoding finishes, or—most importantly—if an error pops up. This lets you build automated alerts or recovery logic directly into your application. You can diagnose and fix problems before your viewers even know something went wrong, which is an essential tool for maintaining a truly robust and reliable video pipeline.
Common Questions About Encoding HD Video
As you get deeper into your encoding workflow, a few questions always seem to come up. I’ve been in this world for a while, and I’ve seen the same practical concerns trip people up time and again. Let’s walk through some of the most common ones to help you sidestep those pitfalls from the start.
What Is the Biggest Mistake to Avoid?
Without a doubt, the single biggest mistake is creating one beautiful, high-bitrate file and calling it a day. That gorgeous 1080p stream at 8 Mbps looks amazing on your fiber connection, but it’s a buffering nightmare for anyone on a spotty mobile network. You’ve just cut out a huge chunk of your potential audience.
You absolutely need to implement an adaptive bitrate (ABR) ladder. This just means creating multiple versions of your video (say, 1080p, 720p, 480p) at different bitrates. The player can then intelligently switch between them based on the viewer’s real-time connection speed. Skipping this step is the fastest way to deliver a frustrating experience.
Should I Use H.265 for Everything?
I get this question a lot. H.265 (HEVC) is incredibly efficient—we’re talking about 50% better compression than the old standby, H.264. But it’s not a silver bullet. The problem is that it isn’t universally supported, especially on older devices or some web browsers that are slow to adapt.
The smartest play here is a dual-codec strategy. Encode your main, high-quality streams in H.265 to give modern viewers the benefit of lower bandwidth. Then, create an H.264 version as a fallback. This gives you the best of both worlds: peak efficiency where it’s supported and maximum compatibility for everyone else.
How Do I Choose the Right Keyframe Interval?
For modern streaming with HLS and DASH, stick to a keyframe interval of 2 seconds. This has become the industry standard for a good reason. Your video segments are usually 2-6 seconds long, and each one has to start with a keyframe. It’s what allows the player to jump into the stream at any point.
A 2-second interval makes sure that when the player switches between different quality levels in your ABR ladder, the transition is fast and smooth. If you set it too high, you’ll see noticeable lag during those shifts. Go too low, and you start to lose a little bit of compression efficiency. Just trust the 2-second rule; it works.
Is a Higher Bitrate Always Better?
Nope, not even close. It’s easy to think more data equals more quality, but you hit a point of diminishing returns surprisingly fast. For instance, bumping a 1080p video from 8 Mbps to 20 Mbps isn’t going to produce a difference most people can even see.
What it will do is send your storage and bandwidth costs through the roof. The real goal isn’t to cram in as much data as possible. It’s to find that sweet spot where the quality is fantastic without wasting a single bit. This is exactly what a well-structured adaptive bitrate ladder is designed to do—it’s all about finding those optimal values.
Ready to build a powerful and scalable video streaming experience? With LiveAPI, you can easily implement advanced encoding workflows, from adaptive bitrate ladders to dual-codec delivery, all through a simple and robust API. Start building with LiveAPI today!
