Before you can even think about fixing a corrupted video, you have to play detective. Just throwing random repair scripts at a broken file is a great way to waste an afternoon. The real first step is figuring out why it’s broken. Is the problem with the container, the codec, or the actual video stream data? Getting this diagnosis right from the start is everything; it dictates your entire strategy and saves you from going down a rabbit hole of useless fixes.
Understanding Why Video Files Break
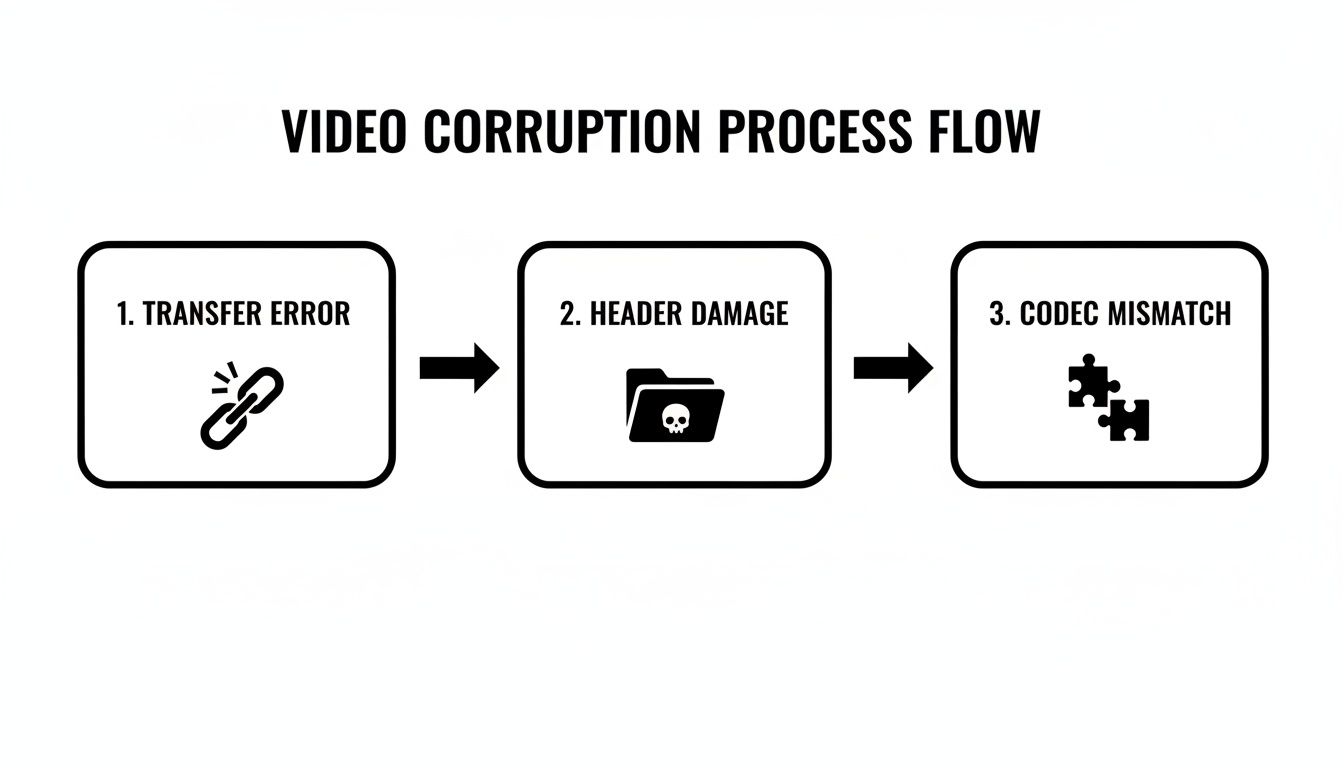
So, what actually happens when a video file goes bad? It’s not just one thing. A video that glitches, freezes, or flat-out refuses to play is basically sending up a flare, signaling a failure that happened somewhere during its journey—creation, transfer, or storage.
For a developer, an error message is just the starting point. The real work is digging into the file’s guts. You have to determine if the problem is with the wrapper—the MP4 or MOV container—or if the actual audio and video data inside is scrambled.
This means looking for a few usual suspects:
- Incomplete File Transfers: This is a classic. An upload or download gets cut short, leaving you with a file that’s missing its end. Media players need that complete structure, especially the index, to understand the file’s duration and contents. Without it, they just give up.
- Header Damage: The header is a tiny, but mighty, part of the file. It holds all the critical metadata—resolution, frame rate, codec info. If that gets mangled, the player has no idea what to do with the data, even if the video stream itself is perfectly fine.
- Codec Mismatches: Sometimes, the file is 100% healthy, but the playback environment just doesn’t have the right decoder installed. It looks and feels like corruption, but it’s really a compatibility issue. To get a better handle on this, check out our detailed guide on video codecs.
- Bit Rot and Storage Decay: Data isn’t immortal. Over time, bits on a storage drive can flip without warning, a phenomenon known as “bit rot.” This can inject tiny, random errors into a video stream, causing those weird artifacts or glitches that seem to come out of nowhere.
This flowchart maps out the common ways a video file can end up in a corrupted state.
Each of these failure points demands a different kind of fix. That’s why a one-size-fits-all approach almost never works.
Differentiating Container and Stream Issues
Here’s a critical distinction you have to make: is the problem with the container or the stream? Think of the container (.mp4, .mov, etc.) as the shipping box and the video/audio streams as what’s inside.
If the box is damaged—maybe the shipping label is unreadable (header corruption) or the bottom falls out (incomplete file)—you can often repair the box without messing with the contents. In the video world, this is like rebuilding an index or re-muxing the file into a new, healthy container.
But if the stuff inside the box is broken, that’s a much bigger problem. This is stream-level damage, like corrupted video packets or garbled audio frames. Fixing this is more like performing surgery, often requiring re-encoding or manipulating the data at the packet level.
To help you get a head start on your diagnosis, here’s a quick reference table I’ve put together based on common issues I’ve seen in the field.
Common Video Corruption Symptoms and Likely Causes
| Symptom | Potential Cause | Initial Diagnostic Step |
|---|---|---|
| File won’t open at all | Header corruption, severe container damage | Run ffprobe to check for metadata; failure to read suggests header issue. |
| Playback starts but freezes | Missing index, truncated file (incomplete download) | Check file size; inspect metadata for reported duration (often 00:00:00). |
| Video has glitches, artifacts, or “blockiness” | Stream-level corruption, bit rot, packet loss | Use ffmpeg -err_detect to scan for stream errors. |
| Video plays, but there’s no audio (or vice-versa) | Missing audio/video stream, codec issue | Use ffprobe or MediaInfo to verify both streams are present and codecs are recognized. |
This table isn’t exhaustive, but it should point you in the right direction for the most frequent problems. It helps turn a vague “it’s broken” into a specific, actionable diagnostic lead.
The Role of Media Inspection Tools
You can’t fix what you can’t see. That’s why tools like MediaInfo and ffprobe are non-negotiable. They’re like an x-ray for your video files, letting you peer inside the container and see exactly what’s going on.
Running a corrupted file through one of these tools is your first move. You’ll quickly spot red flags. Maybe the file reports a duration of zero, a dead giveaway for a busted index. Or perhaps the tool can’t even identify the video codec, pointing straight to a corrupted header. This initial scan gives you the clues you need to choose the right command or build the right repair script.
It’s a more common problem than you might think. Some reports suggest that between 1% and 5% of all consumer video files become partially unreadable over their lifetime due to these kinds of errors. That’s a lot of broken video.
Your Command-Line Toolkit for Video Repair
When the usual GUI tools just aren’t cutting it, it’s time to roll up your sleeves and drop into the command line. For serious video repair, nothing beats the raw power of FFmpeg. It’s the open-source Swiss Army knife for multimedia, capable of dissecting, manipulating, and fixing just about any format you can throw at it.
Think of it less as a single application and more as a complete workshop. Instead of clicking a generic “repair” button and hoping for the best, you’re in direct control. You can target the exact problems you diagnosed earlier, whether it’s a busted container or a scrambled index.

Honestly, spending some time with the official documentation is an investment that pays off big time. The tool’s capabilities are massive, and the docs are the map to all that treasure.
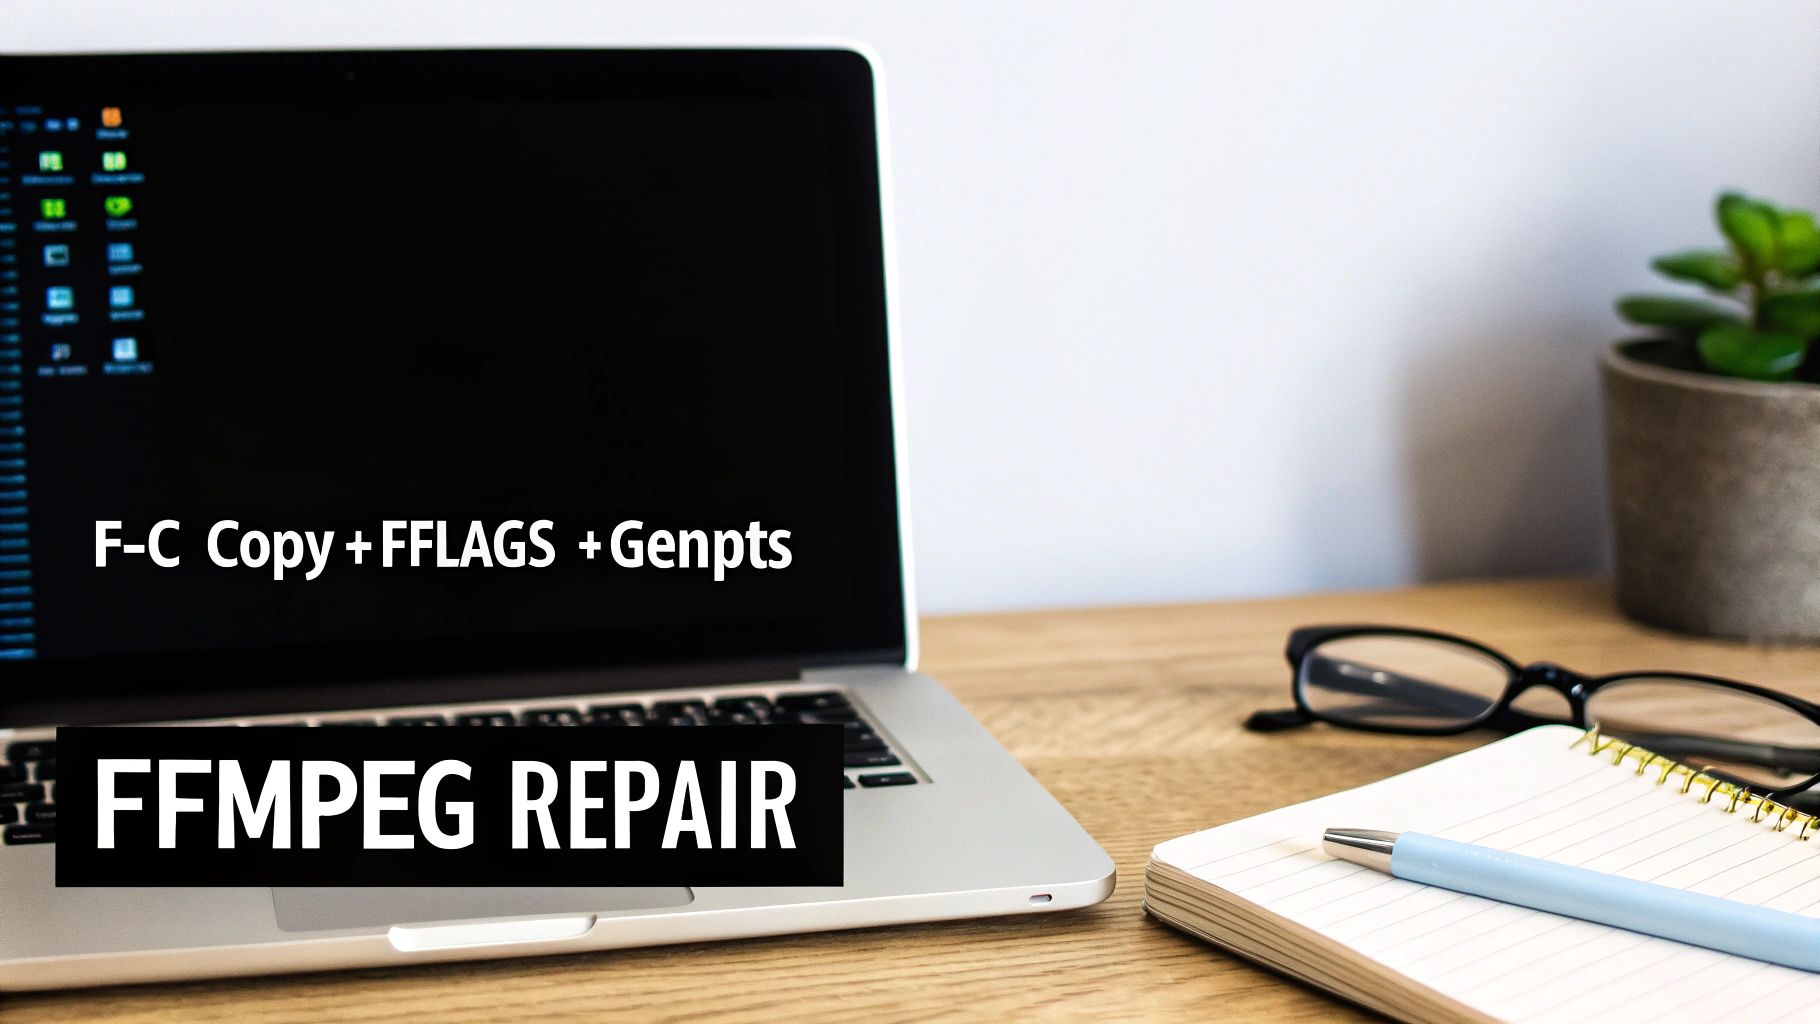
First Line of Defense: Re-Muxing
Before you dive into anything complicated, try the simplest fix first: re-muxing. This process just copies the existing video and audio streams into a brand-new, healthy container file. It doesn’t re-encode anything, so it’s lightning-fast and completely lossless. You’d be surprised how often this alone solves problems caused by container-level damage.
The key is the -c copy command. It tells FFmpeg to do a direct stream copy, preserving the original quality.
ffmpeg -i input_corrupted.mp4 -c copy output_repaired.mp4
This one command can often fix:
- Minor header corruption by building a fresh header.
- Incorrect file flags that might be confusing video players.
- Glitchy metadata that gets stripped out in the process.
If you’re working with a format like MKV, you might even try re-muxing it into a more universally compatible container like MP4. We have a guide on converting MKV files that gets into the nitty-gritty of container compatibility.
Pro Tip: If the first re-mux doesn’t work, don’t give up. Try changing the output container. Sometimes, switching from
.mp4to.movor.mkvis all it takes. Different containers have their own quirks and tolerances for stream errors.
Rebuilding a Broken Index
Ever open a video and the player can’t seek, or the duration is stuck at 00:00:00? That’s a classic symptom of a missing or broken index. In the MP4 world, this is the “moov atom,” and it usually lives at the very end of the file. If a download or file transfer gets cut off, this critical piece might never get written.
Luckily, FFmpeg can try to rebuild it. The -fflags +genpts command is your friend here. It tells FFmpeg to generate new presentation timestamps (PTS) for the packets, essentially recreating the file’s timeline from scratch.
ffmpeg -i input_broken_index.mov -fflags +genpts -c copy output_fixed_index.mov
This is a lifesaver for salvaging files from incomplete transfers. It scans the entire file, analyzes the raw packets, and builds a brand-new index, often restoring full playback and seeking.
Forcing the Input Format
What about a file so mangled that FFmpeg can’t even identify it? You might see an error like “Invalid data found when processing input.” This is common with raw video streams that don’t have a proper container or have a completely trashed header.
In these situations, you have to give FFmpeg a nudge in the right direction. Use the -f flag to manually tell it what kind of file it’s looking at. For example, if you know you have a raw H.264 stream:
ffmpeg -f h264 -i raw_video.h264 -c copy repaired_video.mp4
This forces FFmpeg to skip auto-detection and treat the input as a raw H.264 elementary stream. This trick is invaluable when you’re dealing with video recovered from damaged hard drives or raw footage from security systems, which often use non-standard, headerless formats.
Dealing with Stream Errors
For deeper corruption, you’ll need to inspect the stream itself. The -err_detect flag acts as a diagnostic tool, scanning for bitstream errors inside the actual video packets.
ffmpeg -v error -i severely_damaged.ts -f null – -err_detect compliant
This command doesn’t create an output file (-f null -). Its only job is to scan the input and report any errors it finds directly to your console. It’s a great way to gauge just how bad the damage is.
Once you know what you’re up against, you can tell FFmpeg to be more aggressive in its repair attempts. This might mean instructing it to ignore certain errors to salvage as much of the viewable footage as possible. By combining flags, you can often cook up a recipe to fix corrupted video files that other tools would simply give up on.
When simple re-muxing or index rebuilding fails, it’s a clear sign the corruption goes deeper than the container. The problem isn’t the box; it’s what’s inside. We’re talking about damage to the actual video and audio streams—the raw data packets that create the picture and sound. This is where we shift from basic file first-aid to more surgical, developer-level intervention.
At this stage, you’re often wrestling with individual, broken packets. This is especially common with transport streams (TS) used in broadcasting or the fragmented MP4 files that power adaptive bitrate streaming. The game plan is to hunt down these bad packets and make a tough call: either toss them out or try to intelligently guess the missing data.
This kind of work demands a low-level approach. You have to analyze the stream packet by packet to salvage what you can and piece together a coherent viewing experience. It’s a serious step up in complexity, but it’s often the only path forward for a severely damaged video.
Packet-Level Analysis and Repair
Before you can fix a bad packet, you have to find it. This means digging into the bitstream to look for anomalies like timestamp gaps, invalid packet headers, or checksum errors. Specialized stream analysis tools are your best friend here, as they can pinpoint the exact location of the corruption.
Once you’ve got a bead on the problem packets, your repair strategy will depend on the severity of the damage.
- Discarding Packets: Sometimes, the cleanest solution is to just remove the corrupted packet. This might cause a split-second glitch or artifact on-screen, but that’s a small price to pay to avoid a total playback crash. The trick is to adjust the timestamps of the surrounding packets to keep everything in sync.
- Interpolation: For less severe corruption, it can be possible to interpolate—or make an educated guess about—the missing data based on the frames that come right before and after. It’s a more involved process, but it can smooth over errors and make them almost invisible to the viewer.
- Frame Substitution: An even more advanced move is to replace a totally mangled frame with a copy of the previous good one. This can prevent a jarring visual break, though it might create a brief stutter in fast-moving scenes.
Messing with individual packets is delicate work. One wrong move can introduce more problems than you started with. Always work on a copy of the file and meticulously validate every single change you make.
Real-Time Stream Repair for Live Video
Managing live streams presents a whole different beast. You can’t just hit pause on a live event to run a repair script. The fixes have to happen in real-time as the stream is ingested. This is where API-driven transcoding and resilient streaming protocols truly shine.
Think about a live broadcast where the source feed gets a bit shaky and starts introducing artifacts. A robust platform, like LiveAPI, can spot these errors on the fly. You can configure the ingest server to automatically re-transcode any faulty segments, applying error concealment algorithms to clean up the video before your audience ever sees the problem.
This approach turns a potential stream-killer into a minor, often unnoticeable, blip. Building this kind of resilience into your architecture is what separates amateur setups from professional-grade live streaming.
Live streaming success is less about preventing every single error and more about building a system that can gracefully handle and recover from them in real time. Your architecture’s ability to self-heal is its most important feature.
Implementing Logic for Adaptive Streaming
Today’s streaming is dominated by protocols like HLS and DASH, which chop video into small, downloadable chunks. This segmented structure is a huge advantage when it comes to error recovery. If a player requests a segment and gets a corrupted one (or gets nothing at all), it can be programmed to handle the failure without stopping the show.
Good player-side logic should include a few key strategies:
- Retry Mechanism: Start with a simple retry. Network hiccups are often fleeting, so if a segment fails, just have the player try re-requesting it a couple of times.
- Requesting Lower Bitrates: If retries don’t work, the player should be smart enough to request the same segment from a lower-quality version listed in the manifest. A brief dip in resolution is way better than a frozen screen.
- Skipping Segments: As a last resort, the player can be designed to simply skip the problematic segment and jump to the next one. This creates a tiny jump in the video but keeps the stream flowing.
These strategies create a much smoother user experience, even when the delivery network isn’t perfect. Of course, handling these files can get tricky, and understanding how to package them is vital. To learn more, check out our guide on how to convert M3U8 playlists to MP4, which dives into related concepts for managing containers and streams.
By building these fallback and repair mechanisms into your systems, you move from a reactive state of fixing broken files to proactively engineering a resilient video delivery pipeline that anticipates and overcomes failure.
You’ve run the command, and the terminal says “success.” It’s a great feeling, but your job isn’t over. Just hitting play and watching the first ten seconds is a rookie mistake. Real validation is what separates a quick fix from a reliable repair.
You need to be sure that the fix is solid and that no subtle artifacts—like audio drift or a single glitched frame—are hiding deep inside the file. This is where you switch hats from repair tech to quality assurance engineer. Relying on a quick spot-check is just asking for an embarrassing “Hey, this video is broken” email later.
Building a Bulletproof Validation Workflow
First things first, you need to confirm the file’s structural integrity. This goes way beyond just being able to open it. One of the most solid methods is to generate a checksum of the repaired file, like a SHA-256 hash. Think of it as a unique digital fingerprint.
This hash lets you verify that the file hasn’t changed one bit after being moved or copied, which is absolutely critical for any serious archival or delivery pipeline.
Generating a hash is simple on most systems:
- Linux/macOS:
shasum -a 256 your_repaired_video.mp4 - Windows (PowerShell):
Get-FileHash .\\your_repaired_video.mp4
Tuck that hash away with the video’s metadata. Anytime you need to confirm its integrity, just run the command again. If the hashes match, the file is identical. It’s a simple check that completely removes any doubt about corruption creeping in during a transfer.
Beyond the file itself, you have to validate the actual playback experience. Manually scrubbing through a two-hour video is tedious and you’re bound to miss something. A much smarter approach is to automate your playback tests.
A repair is only successful if it holds up under scrutiny. Automating your validation isn’t just about saving time—it’s about creating a repeatable, objective standard for quality that a manual check could never match.
You can write simple shell scripts using FFmpeg’s ffprobe or ffmpeg to sample key parts of the video. For example, you could script a process that extracts frames from the beginning, middle, and end, plus a few random points in between. This is a great way to catch nasty issues like desynchronization that often don’t show up until well into the video.
Proactive Strategies to Prevent Corruption
Honestly, the best way to fix corrupted video is to stop it from happening in the first place. You can’t eliminate every single risk, but you can build a far more resilient media workflow by focusing on three areas: your storage, your transmission methods, and your handling procedures.
Your storage setup is your first line of defense. Standard filesystems can be susceptible to silent data corruption, or “bit rot,” where bits on a drive flip over time without any warning. To fight this, you should seriously consider using more robust solutions with built-in data integrity features.
Thinking proactively versus reactively is a game-changer for any media workflow. It’s the difference between a smoothly running operation and constantly putting out fires.
Proactive vs Reactive Corruption Fixes
| Strategy | Reactive Approach (Fixing) | Proactive Approach (Preventing) |
|---|---|---|
| Storage | Relying on backups after a drive fails, which might mean restoring an already corrupted version of the file. | Using filesystems like ZFS or RAID 5/6 with built-in redundancy and error correction to stop bit rot. |
| Transmission | Dealing with packet loss after it’s happened, leading to glitches or dropped streams for your users. | Implementing robust protocols like Secure Reliable Transport (SRT) that handle error correction during the stream. |
| File Handling | Trying to rebuild a damaged file header from scratch or dealing with the fallout of an incomplete file copy. | Keeping separate backups of critical metadata and using checksums to verify every single file transfer. |
As the table shows, a proactive strategy saves you from headaches down the road. For instance, a ZFS filesystem will continuously scrub data to find and fix errors before they ever become a problem. This shifts your workflow from a state of constant emergency repair to one of managed stability.
Finally, never underestimate the power of good metadata management. For your most critical assets, get in the habit of extracting and backing up the file header separately. If the main file’s header ever gets damaged, you can often use this backup to restore it. It’s a clean and fast recovery path that helps you avoid complex, time-consuming stream-level repairs. This simple practice can turn a potential disaster into a minor five-minute fix.
Choosing the Right Video Repair Software
FFmpeg is the Swiss Army knife in any developer’s toolkit for targeted, command-line video surgery. But let’s be honest—sometimes you hit a wall. Certain flavors of corruption, especially when you’re dealing with mangled codec data or a file that’s been severely cut short, can stump even the most creative FFmpeg command.
This is exactly where specialized video repair software comes into play. These tools aren’t just a pretty GUI slapped on top of FFmpeg. The good ones use sophisticated algorithms that dig deeper than a simple re-mux. They’re built to scan the binary guts of a damaged file and, most importantly, use a healthy “reference file” to rebuild what’s broken.
The Power of a Reference File
The reference file technique is a total game-changer for seriously corrupted videos. The concept is simple: you feed the software a perfectly healthy video shot with the exact same camera or device, using the exact same settings—resolution, frame rate, codec, everything.
The repair tool analyzes this “good” file to learn its unique DNA. It figures out how the headers are structured, where metadata lives, and how the video packets are supposed to be arranged. It then uses this blueprint to reconstruct the corrupted file from scratch, salvaging every last usable video and audio packet it can find and reassembling them into a brand-new, valid container. This is often the only prayer you have for recovering a file that was never closed correctly, like when a camera dies mid-shot.
Think of it this way: if your corrupted video is a book with the table of contents and first few chapters ripped out, the software uses a perfect copy of another book by the same author to figure out the structure and piece yours back together. This method can rescue footage that would otherwise be gone for good.
Automated Software vs. Manual CLI Methods
The choice between a GUI repair tool and sticking with the command line isn’t about which is “better.” It’s about picking the right tool for the job. Each one has its own strengths and weaknesses that make it a better fit for different situations.
Here’s a practical breakdown to help you decide on a strategy:
| Factor | Automated Software (GUI) | Manual Methods (CLI) |
|---|---|---|
| Speed | Often faster for complex, headerless repairs due to specialized algorithms. | Can be extremely fast for simple re-muxing or index rebuilding. |
| Control | Less granular control; you rely on the software’s internal logic. | Total control over every parameter, flag, and filter. |
| Use Case | Best for one-off recovery of critical files from specific devices (e.g., GoPro, drone). | Ideal for scripting, batch processing, and fixing systemic issues in a media workflow. |
| Learning Curve | Minimal. Usually involves a few clicks to select the bad file and the reference file. | Steep. Requires a solid understanding of FFmpeg commands and video containers. |
| Cost | Typically involves a one-time purchase or subscription fee for reliable tools. | Free and open-source, with the “cost” being the time invested in learning. |
When to Reach for a Specialized Tool
While I’m a huge believer in mastering FFmpeg, I always keep a trusted repair app handy for a few specific emergencies. A specialized tool is probably your best bet if you run into any of these scenarios:
- Camera-Specific Corruption: Files from devices that stop recording abruptly (dead battery, crash) often lack the crucial
moov atom. Automated tools are purpose-built for this exact problem. - Time-Sensitive Recovery: When a client needs a critical file salvaged yesterday, the speed of a GUI tool can be a lifesaver. You might not have a few hours to experiment with different FFmpeg flags.
- Non-Developer Stakeholders: If you need to empower a team member without a technical background to fix a common issue, a user-friendly application is the obvious choice.
At the end of the day, a pragmatic developer knows how to use every tool at their disposal. Mastering FFmpeg gives you the power to automate and scale repairs, while knowing which commercial tools to trust gives you a powerful fallback for the most stubborn cases of corruption.
Common Questions on Fixing Corrupted Video
Even when you’re comfortable in the command line and understand the basics of video corruption, you’ll still run into some weird, head-scratching issues. Let’s tackle some of the most common questions that pop up for developers trying to salvage a broken video file.
Can I Fix a Video That Won’t Play at All?
It’s often possible, so don’t give up hope. A video that refuses to open is usually a sign of a completely busted header or a missing index—the classic symptom of a recording that was cut short, like a camera battery dying mid-shot.
The goal here is to reconstruct that missing metadata. While FFmpeg can sometimes rebuild an index with +genpts, this is where specialized repair software often shines. These tools can take a healthy “reference” file from the same camera or encoder and use it to reverse-engineer the correct file structure, essentially rebuilding the unplayable file from its raw, orphaned video and audio packets.
How Can I Tell if a File Is Actually Corrupted or Just a Codec Problem?
This is a critical distinction, and figuring it out first will save you a ton of time. A codec issue can look a lot like corruption, but it’s really just a compatibility problem—your player has no idea how to interpret the video stream.
To figure out which one you’re dealing with, pop open a tool like ffprobe or MediaInfo.
- If the tool can read the file and correctly identify the codec (e.g., H.264, HEVC, AV1), but your player chokes on it, you’ve almost certainly got a codec issue. The fix is simple: install the right codec or transcode the file.
- If the tool throws a bunch of errors, can’t find any streams, or reports a duration of
00:00:00, then you’re looking at real file corruption.
This quick diagnostic step makes sure you’re aiming at the right target before you dive into any complex repairs.
Is Re-encoding a Corrupted Video a Good Idea?
Honestly, re-encoding should be the absolute last thing you try. The process is inherently lossy, which means you’re guaranteed to lose some quality, even if it’s not immediately obvious. Worse, trying to re-encode a file with deep structural damage can either fail outright or permanently “bake” the glitches into the new file.
Always try lossless methods first:
- Re-muxing: Use
ffmpeg -c copyto move the streams into a fresh container. It’s fast, lossless, and fixes a surprising number of container-level issues. - Index Rebuilding: If the main problem is that you can’t seek through the video, try to rebuild the index before you even think about a full re-encode.
Only when those options fail—and you suspect the corruption is at the stream level (like severe packet errors)—should you attempt to re-encode. This can sometimes force the decoder to limp past the bad frames and spit out a playable, though imperfect, file.
Think of re-encoding as a form of digital triage. It’s a powerful way to salvage something watchable from a file that’s otherwise a total loss, but it’s not a true repair. You’re just producing a usable copy, accepting that some data is gone for good.
What’s the Best Way to Prevent Future Video Corruption?
The best strategy is to be proactive. If you’re always relying on repair tools, you’re always fighting fires. Building a more resilient workflow is all about prevention.
First off, use storage that has built-in integrity checks. Filesystems like ZFS or hardware RAID setups with redundancy are designed to catch and correct “bit rot” before it can silently mangle your media files.
Second, verify every single file transfer. Always run checksums like SHA-256 to confirm that the file you received is bit-for-bit identical to the one that was sent. This simple step completely eliminates corruption caused by network hiccups or incomplete copies.
Finally, for your most critical assets, consider backing up the metadata separately. A tiny file containing just the header information can make restoring a damaged video a trivial task compared to performing complex stream-level surgery later.
A robust infrastructure is your best defense. With LiveAPI, developers can build resilient streaming applications with features like on-the-fly transcoding and error correction, helping to minimize corruption before it ever reaches your audience. Learn more and get started with LiveAPI.