A professional live streaming setup is more than just a camera and an internet connection; it’s an entire ecosystem designed to capture, process, and deliver video to your audience in real time. Getting it right involves a delicate balance of hardware, software, and network infrastructure, all working together to create that seamless, buffer-free experience viewers expect.
Building Your Live Stream Blueprint
Before you even think about buying gear, you need a plan. Seriously. The first step is to map out exactly what a successful stream looks like for your specific goal, whether it’s a developer Q&A or a massive product launch.
Think of it as the architectural blueprint for your whole operation. When you understand the complete journey—from your camera’s sensor to your viewer’s screen—you can make much smarter choices about your equipment and services. This kind of planning helps you build for reliability and scale from the get-go, so you can sidestep those technical hiccups that drive everyone crazy.
The Core Workflow of Any Live Stream
Every live broadcast, from a simple webcam stream to a multi-camera production, follows the same fundamental path. Each stage in the chain hands off to the next, so a bottleneck anywhere can bring the whole show to a halt.
This diagram lays out the five essential stages that every piece of live video content must pass through.
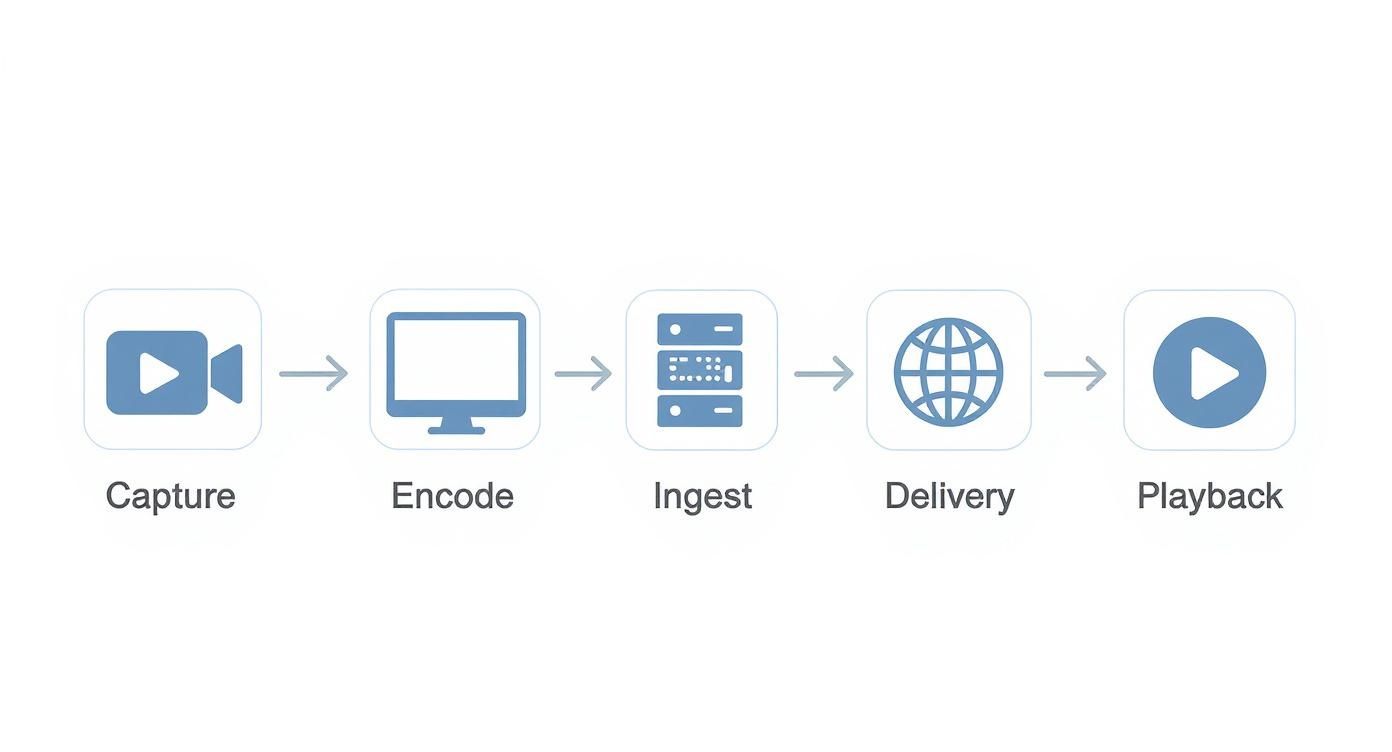
Let’s break down what’s happening at each step of this journey. To help visualize this, here’s a quick rundown of the components and their roles in the process.
| Core Components of a Live Streaming Workflow | | :— | :— | :— | | Component | Primary Function | Key Considerations | | Capture | Grabs raw video and audio signals. | Camera resolution, sensor quality, microphone type, lighting. | | Encoding | Compresses raw data into a streamable format (e.g., H.264). | Software vs. hardware encoder, bitrate, CPU load, output resolution. | | Ingest | Transmits the encoded stream to a media server (e.g., LiveAPI). | Upload bandwidth, protocol (RTMP/SRT), network stability. | | Delivery | Distributes the stream to viewers globally via a CDN. | CDN reach, latency, scalability, security. | | Playback | Decodes and displays the video on the viewer’s device. | Player compatibility, device support, user experience. |
Each of these stages is a critical link in the chain. A high-end 4K camera is pointless if your internet connection can’t handle the upload, and a beast of an encoder won’t save you if your CDN can’t manage the viewer load.
My Takeaway: Treat your live stream like a production line. A weakness at any single point will impact the final product. Your goal is to identify and strengthen the weakest link before you go live.
The pressure to deliver high-quality streams is only growing. The global market, valued around USD 106.5 billion in 2025, is on a trajectory to hit an astounding USD 725.5 billion by 2034, according to projections from Custom Market Insights. This explosive demand makes a well-planned, robust setup more important than ever.
If you’re looking for a deeper dive into the basics, we cover all the fundamentals in our guide on how to stream live video.
Choosing Your Core Streaming Hardware
Your hardware is the bedrock of your stream’s production quality. Forget generic shopping lists; let’s talk about the practical decisions that actually impact what your audience sees and hears. The right gear for your live streaming setup isn’t always the most expensive—it’s the gear chosen for the right reasons.
The whole point is to capture clean, reliable signals that you can then process and push out to your viewers. It all starts with your camera and microphone, the two pieces of equipment that directly connect your content to the real world.
Selecting the Right Camera for Live Video
Your camera choice fundamentally shapes your stream’s visual identity. Sure, a simple webcam can get you started, but moving to a dedicated camera is where you’ll see a massive leap in quality.
You’ll generally run into three main options:
- DSLRs/Mirrorless Cameras: These deliver that fantastic image quality with a shallow depth of field and the flexibility of interchangeable lenses. They’re perfect for controlled setups, like a developer talk from a home studio.
- Camcorders: Built from the ground up for video, they typically have better battery life and more professional I/O (like XLR audio inputs). Think of them as the reliable workhorses for longer events.
- PTZ (Pan-Tilt-Zoom) Cameras: These are robotic cameras you can control from a distance. They are a game-changer for multi-angle productions with a small crew, like covering different speakers on a conference stage.
When you’re looking at a camera specifically for live streaming, a couple of features are absolutely non-negotiable.
First, you need a clean HDMI output. This is crucial. It means the camera sends a pure video signal without all the on-screen display junk (like battery icons or settings menus) cluttering up your shot.
Second, look for continuous power options. Many DSLRs are notorious for their short battery life. An AC adapter or a dummy battery setup is a must-have to keep your stream from abruptly ending mid-session.
Capturing Crystal-Clear Audio
Here’s a hard truth: audio quality is almost always more important than video quality. Your audience might put up with a slightly grainy image, but they will leave in a heartbeat if the audio is distorted, muffled, or out of sync. Your choice here really comes down to two main microphone connection types.
USB Microphones are the definition of plug-and-play. They connect right to your computer and are incredibly simple to set up, making them a great starting point for solo streamers or simple commentary.
XLR Microphones are the next level up, connecting through an audio interface or mixer. This route gives you far more control, higher fidelity, and the flexibility to bring in multiple mics for things like interviews or panels. It’s more hardware, but the payoff in professional-grade sound is undeniable.
For any developer walking through technical content, clarity is everything. An XLR condenser microphone is often the best tool for the job. It captures the nuance in your voice, ensuring every line of code you explain is heard perfectly.
No matter what mic you choose, placement is king. Get that microphone as close to your mouth as you can (just out of the camera’s frame) to kill room echo and push background noise into oblivion.
The Role of the Video Capture Card
So you’ve got a great camera and a crisp microphone. How do you actually get those signals into your computer for encoding? That’s where the video capture card comes in. It’s the essential bridge between your professional gear and your streaming software.
A capture card grabs the HDMI or SDI signal from your camera and translates it into a digital format your computer sees as a simple webcam source. From there, you can easily select it in software like OBS or vMix.
You’ll find two main types for your live streaming setup:
- Internal Cards: These are PCIe cards you install right onto your computer’s motherboard. They give you the absolute best performance and lowest latency, making them the top choice for high-end desktop builds.
- External Devices: These handy little boxes connect via USB or Thunderbolt. They’re perfect for laptops or any situation where you need to be portable, offering excellent quality and convenience.
Choosing the right one boils down to your camera’s output. A card that can handle 4K at 60fps is complete overkill if your camera only puts out 1080p at 30fps. Match the hardware to your source to avoid overspending and guarantee everything just works.
Finding the Right Streaming Software
Once your hardware is feeding clean video and audio into your computer, the software you choose becomes your control room. This is where you actually direct the show—mixing cameras, layering in graphics, tweaking audio levels, and ultimately, encoding and sending your final product out to your audience. The most powerful live streaming setup is one where the software seamlessly orchestrates all the hardware components into a professional broadcast.
The market for this kind of software is dominated by a few key players, and each brings something different to the table. Making the right choice isn’t just about ticking off feature boxes; it’s about finding the tool that aligns with your technical skill, production complexity, and, of course, your budget.
The Heavy Hitters in Streaming Software
For most of us, developers and creators alike, the decision typically boils down to one of three main options. They all get the core job done—encoding and transmitting your stream—but their philosophies and capabilities diverge pretty quickly.
To get a clearer picture, let’s compare them side-by-side.
Software Encoder Feature Comparison
This table gives you a quick rundown of what each major player offers, who they’re for, and what they’ll cost you.
| Software | Best For | Key Features | Cost |
|---|---|---|---|
| OBS Studio | Beginners to advanced users on a budget. | Open-source, highly customizable with plugins, cross-platform (Windows, Mac, Linux). | Free |
| vMix | Windows users needing advanced production features. | NDI support, instant replays, built-in animated titles, multi-destination streaming. | Tiered (Free to $1200) |
| Wirecast | Professional productions needing an all-in-one solution. | Built-in stock media library, integrated remote guests, ISO recording. | Subscription/Perpetual |
As you can see, OBS Studio is the undisputed king for anyone starting out or wanting maximum flexibility on a budget, thanks to its open-source nature and huge community. But for more complex productions, tools like vMix offer powerful, integrated features that would require a whole mess of plugins and workarounds to achieve in OBS. Wirecast carves out its space as a premium, turnkey solution for serious, professional broadcasts.
Practical Production Workflow Examples
Let’s ground this in reality. The software you pick has a direct impact on how you actually build and run your stream day-to-day.
Say you’re hosting a live coding session. In OBS Studio, your workflow might look like this:
- Set up a “Main” Scene: This would be a composition of your camera feed, your screen capture (showing your IDE), and your microphone audio source.
- Create a “Be Right Back” Scene: You’d have a simple graphic and maybe some background music ready for when you need to take a break.
- Configure Hotkeys: You’d map keys on your keyboard to instantly switch between your main and break scenes, so you’re not fumbling with your mouse live on air.
Now, imagine a more involved setup, like a two-person interview with a remote guest. This is where a tool like vMix or Wirecast really starts to pull ahead. Using vMix’s “vMix Call” feature, you can bring your remote guest’s webcam feed directly into your production as a dedicated source. From there, you can build out scenes showing just you, just your guest, or both of you in a polished side-by-side layout, all managed from one interface.
Pro Tip: Whatever software you land on, get comfortable with the concepts of “scenes” and “sources.” A source is a single input—a camera, an image, a microphone. A scene is a collection of those sources arranged in a specific layout. Building out your scenes before you go live is the secret to a dynamic and professional-looking broadcast.
The industry landscape also plays a role here. Gaming is a huge driver, with the global gaming live streaming audience projected to hit 1.4 billion by 2025. With Twitch commanding around 61% of all live-streaming hours watched, software developers naturally focus on tight integrations with the Twitch API. This focus, as detailed in a report on live streaming statistics, ultimately benefits all streamers, not just gamers.
Automating and Extending Your Stream
For developers, the real magic happens when you move beyond manual clicking and start tapping into APIs and automation. This is how you can build truly dynamic and interactive experiences.
OBS Studio, for instance, has an incredibly powerful WebSocket plugin that lets you programmatically control almost everything. You could write a simple script that:
- Automatically switches to a “celebration” scene when a specific event happens in a game you’re playing.
- Pulls data from a live API—like stock prices or sports scores—and displays it in an on-screen text overlay.
- Triggers a graphic to appear when a viewer uses a specific command in your live chat.
The professional tools are built for this, too. vMix has a robust API and scripting engine. You could integrate your broadcast with a service like LiveAPI to automate your entire workflow—triggering cloud transcoding, dynamically multistreaming to different platforms based on your own logic, or creating programmatic video archives. This turns your streaming software from a simple production tool into a programmable video engine at the core of your operation.
Dialing in Your Encoding and Bitrate
This is where the real magic happens. Encoding is the process of taking your raw, high-quality video feed and compressing it into a streamable format. You’re essentially shrinking a massive file down so it can travel smoothly across the internet without losing too much quality. Getting these settings right is absolutely critical for any professional live streaming setup, as it has a direct, immediate impact on your viewer’s experience.
Trying to send an uncompressed video feed live is like trying to fit an elephant through a garden hose—it’s just not going to work. Encoding makes that elephant manageable, getting it ready for the journey to your audience. This isn’t just a technical step; it’s the very foundation of a stable, buffer-free stream.
Getting a Grip on Codecs and Bitrates
The two concepts you have to nail down are codecs and bitrates. A codec (coder-decoder) is the algorithm that does the heavy lifting of compressing and decompressing the video. For live streaming, the undisputed king is H.264 (AVC). It hits the sweet spot between quality and compatibility, meaning almost any device on the planet can play it back without a fuss.
Then there’s the bitrate, which is measured in kilobits per second (kbps) or megabits per second (Mbps). This number dictates how much data you’re pushing out every second. A higher bitrate means more data, which translates to better video quality—but it also demands more upload bandwidth from you and more download bandwidth from your viewer. It’s always a trade-off.
For a standard 1080p stream at 30 frames per second (fps), here are some solid starting points:
- Resolution: 1920×1080
- Frame Rate: 30 fps
- Video Bitrate: 3,000 to 6,000 kbps
- Audio Bitrate: 128 kbps
Remember, these are just guidelines. Your perfect bitrate is tied directly to your available upload speed. A good rule of thumb is to never use more than 75% of your stable upload bandwidth. That extra 25% is your safety net for any network hiccups.
My Takeaway: Don’t just guess your upload speed. Run a few speed tests at different times of the day to find your sustained upload rate, not just a one-time peak. The stability of your entire stream hinges on this number.
If you want to go deeper on how this all fits together, our guide on what video encoding is is a great resource that breaks down the fundamentals.
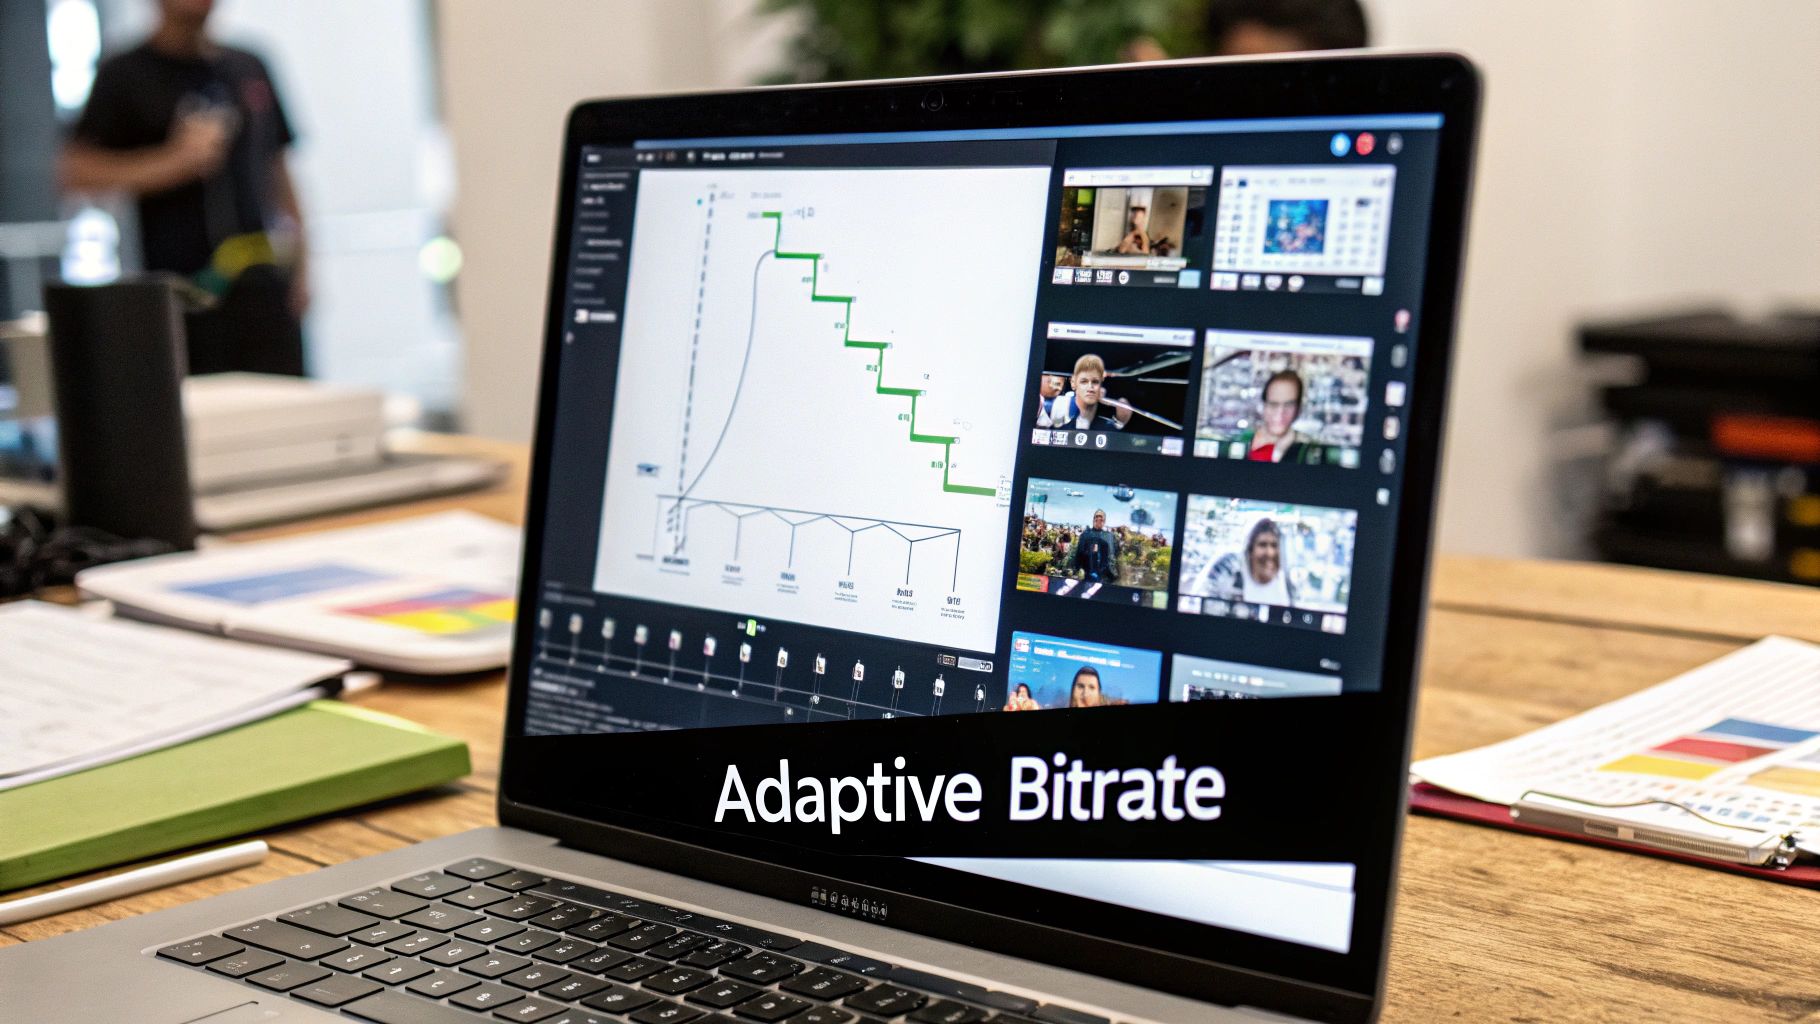
The Power of Adaptive Bitrate Streaming
Now, here’s the catch with sending a single bitrate stream: you’re assuming every viewer has the exact same internet connection. Someone on a blazing-fast fiber connection can easily handle a 6,000 kbps stream, but a viewer on a spotty mobile network will be stuck in buffering purgatory. This is precisely the problem that Adaptive Bitrate (ABR) streaming solves.
With ABR, you create multiple versions (or “renditions”) of your stream at different bitrates and quality levels. The viewer’s video player is smart enough to detect their network conditions in real-time and automatically requests the best-quality stream they can handle. If their connection suddenly dips, the player seamlessly switches to a lower-quality version to avoid buffering.
This ensures every single person gets the best possible experience their connection can support. It’s the secret sauce behind the smooth, uninterrupted playback you get from major platforms like YouTube and Twitch.
Building Your Bitrate Ladder
To make ABR work, you need to set up a “bitrate ladder” in your encoder or with your streaming provider. It’s just a list of the different resolutions and bitrates you want to offer.
Here’s a practical example of a bitrate ladder for a 1080p source stream:
| Resolution | Video Bitrate (kbps) | Audio Bitrate (kbps) | Target Use Case |
|---|---|---|---|
| 1080p | 4500 | 128 | High-speed fiber/ethernet |
| 720p | 2500 | 128 | Standard broadband/strong Wi-Fi |
| 480p | 1200 | 96 | Slower DSL/strong mobile signal |
| 360p | 800 | 96 | Weak mobile/congested networks |
Platforms like LiveAPI can handle this transcoding for you in the cloud. You just send one high-quality source stream to their ingest servers, and they automatically generate the entire bitrate ladder. This takes the intense computational load off your local machine and guarantees a smooth ABR experience for your audience, wherever they are.
Building a Scalable Delivery Strategy
Once your stream is perfectly encoded and ready to go, the next big hurdle is actually getting it to a global audience without crippling lag. This is where your delivery strategy comes in. Think of it as the heavy-lifting infrastructure that turns a local broadcast into a professional, worldwide stream. It’s the difference between viewers seeing your content instantly and just staring at a spinning wheel.
It all starts with getting your encoded stream from your machine to a media server. The protocol you use for this “ingest” involves some real-world trade-offs between speed and stability.
Choosing Your Ingest Protocol
For years, RTMP (Real-Time Messaging Protocol) has been the go-to standard. Just about every piece of streaming software and hardware on the planet supports it, which makes it incredibly reliable from a compatibility standpoint. The catch? RTMP is based on TCP, which can introduce latency if your network conditions aren’t pristine.
A much more modern alternative is SRT (Secure Reliable Transport). It’s built on UDP and designed from the ground up to handle packet loss and network jitter gracefully. This makes it a fantastic choice for pushing your stream over the unpredictable public internet, often resulting in lower latency and a more stable connection.
- RTMP: Best for compatibility and simpler setups where shaving off every millisecond isn’t the top priority.
- SRT: Your best bet for challenging network conditions or when you absolutely need the lowest possible delay.
For most projects, starting with RTMP is perfectly fine. But having the ability to switch over to SRT is a powerful tool to have in your back pocket, especially when stream stability is critical.
The Non-Negotiable Role of a CDN
Let me be clear: sending a stream directly from your server to every single viewer is a recipe for disaster. A single server in one location simply cannot provide a good experience for a geographically diverse audience. This is exactly why a Content Delivery Network (CDN) is an essential, non-negotiable part of any serious live streaming architecture.
A CDN is a vast, distributed network of servers strategically placed around the globe. When you send your stream to the CDN, it gets cached and replicated across these servers. So, when a viewer in London requests your stream, they pull it from a local server in Europe, not from your origin server sitting in Los Angeles.
This simple act of moving content closer to the end-user dramatically slashes latency and buffering. It ensures a smooth, high-quality playback experience for everyone, no matter where they are. You can find a great breakdown of the best CDNs for video streaming to see how different providers compare.
Pursuing Low Latency Streaming
For interactive streams—think live Q&As, online auctions, or real-time gaming—standard broadcast latency of 15-30 seconds just won’t cut it. To get that near-instant feel these events demand, you have to lean on modern low-latency delivery technologies.
One of the most promising standards gaining traction is Low-Latency HLS (LL-HLS). It’s an extension of Apple’s ubiquitous HLS protocol that works by breaking the video into much smaller chunks, allowing players to start playback significantly faster. With a properly configured LL-HLS pipeline, you can get latency down into the 2-5 second range. That’s a game-changer.
The push for low-latency, mobile-first streaming is reshaping the entire industry. When viewers can interact in near real-time, engagement skyrockets, which is a key reason platforms are investing so heavily in this technology.
Recent metrics really drive this point home. In Q3 2025, viewers spent a staggering 29.45 billion hours watching live content. And while YouTube Live’s market share dipped below 50% for the first time, TikTok Live grew by 14.9%, capturing 31.2% of the market share with 9.2 billion hours watched. This explosive growth reflects a clear viewer preference for mobile-friendly, low-latency streams that feel immediate and interactive.
Fortunately, you don’t have to build all this complex infrastructure from scratch. Platforms like LiveAPI integrate these technologies out of the box, allowing you to build a delivery pipeline that is both robust and scalable. By combining a reliable ingest protocol, a powerful CDN, and modern low-latency protocols, you can architect a system that delivers a professional, buffer-free experience to a global audience.
Answering Your Top Live Streaming Setup Questions
Diving into the technical side of live streaming can feel like opening a can of worms. There are a million little things that can go wrong, and getting them right is what separates a professional broadcast from a frustrating, glitchy mess.
https://www.youtube.com/embed/aYa-7oltrAc
I get asked about this stuff all the time, so let’s break down some of the most common hurdles that trip people up. We’ll cover everything from the network connection that fuels your stream to those pesky audio glitches that can drive viewers away.
How Much Upload Speed Do I Really Need?
This is the big one. And the honest answer? It depends entirely on the quality you’re aiming for. Sending a high-resolution, high-frame-rate stream simply requires more data.
A good rule of thumb I always recommend is to have an upload speed that’s at least double your streaming bitrate. Why double? Because internet speeds fluctuate. That extra headroom acts as a buffer, preventing dropped frames when your connection dips, which it inevitably will.
- For a 720p stream at 30 fps (around 2500 kbps): You’ll want a stable 5 Mbps upload speed, minimum.
- For a 1080p stream at 60 fps (around 6000 kbps): You should be looking for a solid 12 Mbps or more.
And I can’t stress this enough: stability trumps peak speed. Always plug your streaming computer directly into your router with an Ethernet cable. Wi-Fi is convenient, but a wired connection is non-negotiable for a serious stream. It delivers a consistent data flow that wireless connections just can’t guarantee.
Why Does My Stream Look Blurry or Pixelated?
Seeing a blocky, pixelated mess when you know you selected 1080p? The culprit is almost always your bitrate being too low for the resolution and content.
Think of bitrate as the amount of information you give the encoder to draw each frame of your video. If you’re streaming a fast-paced game with lots of on-screen motion at 1080p but only feeding it a 2000 kbps bitrate, the encoder is starved for data. It has to cut corners, and that’s when you see those ugly compression artifacts.
The fix is simple: either crank up your bitrate (if your internet connection can handle the extra load) or drop your stream resolution to 720p. Giving the encoder more data per pixel to work with will produce a much cleaner, sharper image.
Key Takeaway: A crisp 720p stream is always better than a pixelated 1080p stream. Your goal is to find the sweet spot where your bitrate, resolution, and content all play nicely together.
How Can I Fix Audio Echo or Sync Issues?
Bad audio will make people click away faster than anything else. Echo and out-of-sync audio are two of the most common—and most annoying—problems.
Echo is almost always caused by your microphone picking up the output from your speakers or even leaky headphones. The solution is straightforward: monitor all your stream audio through a good pair of closed-back headphones. This keeps the sound in your ears and out of your mic’s range.
Sync issues, where your mouth moves before or after your voice is heard, are a bit trickier. This happens because video processing is much more intensive than audio processing, causing the video feed to lag behind by a few milliseconds. Most streaming software, like OBS Studio, has a fix for this. Look for a “Sync Offset” or “Async Delay” setting in your microphone’s advanced audio properties. You’ll need to add a slight delay (start with something like 200ms) to your microphone to let the video catch up. It takes some trial and error, but getting it perfect is worth the effort.
Ready to build a powerful, scalable video application? With LiveAPI, you can integrate live and on-demand video with just a few lines of code, leveraging our robust infrastructure for encoding, delivery, and analytics. Focus on creating amazing user experiences while we handle the complexities of video streaming.
Start building with LiveAPI today.