
Imagine you’re trying to get into a members-only club. The bouncer checks your ID once at the door and, instead of having you pull it out every time you want to order a drink, gives you a wristband. That wristband is your proof of entry for the rest of the night.
That’s a pretty good way to think about token-based authentication. It’s a modern security method where, after you log in once, you get a digital “wristband” — a token — that grants you temporary access without you having to re-enter your password over and over.
Why Token-Based Authentication Matters
This approach is a big departure from the older, more traditional way of handling logins with server-side sessions. In the old model, the server had to keep a running list of every single user who was logged in. This created a lot of overhead and made it a real headache to scale up. If one server in a cluster went down, poof—all the user sessions on it were gone.
Token-based auth flips that script completely. Instead of the server needing to remember you, the token itself holds the proof of who you are and what you’re allowed to do. This is what we call a “stateless” system, and it’s a game-changer.
The core idea is simple but powerful: Authentication is decoupled from the server. This allows systems to scale effortlessly because any server can validate a token without needing prior knowledge of the user’s session.
This is absolutely critical for the way applications are built today, with distributed systems, microservices, and single-page apps (SPAs). When your application is made up of many small, independent services, a central session database quickly becomes a bottleneck. Tokens, on the other hand, can be passed around freely and securely between all of them.
The Rise of Tokens in Secure Systems
The shift to this authentication model, especially with JSON Web Tokens (JWT), has really taken off. You see it everywhere now, but it’s particularly dominant in security-first industries like banking and finance. In fact, industry data shows that token-based authentication usage has shot up by 47% in these sectors.
This isn’t just a trend; it’s a direct response to the need for stronger, more efficient security as the cost of cybercrime is expected to hit a staggering $10.5 trillion annually by 2025. You can dig deeper into these trends by checking out the authentication services market analysis on GlobalGrowthInsights.com.
Core Benefits of This Approach
The upside of using tokens goes well beyond just making it easier to scale your application. Here are a few of the biggest wins:
- Improved Security: Tokens drastically reduce how often you have to expose sensitive credentials. Instead of sending a password with every request, the client just sends a short-lived token. If a token is compromised, it expires quickly and can be easily replaced.
- Enhanced User Experience: By using strategies like refresh tokens (which we’ll cover later), you can give users long, uninterrupted sessions across their different devices without forcing them to constantly log back in.
- Greater Flexibility: Tokens aren’t tied to any specific platform. A token issued by a Node.js web server can be perfectly understood and validated by a mobile backend written in Go, a third-party API, or any other piece of your infrastructure. This makes building and connecting systems so much smoother.
Choosing the Right Authentication Token
Picking the right token for your system is one of those foundational decisions that can make or break your application’s security and performance. It’s not a one-size-fits-all situation. Each token type has its own personality, with a unique set of strengths and weaknesses. The choice you make will ripple through your entire architecture.
Think of it like choosing a key for a specific lock. You wouldn’t use a bulky master key for a simple diary, nor would a temporary hotel keycard work for your front door. You need the right tool for the job. Your application’s specific needs—be it stateless microservices, high-security session management, or temporary file access—will point you to the right token.
This decision tree helps visualize where token-based authentication shines, especially in modern, scalable app design.
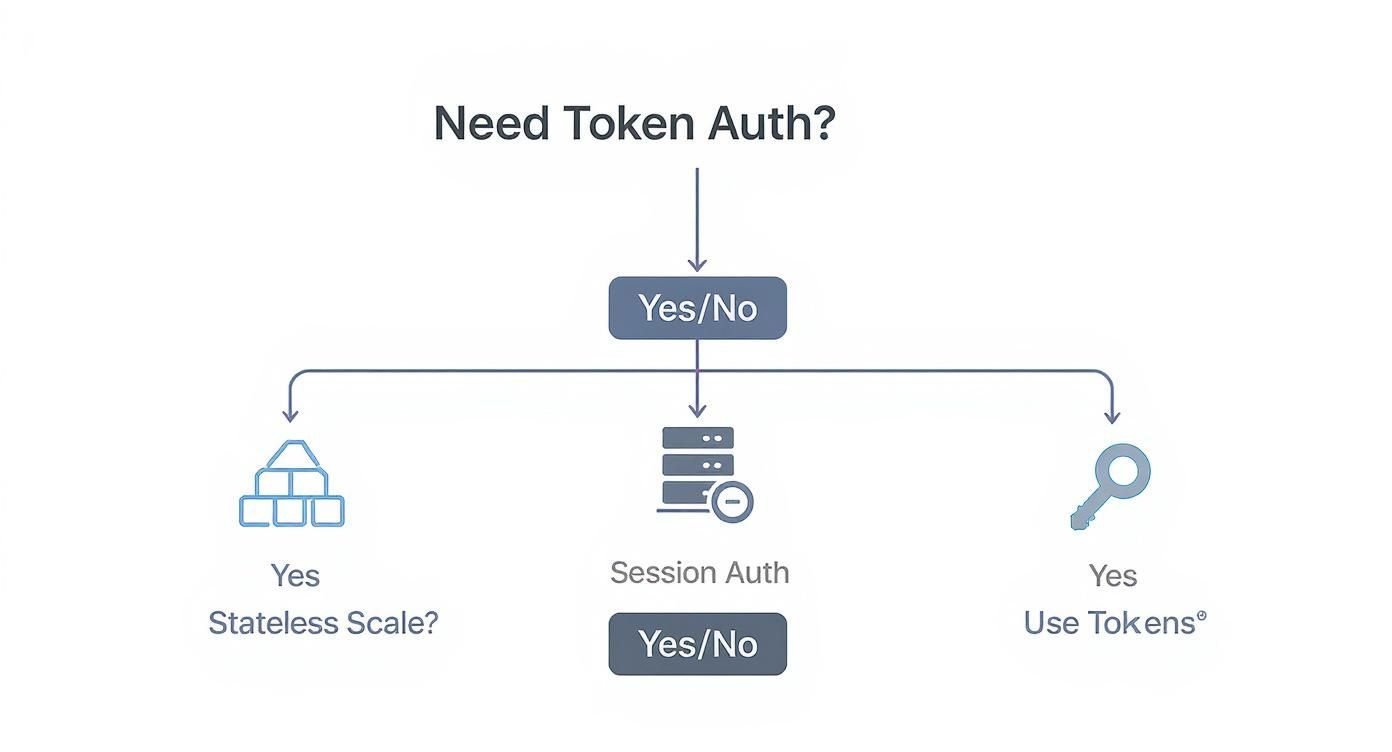
As you can see, when your goal is stateless scalability—a must-have for most distributed applications today—tokens become the obvious choice over traditional sessions.
JSON Web Tokens (JWTs): The Self-Contained ID Card
First on the list are JSON Web Tokens, or JWTs. The best analogy for a JWT is a detailed, tamper-proof ID card. It’s a self-contained string of characters that packs all the essential user information—like user ID, roles, and permissions—directly inside it. This data is encoded in a JSON object called the “payload.”
A JWT is structured into three parts, separated by dots: a header, the payload, and a cryptographic signature. That signature is the secret sauce. It mathematically proves that the token’s contents haven’t been messed with, guaranteeing its integrity. Because the token itself contains all the necessary data, a server can validate it on the spot without ever hitting a database.
This stateless validation is a huge win for microservice architectures. Different services can independently verify a user’s identity just by checking the signature, which dramatically cuts down on database chatter and boosts performance.
Opaque Tokens: The Secure Claim Check
Next up, we have opaque tokens. If a JWT is a detailed ID card, an opaque token is more like a claim check you’d get at a coat counter. It’s just a random, meaningless string of characters. By itself, it tells you nothing. Instead, it acts as a unique pointer to the actual user session information stored safely on your server.
To validate an opaque token, the server has to take that random string and look up the corresponding session in a database or a fast in-memory cache. This makes the process stateful, as the server must keep a record of every single active token.
While this means an extra database call, it offers a massive security advantage: opaque tokens can be revoked instantly. If a token is ever compromised, you just delete its entry from your database, and it’s immediately useless.
This makes opaque tokens the gold standard for applications where immediate session termination—like after a user logs out or changes their password—is non-negotiable.
Signed URLs: The Single-Use Key
Finally, let’s talk about signed URLs, a very specific and powerful type of token. A signed URL is just a regular web link with some extra parameters tacked on that contain authentication info, including a cryptographic signature. This signature grants temporary, limited access to a single resource, all without needing a traditional session token.
This approach is perfect for granting one-time access to things like a video stream on a platform like LiveAPI or a private file download from cloud storage. You could, for instance, generate a signed URL that lets a user watch a specific video for the next 10 minutes. Once that time is up, the link expires and becomes completely inert.
This tight control ensures that even if someone shares the URL, the access is strictly limited by time and scope, protecting your valuable content from being passed around freely.
Comparing Your Token Options
To help you map these concepts to your own project, let’s put the three token types head-to-head. Each shines in different scenarios, from scaling distributed systems to locking down secure video playback.
Here’s a breakdown of how JWTs, Opaque Tokens, and Signed URLs stack up against each other.
| Attribute | JSON Web Token (JWT) | Opaque Token | Signed URL (HMAC) |
|---|---|---|---|
| Structure | Self-contained with header, payload, and signature. Human-readable when decoded. | A random, unreadable string that acts as a reference to server-side data. | A standard URL with appended query parameters for signature and expiry. |
| Validation | Stateless. Validated locally by checking the cryptographic signature and expiration. | Stateful. Requires a database or cache lookup to validate and retrieve session info. | Stateless. Validated by checking the signature and expiration time in the URL. |
| Primary Use | Securing APIs and enabling stateless communication between microservices. | High-security applications where immediate token revocation is required. | Granting temporary, scoped access to specific resources like files or media streams. |
| Pros | Fast and efficient. Reduces database load. Great for distributed systems. | Highly secure. Can be revoked instantly. Centralized session control. | Perfect for secure, temporary access to files. Easy to implement with CDNs. |
| Cons | Difficult to revoke before expiration. Can become large with many claims. | Slower due to database lookups. Creates a stateful dependency on the server. | Limited to specific resource access. Not suitable for general API authentication. |
Ultimately, the right token is the one that best fits your application’s specific security and performance profile. By understanding these trade-offs, you can build a more robust and secure system.
Essential Security Practices for Token Management
Giving out an authentication token is like handing someone a key to your office. Without a solid plan for managing that key, you’re leaving the door wide open. If a token falls into the wrong hands, an attacker gets the same level of access as the legitimate user. Proper token management isn’t an optional extra—it’s the core of building a secure system with token-based auth.
This isn’t just theory. The entire mobile user authentication market, which relies heavily on these tokens, was valued at $3.7 billion in 2024 and is expected to climb to $4.44 billion in 2025. You can dig into the numbers in the full mobile user authentication market report. That growth shows just how much trust we place in these digital keys.
A truly secure system treats every single token like the sensitive asset it is, with clear rules for its entire lifecycle, from the moment it’s created to the second it expires.

Embrace Short-Lived Access Tokens
Your first and most powerful line of defense is simple: make your access tokens expire quickly. A token that lives for hours or days is a tempting target for an attacker. If one gets stolen, the thief has a huge window of opportunity to snoop around, steal data, or cause other damage.
By keeping access token lifespans short—think 5 to 15 minutes—you shrink that window dramatically. A compromised token becomes useless almost as fast as it was stolen. It’s a classic security principle applied to time: grant the least amount of privilege for the least amount of time.
An expired token is a safe token. The shorter its life, the smaller the potential damage from a breach. This single practice significantly raises the bar for attackers.
Of course, you can’t ask users to log back in every 15 minutes. That would be a nightmare. This is where a smart, complementary strategy comes into play to keep things both secure and user-friendly.
Implement Token Rotation with Refresh Tokens
To avoid constantly bugging your users, you can use a refresh token strategy. It’s a system where two different tokens work together to keep sessions alive securely.
- Access Tokens: These are the short-lived tokens you send with every API request. They carry the user’s permissions and, as we just discussed, expire very quickly.
- Refresh Tokens: These are long-lived tokens with only one job: to securely ask for a new access token when the old one expires. They are stored safely on the client and sent to a special, protected endpoint on your server.
This dual-token model gives you the best of both worlds. You get the tight security of short-lived access tokens while the user enjoys a seamless, long-term session. When an access token expires, the application just uses the refresh token in the background to get a new one, and the user never even knows it happened.
Plan for Immediate Token Revocation
So, what happens if a user logs out, changes their password, or you need to boot them out of the system right away? This is a tricky spot for stateless tokens like JWTs, because the token itself is perfectly valid until it expires, no matter what happens on your server. Just deleting it from the user’s browser isn’t enough if a thief has already copied it.
The answer is to create a token denylist. Think of it as a server-side blocklist, often kept in a fast in-memory database like Redis, that tracks all the tokens that are no longer welcome.
Here’s how it works:
- Each JWT you issue should have a unique identifier, often called a
jti(JWT ID) claim. - When a user logs out or their session needs to be killed, you add that token’s
jtito the denylist along with its original expiration time. - Your API middleware then checks every incoming token’s
jtiagainst this list before bothering to validate its signature.
Yes, this adds a tiny bit of state back into your stateless world, but it’s a critical trade-off for having the power to instantly terminate a compromised or unwanted session.
Validate Claims to Prevent Misuse
A token’s signature proves it hasn’t been tampered with, but the real context is inside its payload—the claims. Just verifying the signature isn’t enough; you also have to validate the claims to make sure the token is being used as intended. The two most important claims to check are the issuer (iss) and the audience (aud).
The iss claim tells you who created the token. Your server should always check that the token was issued by a source it trusts, whether that’s itself or a specific identity provider. This stops an attacker from trying to use a token from some other random service to access your API.
The aud claim specifies who the token is for. For example, a token meant for your billing API might have an audience claim like "api://billing". The billing API, in turn, should reject any token that doesn’t have that exact audience. This is crucial for preventing a token stolen from one service from being used to attack another, especially in a microservices architecture.
Putting Token-Based Authentication to Work in Your API
Alright, we’ve covered the “what” and “why.” Now for the fun part: let’s get our hands dirty and actually build a secure API using token-based authentication. This is where theory hits the road. We’ll walk through the entire process with commented code examples, giving you a solid foundation you can use to secure your own applications.
For our examples, we’ll be using a really common stack: Node.js with the Express framework. It’s a popular combo for a reason—it’s fast, flexible, and perfect for building APIs. But don’t worry, the core ideas here apply no matter what language or framework you’re using. Our goal is to see the whole authentication loop in action.

We’ll break this down into three essential steps:
- Issuing a token when a user successfully logs in.
- Creating a “gatekeeper” (middleware) to protect our API routes.
- Applying this to a real-world scenario like securing video content.
Step 1: Issuing a JWT on Login
Everything kicks off the moment a user signs in. After your server checks their username and password against your database and gives them the green light, your next job is to generate a JSON Web Token (JWT). Think of this token as their digital “wristband” for the event—it proves who they are for every subsequent request they make.
We’ll use the fantastic jsonwebtoken library in Node.js to handle the heavy lifting. The most critical part of this step is crafting the token’s payload. This is where you embed essential, non-sensitive data the server will need later, like the user’s unique ID or their role (e.g., ‘admin’).
Here’s a simple look at an Express login route:
const jwt = require(‘jsonwebtoken’);
// Assume this is your user login endpoint app.post(‘/login’, async (req, res) => { const { username, password } = req.body;
// 1. Authenticate the user (e.g., check credentials against a database) const user = await authenticateUser(username, password);
if (!user) { return res.status(401).json({ message: ‘Invalid credentials’ }); }
// 2. Create the JWT payload with user-specific claims const payload = { userId: user.id, role: user.role // e.g., ‘admin’, ‘viewer’ };
// 3. Sign the token with a secret key and set an expiration const token = jwt.sign(payload, process.env.JWT_SECRET, { expiresIn: ’15m’ // A short expiration is a best practice });
// 4. Send the token back to the client res.json({ accessToken: token }); }); Did you notice we set the expiration to just 15 minutes? That’s not an accident. Short-lived tokens are a cornerstone of good security.
Step 2: Validating Tokens with Middleware
Now that the client has a token, we need a bouncer at the door of our protected API routes. This is a perfect job for middleware. In Express, middleware is just a function that intercepts an incoming request before it reaches its final destination. Our middleware’s sole purpose is to check for a token, verify its authenticity, and decide whether to let the request pass or send it packing.
The standard way to do this is for the client to send the JWT in the Authorization header, usually prefixed with Bearer. Our middleware will grab the token from this header and use the exact same secret key from the login step to confirm its signature and make sure it hasn’t expired.
This server-side validation is the heart of token-based security. It’s the mechanism that ensures a token is genuine, hasn’t been tampered with, and is still within its valid time window.
If the token checks out, the middleware decodes the payload and attaches the user’s info (like userId and role) directly to the request object. This is incredibly useful because it makes the user’s identity available to any subsequent functions in the chain, allowing them to make fine-grained authorization decisions.
Here’s what that validation middleware looks like in code:
function verifyToken(req, res, next) { const authHeader = req.headers[‘authorization’]; // Extract token from “Bearer ” const token = authHeader && authHeader.split(‘ ‘)[1];
if (token == null) { return res.sendStatus(401); // No token, unauthorized }
jwt.verify(token, process.env.JWT_SECRET, (err, user) => { if (err) { // Token is invalid (bad signature, expired, etc.) return res.sendStatus(403); // Forbidden }
// Attach the decoded payload to the request object
req.user = user;
next(); // All good, proceed to the protected route
}); } Using this middleware is a breeze. For any endpoint you want to protect, just slot verifyToken in right before your main route handler.
// Example of a protected route using our new middleware app.get(‘/api/profile’, verifyToken, (req, res) => { // We can now access user data added by the middleware res.json({ message: Welcome user ${req.user.userId} }); });
Step 3: Securing Content with Signed Tokens
Let’s ground this in a common, practical use case: securing video streams. When you use a service like LiveAPI, you often need to control who can view content delivered through a Content Delivery Network (CDN). Signed tokens are the perfect tool for the job.
The logic is almost identical to our API authentication, but instead of a header, the token is usually passed as a query parameter in the URL. This prevents people from grabbing a video URL and sharing it widely, because the link will only work for a specific user and for a limited time.
Here’s how you might generate a signed playback URL on your server:
// Function to generate a signed URL for a specific video function generateSignedPlaybackUrl(videoId, userId) { const payload = { vid: videoId, sub: userId, // ‘sub’ (subject) is a standard claim for user ID // Set the token to expire in 1 hour from now exp: Math.floor(Date.now() / 1000) + (60 * 60) };
const playbackToken = jwt.sign(payload, process.env.CDN_SECRET);
// The CDN would be configured to validate this token return https://cdn.yourapi.com/videos/${videoId}?token=${playbackToken}; } In this setup, your application server generates the secure URL, and the client’s video player uses it to fetch the content. The CDN edge servers are configured with the CDN_SECRET to validate the token on every single playback request. This offloads the security check from your main server, giving you scalable and highly secure content delivery.
Mastering the Refresh Token Strategy
https://www.youtube.com/embed/-Z57Ss_uiuc
So, you’ve done the right thing and embraced short-lived access tokens, maybe keeping them alive for just a few minutes. That’s a huge security win. But now you’ve got a new puzzle to solve: how do you keep a user logged in for days or even weeks without making them type in their password over and over again?
This is exactly where the refresh token strategy becomes your secret weapon. It introduces a second, long-lived token that works quietly in the background. Think of the access token as a temporary keycard for day-to-day API calls, while the refresh token is the master key used only to get a new keycard when the old one expires. It’s a beautifully simple system that nails both security and user experience.
The best part? This entire process is invisible to the user. When their access token expires, your application sends the refresh token to a special, highly secured endpoint on your server. The server checks if the refresh token is legit, and if so, it hands back a brand new, short-lived access token. The user’s session continues, completely uninterrupted.
Securing Your Refresh Tokens
Because refresh tokens are so powerful and stick around for a while, protecting them is absolutely non-negotiable. If an attacker gets their hands on a refresh token, they can keep generating new access tokens forever, giving them persistent access to the user’s account. This makes their storage and handling a top security priority.
The gold standard for securing a refresh token on the web is to store it in an HttpOnly cookie. This is a browser security feature that makes it impossible for any client-side JavaScript to read the cookie. That’s a massive defense against Cross-Site Scripting (XSS) attacks. Even if an attacker manages to inject a malicious script onto your site, they can’t steal the refresh token.
While you’re at it, always set the Secure and SameSite=Strict flags on that cookie.
- Secure: This guarantees the cookie is only ever sent over an encrypted HTTPS connection.
- SameSite=Strict: This stops the browser from sending the cookie along with requests initiated from other websites, which helps shut down Cross-Site Request Forgery (CSRF) attacks.
Implementing Refresh Token Rotation
To take your security to the next level, you need to implement refresh token rotation. It’s a simple but brilliant idea: every time a refresh token is used, the server issues a new access token and a new refresh token, immediately invalidating the one that was just used.
Why is this so critical? It’s an incredible defense against token theft. Let’s say an attacker manages to steal a refresh token but doesn’t use it right away. The legitimate user’s app will eventually use that same token to refresh its session. When it does, the server sends back a new token pair and kills the old refresh token.
If the attacker then tries to use the stolen (and now invalidated) token, the server immediately sees it’s a replay attempt. This is a huge red flag, giving you the signal to terminate the user’s entire session and warn them about a potential security breach.
This whole mechanism acts like a tripwire, instantly detecting when a compromised refresh token is used outside of the legitimate session.
Establishing a Revocation System
Finally, you need a bulletproof way to kill a session whenever you want. What happens if a user logs out from one of their devices, changes their password, or you, as an admin, need to force-terminate their access? You have to be able to revoke their refresh token on the spot.
Unlike stateless JWT access tokens, refresh tokens have to be stateful. This means your server needs to keep a list—usually in a database—of all active refresh tokens for every user. With this list, revocation becomes simple: you just delete the refresh token from your database. The next time an application tries to use that revoked token, your server won’t find it and will reject the request, effectively ending the session.
This stateful management is a small trade-off for the immense security and control it gives you. The hardware token market, for instance, is built on this very principle of verifiable security. In fact, the global hardware OTP token authentication market was valued at about USD 745.96 million in 2025 and is projected to hit USD 1.31 billion by 2033. You can find more insights on this hardware token market growth at StraitsResearch.com.
By combining rotation with a rock-solid revocation system, you can build a token-based authentication system that’s both wonderfully convenient for your users and a nightmare for attackers.
Common Questions About Token-Based Auth
As you start working with token-based authentication, you’re bound to run into a few common hurdles. It’s totally normal. Let’s walk through some of the most frequent questions that pop up and get you some clear, practical answers.
Where Should I Store JWTs on the Client-Side?
This is a great question, and the answer really depends on what kind of application you’re building. For Single-Page Applications (SPAs), the absolute safest spot for an access token is right in memory—think a simple JavaScript variable. This keeps it away from prying eyes in a Cross-Site Scripting (XSS) attack, but there’s a catch: the token vanishes the moment the user refreshes the page.
If you need the token to stick around, your best bet is an HttpOnly, Secure cookie. Why? The HttpOnly flag is a game-changer because it blocks JavaScript from touching the cookie, which is your main defense against XSS. It’s a fantastic middle ground, offering persistence without sacrificing security. While LocalStorage is easy to use, it’s also wide open to script access, so I’d strongly advise against storing sensitive tokens there.
How Do I Revoke a Stateless JWT?
Ah, the classic problem with stateless tokens. Since JWTs are self-contained, you can’t just “turn them off” on the server. So, what do you do when a user logs out or you suspect a token has been compromised? The standard industry solution is to create a token denylist.
When a token needs to be invalidated, you grab its unique identifier (the jti claim is perfect for this) and add it to a super-fast database, like Redis.
Then, your API middleware has a new job: before it even tries to validate an incoming token, it must first check against this denylist. It adds a tiny bit of state back into your system, but it’s a worthwhile trade-off for real security.
Another popular strategy is to keep access tokens very short-lived—think 5-15 minutes. This dramatically shrinks the window of time a stolen token could be useful.
What Is the Difference Between Authentication and Authorization?
Getting this right is fundamental to building any secure system. It’s easy to mix them up, but they handle two very different jobs. Simply put, authentication is about who you are, and authorization is about what you’re allowed to do.
- Authentication is the front door. It’s the process of verifying someone’s identity. When a user logs in with a password, a biometric scan, or a social account, they’re authenticating. Once the system confirms they are who they say they are, it hands them a token.
- Authorization happens next. Now that the system knows who the user is, it needs to figure out what they have permission to access. This is where the token’s payload comes in, often containing roles or permissions like ‘admin’ or ‘read_only’ that your application can check before allowing an action.
Ready to lock down your video streams with solid token authentication? LiveAPI makes it incredibly easy to generate signed playback URLs, protecting your content so only authorized viewers can tune in. Get started with LiveAPI today and build a secure, scalable video platform.