So you’ve got an MKV file. It’s a fantastic container format, great for packing multiple audio tracks, subtitles, and high-quality video all into one place. But as any developer knows, what works perfectly in a desktop player like VLC often falls flat the moment you try to use it in a web app or on a mobile device.
This isn’t a new problem. It’s a classic case of a powerful, flexible format running headfirst into the walled gardens of mainstream device and browser support.
Why MKV Files Require Conversion for Developers

The issue isn’t the quality of the video or audio inside the MKV. It’s the container itself—the digital wrapper. Matroska is an open-source powerhouse, but its very flexibility is what trips up most production environments.
The Compatibility Roadblock
Web browsers, iOS, Android, and most smart TVs are built for consistency, not flexibility. They have rock-solid, native support for the MP4 container because its structure is predictable. When these platforms encounter an MKV file, they often just don’t have the built-in instructions to unpack it, leading to playback errors or a total failure.
For any application that deals with user-generated content or needs to deliver media reliably, this is a non-starter. This need for reliable MKV files conversion is only growing, especially when you consider the video production market hit nearly USD 99 billion in 2023.
Two Paths Forward: Remuxing and Transcoding
When you need to get an MKV file ready for broad distribution, you have two main options. Knowing which one to use is crucial for building an efficient media pipeline. You can either remux the file or transcode it.
To make the choice clearer, here’s a quick breakdown of how they stack up against each other.
Remuxing vs Transcoding Quick Comparison
| Attribute | Remuxing (Changing Container) | Transcoding (Re-encoding) |
|---|---|---|
| Process | Repackages existing video/audio streams into a new container (e.g., MKV to MP4). | Decodes and re-encodes video/audio streams, often to a new codec or bitrate. |
| Speed | Extremely fast, often completing in seconds. | Computationally intensive and can be very slow, depending on the file and hardware. |
| Quality | Lossless. The underlying data is untouched, so quality is 100% preserved. | Lossy. Re-encoding always introduces some quality degradation. |
| CPU Usage | Very low. It’s mostly an I/O operation. | Very high. It’s one of the most CPU-intensive tasks a server can perform. |
| When to Use | When the codecs inside the MKV (e.g., H.264 video, AAC audio) are already compatible with your target devices. | When the internal codecs are incompatible (e.g., VP9, AV1) or you need to create multiple versions for adaptive bitrate streaming. |
Basically, remuxing is your best first move. It’s a lightning-fast, quality-preserving way to swap the container. Transcoding is the heavier tool you bring out only when you absolutely have to change the underlying video or audio itself. You can learn more about the specifics in our deep-dive guide that explains what video transcoding is.
The golden rule for developers is to always try remuxing first. Only resort to the computationally expensive process of transcoding when absolutely necessary. This simple principle can save a massive amount of server resources, processing time, and money.
Getting Hands-On with FFmpeg for MKV Conversion
Theory is one thing, but getting your hands dirty is where the real learning happens. Let’s roll up our sleeves and dive into FFmpeg, the command-line Swiss Army knife for just about any media manipulation you can imagine. It’s a seriously powerful, open-source tool that can handle almost any conversion task you throw at it.
Here’s the iconic logo for the project, a familiar sight for anyone who works with video.
This logo has become synonymous with the robust framework that developers and creators rely on for complex video and audio tasks.
We’ll walk through the exact commands that solve the most common problems developers run into, starting with the quickest wins and moving on to more nuanced scenarios.
First Things First: Always Inspect Your File with ffprobe
Before you even think about converting, you need to know what you’re working with. Just blindly firing off conversion commands is a surefire way to waste time and get unexpected results. The ffprobe utility, which comes bundled with FFmpeg, is your go-to tool for this initial recon.
A simple command gives you a complete blueprint of what’s inside the MKV container—video codec, audio codec, subtitle formats, chapters, you name it.
ffprobe -i your_video.mkv
This command spits out a detailed list of all the streams in the file. Keep an eye out for the Stream lines. You might see something like Stream #0:0: Video: h264 and Stream #0:1: Audio: aac. If you do, you’re in luck. That file is a perfect candidate for a lossless remux.
The Fastest Way: Lossless Remuxing
When the codecs inside your MKV are already common and well-supported (like H.264 video and AAC audio), re-encoding them is the last thing you want to do. It just chews up CPU cycles and degrades the quality for absolutely no benefit. Instead, the smart move is to remux—essentially, copying the existing streams into a new container format.
This process is lightning-fast because you’re just doing a high-level copy-paste, not re-processing the actual video and audio data. The command couldn’t be simpler.
ffmpeg -i input.mkv -c copy output.mp4
Let’s quickly break that down:
-i input.mkv: Specifies your source file.-c copy: This is the magic ingredient. It tells FFmpeg to copy all streams (video, audio, etc.) without touching them. The-cis just shorthand for-codec.output.mp4: Defines your new file, now in an MP4 container.
From my own experience, you can remux a 2-hour, 10 GB movie file in under a minute on a decent machine. Trying to transcode that same file could easily take an hour or more.
Pro Tip: Always try to remux an MKV file first. It’s the most efficient path to compatibility when the internal codecs are already standard. Only resort to transcoding when the codecs themselves are the problem.
Transcoding Video to H.264 for Universal Playback
So, what happens if ffprobe shows your video stream is something less common, like VP9, AV1, or even an old MPEG-2 stream? In that case, remuxing is off the table because the video data itself won’t play on most devices. This is where you have to transcode, or re-encode, the video stream.
The most reliable and universally supported target is the H.264 codec, also known as AVC. The good news is that even if we have to re-encode the video, we can often still copy the audio stream if it’s already in a compatible format like AAC.
ffmpeg -i input.mkv -c:v libx264 -c:a copy output.mp4
Here’s what’s new in this command:
-c:v libx264: This targets the video stream (v) specifically and tells FFmpeg to encode it using the excellentlibx264software encoder, the gold standard for H.264.-c:a copy: We’re still copying the audio stream (a) to save a ton of processing time, assuming it’s already compatible.
Stepping Up to H.265 for Better Compression
When file size is a top priority, transcoding to H.265 (HEVC) is a fantastic option. H.265 delivers roughly 50% better compression than H.264 at the same visual quality, which is a game-changer for 4K content or for cutting down on streaming bandwidth costs.
The command is very similar; you just swap out the video codec.
ffmpeg -i input.mkv -c:v libx265 -c:a copy output.mp4
The main trade-off here is that H.265 encoding is more computationally intensive than H.264. But for archiving or streaming, that significant reduction in file size is often well worth the extra processing time. For a deeper dive into this modern codec, check out our comprehensive guide on the HEVC video format.
Don’t Forget Subtitles and Multiple Tracks
MKV files are notorious for packing in multiple audio and subtitle tracks. When you convert, you definitely don’t want to lose all that useful data. By default, FFmpeg often just grabs the first video, audio, and subtitle stream it finds. To make sure you bring everything over, you need to use the -map flag.
Let’s say your file has one video stream, two audio tracks (English and Spanish), and a couple of subtitle tracks. You can map all of them into the new MP4 like this:
ffmpeg -i input.mkv -map 0 -c copy -c:s mov_text output.mp4
-map 0: This powerful flag tells FFmpeg to grab all available streams from the first input file (which is indexed at 0) and include them in the output.-c:s mov_text: Subtitles require a bit of special attention. While we can often copy video and audio, many subtitle formats found in MKVs (like ASS or SRT) aren’t native to the MP4 container. This command converts the subtitle streams (s) into themov_textformat, which is perfectly compatible with MP4.
Running this command ensures your final MP4 is just as feature-rich as the original MKV, keeping all language options and subtitles intact.
Scaling Up: Faster Conversions and Automated Workflows
When you’re only dealing with one MKV file, running a single command is no big deal. But what happens when you have a whole directory of them? Converting dozens or even hundreds of files one by one is a surefire way to kill an afternoon. This is where you need to get smart about your workflow by using hardware acceleration and simple scripting to make your MKV file conversions faster and more efficient.
By default, when you transcode a video with FFmpeg, it uses software encoders like libx264. These do all the heavy lifting on your computer’s CPU. While you get fantastic quality, it’s also painfully slow. Hardware acceleration is the answer—it offloads that intense workload to your graphics card (GPU), which is built from the ground up for these kinds of parallel processing tasks.
This diagram shows the typical decision-making process when you’re working with media files.
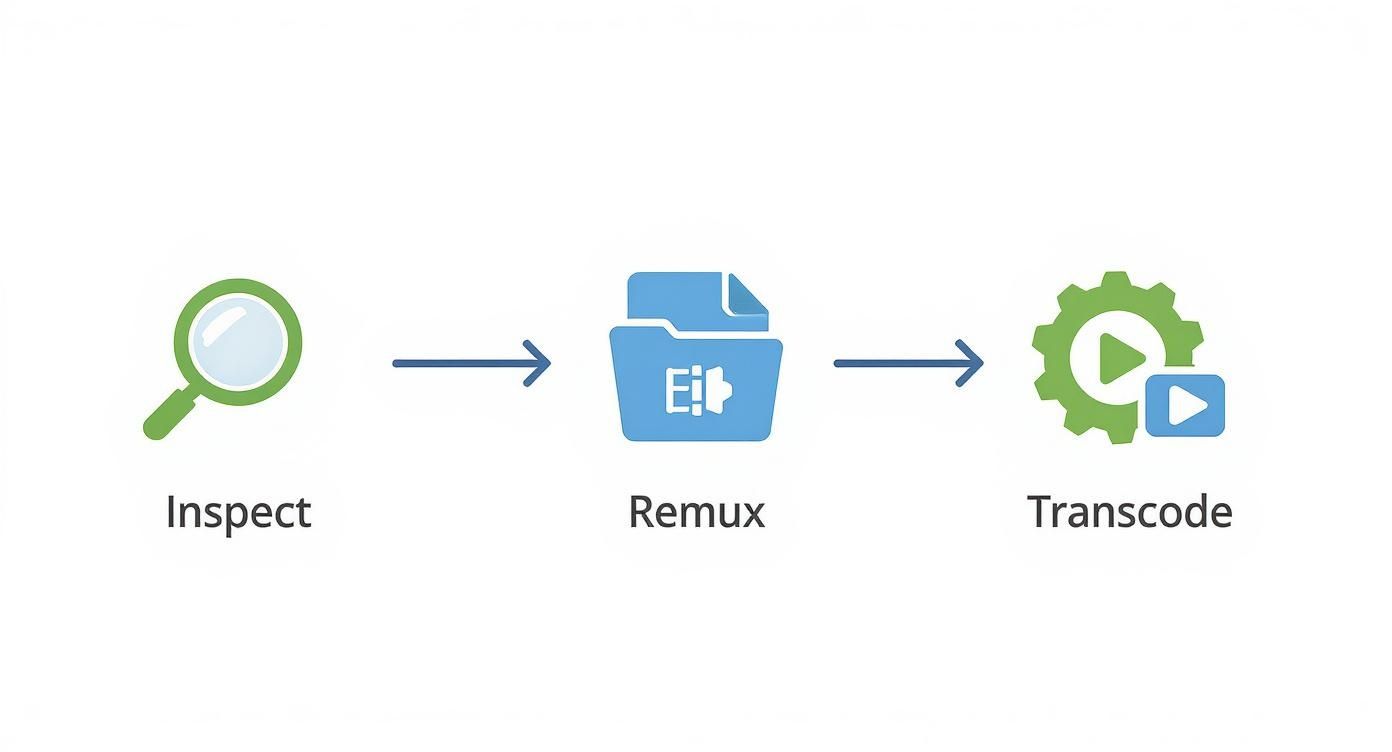
As you can see, that initial inspection is crucial. It tells you whether you can get away with a quick remux or if you need to settle in for a full transcode.
Tapping into Hardware Acceleration with FFmpeg
The speed boost you get from using a GPU isn’t a small one; I’ve personally seen transcoding times drop by as much as 70-80%. The two most common hardware encoders you’ll work with are NVIDIA’s NVENC and Intel’s Quick Sync Video (QSV).
To put them to work, all you have to do is swap the software encoder flag (-c:v libx264) for its hardware equivalent.
If you have an NVIDIA GPU, the command looks like this: ffmpeg -i input.mkv -c:v h264_nvenc -preset slow -c:a copy output.mp4
For a modern Intel CPU with an integrated GPU, you’d use this instead: ffmpeg -i input.mkv -c:v h264_qsv -c:a copy output.mp4
A Quick Word on Quality: It’s important to know that hardware encoding is a trade-off. It’s built for speed, not maximum compression efficiency. To get the same visual quality as a software encode, you’ll probably need to use a slightly higher bitrate. But for many projects where speed is the top priority, it’s a compromise worth making.
The table below breaks down the key differences between software encoding and the most popular hardware options.
Hardware Acceleration Encoder Comparison
| Encoder | Typical Use Case | Speed | Quality/Bitrate Efficiency |
|---|---|---|---|
libx264 (CPU) |
Archival, high-quality VOD, when quality is paramount. | Slowest | Highest |
h264_nvenc (NVIDIA) |
Live streaming, fast batch processing, real-time transcoding. | Very Fast | Good |
h264_qsv (Intel) |
General-purpose transcoding on consumer hardware, media servers. | Fast | Good |
h264_amf (AMD) |
Fast transcoding on systems with AMD GPUs. | Fast | Good |
Ultimately, the best encoder depends on your hardware and your priorities. For raw quality, stick with the CPU. When you need to get things done now, a hardware encoder is your best friend.
Automating with Batch Scripts
Why sit there and manually run commands for an entire folder of MKVs when you can let a script do the work? A simple batch script can automate the entire process, letting you kick off the job and get back to more important things.
For Windows Users (.bat file)
This script will loop through every .mkv file in its current folder and losslessly remux it into an .mp4 container. Just save the following as convert.bat and drop it in the folder with your videos.
@echo off for %%F in (*.mkv) do ( echo Processing "%%F"... ffmpeg -i "%%F" -c copy "%%~nF.mp4" ) echo All files converted! pause
To get it running, just double-click the .bat file. That %%~nF bit is a handy Windows Batch trick that grabs the filename without the extension, so movie.mkv cleanly becomes movie.mp4.
For Linux and macOS Users (.sh file)
The idea is exactly the same on Linux or macOS, but the syntax is different. Save this code as convert.sh in your target folder.
#!/bin/bash for f in *.mkv; do echo "Processing $f..." ffmpeg -i "$f" -c copy "${f%.*}.mp4" done echo "All files converted!"
Before you can run the script, you have to make it executable. Open your terminal and run chmod +x convert.sh. After that, you can execute it anytime with ./convert.sh. Here, the ${f%.*} expression does the same job as its Windows counterpart, stripping off the .mkv extension.
These scripts are massive time-savers, whether you’re managing a local media library or prepping a batch of videos for an application. By combining them with hardware acceleration, you can build a seriously powerful and efficient pipeline for all your MKV file conversion tasks.
Integrating MKV Conversion into Your Application with an API
While FFmpeg is an absolute beast for one-off conversions and scripting, building video features directly into a scalable application is a whole different ballgame. Trying to manage your own server infrastructure for video processing is a fast track to complexity and spiraling costs. This is exactly where a video API like LiveAPI steps in, taking the heavy lifting of transcoding, storage, and delivery right off your plate.
Instead of wrestling with FFmpeg commands on your own servers, you can just make a simple API call. A dedicated service then handles the entire conversion pipeline for you, letting you focus on your app’s core features instead of becoming a reluctant video infrastructure expert.
From Local Scripts to Cloud-Based Workflows
The jump from command-line tools to an API-driven process really changes how you think about media. Your application can programmatically take an MKV upload from a user, fire it off to the API, and get back a perfectly formatted, stream-ready video without anyone lifting a finger.
This kind of automation is a must-have for apps dealing with user-generated content, online courses, or any service where video is front and center. The demand is huge. In fact, the market for video converter apps is expected to hit USD 1.5 billion by 2033, growing at a 6.8% CAGR. This just goes to show how critical seamless video compatibility has become. You can dig into more details about this expanding market on strategicrevenueinsights.com.
Getting Started with API-Based MKV Conversion
Let’s walk through a real-world scenario. Imagine a user uploads a large MKV file to your web app. Your job is to convert it into an adaptive bitrate HLS stream so it plays back smoothly on any device, anywhere.
With a service like LiveAPI, the whole thing boils down to a few straightforward steps:
- Authentication: First, you’ll authenticate your requests with a secure API key.
- Upload: Next, you send the user’s MKV file to a specific upload endpoint.
- Job Creation: Then, you create a conversion job via an API call, pointing to the uploaded file and defining your desired outputs (like HLS or DASH).
- Monitoring: Finally, you can use webhooks to get real-time pings as the job starts, progresses, and finishes.
This whole process hides the messy reality of server management, codec libraries, and scaling from you.
Practical Code Examples for API Integration
Here’s what initiating a conversion job might look like in Node.js. This snippet shows how you’d make a POST request to kick off a new transcoding job for an MKV file you’ve already uploaded.
const axios = require(‘axios’);
const API_KEY = ‘YOUR_LIVEAPI_KEY’; const VIDEO_ID = ‘YOUR_UPLOADED_VIDEO_ID’;
const createConversionJob = async () => { try { const response = await axios.post(‘https://api.liveapi.com/v1/videos/transcode‘, { videoId: VIDEO_ID, profiles: [ { name: ‘720p_hls’, resolution: ‘1280×720’, bitrate: 2500000 }, { name: ‘480p_hls’, resolution: ‘854×480’, bitrate: 1000000 }, { name: ‘360p_hls’, resolution: ‘640×360’, bitrate: 500000 } ] }, { headers: { ‘Authorization’: Bearer ${API_KEY}, ‘Content-Type’: ‘application/json’ } }); console.log(‘Job created successfully:’, response.data); } catch (error) { console.error(‘Error creating job:’, error.response.data); } };
createConversionJob();
The Python equivalent is just as clean, using the ever-popular requests library.
import requests import json
API_KEY = “YOUR_LIVEAPI_KEY” VIDEO_ID = “YOUR_UPLOADED_VIDEO_ID”
url = “https://api.liveapi.com/v1/videos/transcode”
payload = { “videoId”: VIDEO_ID, “profiles”: [ {“name”: “720p_dash”, “resolution”: “1280×720”, “bitrate”: 2500000}, {“name”: “480p_dash”, “resolution”: “854×480”, “bitrate”: 1000000} ] } headers = { “Authorization”: f”Bearer {API_KEY}”, “Content-Type”: “application/json” }
response = requests.post(url, data=json.dumps(payload), headers=headers)
if response.status_code == 201: print(“Job created successfully:”, response.json()) else: print(“Error creating job:”, response.text)
Notice that in both examples, we’re doing more than a simple MKV files conversion. We’re creating multiple renditions for adaptive bitrate streaming, which is a non-negotiable best practice for modern video delivery.
Best Practice for Production: Never, ever hardcode your API keys directly into your source code. Use environment variables or a proper secrets management service to handle them. This simple step saves you from the nightmare of accidentally exposing your keys in a public code repository.
Configuring Outputs for Adaptive Streaming
One of the biggest wins of using an API is how easy it makes creating adaptive bitrate (ABR) streams. ABR is the magic that lets a video player automatically switch between different quality levels based on the viewer’s internet connection, ensuring a smooth experience for everyone.
When you create the conversion job, you simply define a set of “profiles.” Each profile is just a target resolution and bitrate. The API takes it from there, transcoding your source MKV into several fragmented MP4 files and generating the HLS or DASH manifests that tie them all together. If you want a deeper dive into how this all works, check out our guide on what is encoding a video.
A single API call like this replaces what would otherwise be a complex chain of FFmpeg commands, segmentation, and manifest generation. It truly makes sophisticated video features accessible to any developer.
Troubleshooting Common MKV Conversion Issues

Even with the best tools, converting MKV files isn’t always a smooth ride. Sooner or later, you’re going to hit a snag. I’ve spent more hours than I’d like to admit staring at cryptic FFmpeg errors and wondering why an output file is completely broken.
This section is my personal field guide, born from years of that exact kind of troubleshooting. We’ll skip the generic advice and get straight to the specific, real-world problems and the commands that actually fix them. Hopefully, it’ll save you a few of those late-night forum-scrolling sessions.
Fixing Audio and Video Desynchronization
There’s nothing more maddening than watching your perfectly remuxed video and noticing the audio is just slightly off. It often starts subtly, then drifts further and further out of sync as the video plays.
This is a classic symptom of wonky presentation timestamps (PTS) in the source MKV. While many media players can compensate for this in real-time, FFmpeg’s default remuxing (-c copy) faithfully copies those bad timestamps right into your new MP4, locking in the problem.
Luckily, the fix is usually simple. You just have to tell FFmpeg to rebuild the timestamps from scratch.
ffmpeg -i input.mkv -fflags +genpts -c copy output.mp4
The key is the -fflags +genpts flag. It forces FFmpeg to generate a fresh set of PTS for the output, which cleans up the sync drift in the vast majority of cases. Best of all, it does this without a full, time-consuming re-encode. This is always the first thing I try when audio sync goes sideways.
My Personal Rule: If a remuxed file has A/V sync issues,
+genptsis the first flag I add. It solves the problem around 80% of the time and takes no extra processing power. It’s the simplest, most effective fix for this common problem.
Handling Disappearing or Incompatible Subtitles
Another all-too-common headache: you know the MKV has subtitles, but they’re nowhere to be found in the final MP4. This isn’t a bug; it’s a compatibility issue. The MP4 container is much pickier about subtitle formats than the flexible MKV container is.
MKV files can hold pretty much anything, including image-based subtitles like PGS (common on Blu-rays) or heavily styled text subs like ASS/SSA. MP4s, on the other hand, don’t play well with those. They really want a simple text format called mov_text.
To fix this, you have to convert just the subtitle track while copying everything else.
- Find your subtitle stream: First, inspect the file with
ffprobe input.mkvto find the stream index (e.g.,Stream #0:3). - Target and convert it: Use the
-mapand-c:sflags in your FFmpeg command to isolate and convert that specific stream.
ffmpeg -i input.mkv -map 0 -c:v copy -c:a copy -c:s mov_text output.mp4
This command is elegant. It maps all streams from the input, losslessly copies the video and audio, but specifically re-encodes the subtitle stream (-c:s mov_text) into a format the MP4 container understands. Your subtitles are now preserved and will show up as expected.
Resolving Codec and Pixel Format Errors
Sometimes, FFmpeg just gives up and throws an error like “Unsupported pixel format” or “Codec not found.” When this happens, it’s a clear sign that a simple remux is off the table. You’ve hit a stream that either your build of FFmpeg or the target container just can’t handle as-is.
This is especially common with older, obscure video codecs or non-standard pixel formats. The solution is to perform a targeted transcode. For instance, if you get a pixel format error for something like yuv444p, you can force a more compatible format.
ffmpeg -i input.mkv -c:v libx264 -pix_fmt yuv420p -c:a copy output.mp4
By adding -pix_fmt yuv420p, we’re telling FFmpeg to convert the video to the most widely supported pixel format for H.264 video. This one small tweak can resolve a whole host of compatibility errors and make your conversion process far more reliable.
Quick Answers to Common MKV Conversion Questions
When you start digging into MKV conversion, a few common questions always seem to pop up. Let’s tackle them head-on with some practical, no-nonsense answers to get you unstuck and back to building.
When Should I Remux Instead of Transcode?
My rule of thumb? Always try to remux first. Think of it as simply changing the box your stuff is in without touching the contents.
Remuxing an MKV file is incredibly fast and completely lossless. It just takes the existing video and audio streams and repackages them into a new container, like MP4. If the codecs inside your MKV (say, H.264 video and AAC audio) are already good to go for your target device or platform, remuxing is the perfect solution.
You should only ever transcode (or re-encode) when you have no other choice. This is necessary when the codecs themselves aren’t supported, or when you specifically need to shrink the file size or prepare multiple versions for adaptive bitrate streaming.
How Can I Check the Codecs in an MKV File?
Before you do anything, you need to know what you’re working with. The best tool for peeking inside an MKV file is ffprobe, which comes packaged with the FFmpeg suite.
Just run this simple command, and you’ll get a clean list of the codecs for each stream.
ffprobe -v error -show_entries stream=codec_name,codec_type -of default=noprint_wrappers=1:nokey=1 yourfile.mkv
This will tell you straight away if the video is H.264, H.265, VP9, etc., and if the audio is AAC, AC3, or DTS. Armed with that knowledge, you can make a smart decision instead of a blind guess.
A Pro Tip from Experience: Never skip this step. Seriously. Running
ffprobetakes two seconds and can save you hours of wasted time trying to figure out why a conversion failed or why a file won’t play. It’s the first thing I do.
Will Converting MKV to MP4 Reduce Quality?
This is a great question, and the answer completely depends on how you do the conversion.
- If you remux using the
-c copyflag in FFmpeg, the answer is a definitive no. There is zero quality loss. The original video and audio data is copied, bit-for-bit, into the new MP4 container. - If you transcode the file, then yes, there will be some quality loss. Re-encoding is a lossy process by nature. The trick is to manage that loss so it’s visually imperceptible. You can do this by setting a high enough bitrate or using a quality-based setting like CRF.
The growing demand for easy-to-use MKV to MP4 converter apps, especially for mobile and offline use, really underscores how important quality preservation is. Many of these tools rely on powerful libraries like FFmpegKit under the hood to maintain video fidelity. You can even see the growth trend of these converter apps as more people run into format compatibility issues.
What Is the Best Format for Web Streaming?
For broad compatibility across the web, you can’t go wrong with an MP4 container holding H.264 video and AAC audio. It’s the gold standard. This combination just works, playing natively in almost every modern browser and device you can think of.
If you’re building a more sophisticated streaming experience, you’ll want to take it a step further. The best practice is to convert your MKV into fragmented MP4 segments and pair them with an HLS or DASH manifest. This enables adaptive bitrate streaming, where the player can intelligently switch between different quality levels based on the user’s connection, giving everyone the smoothest playback possible.
Ready to build seamless video conversion and streaming into your application without the headache of managing servers? LiveAPI gives you a powerful, developer-friendly toolkit to handle everything from on-the-fly transcoding to global content delivery. Explore our solutions and start building something amazing today.