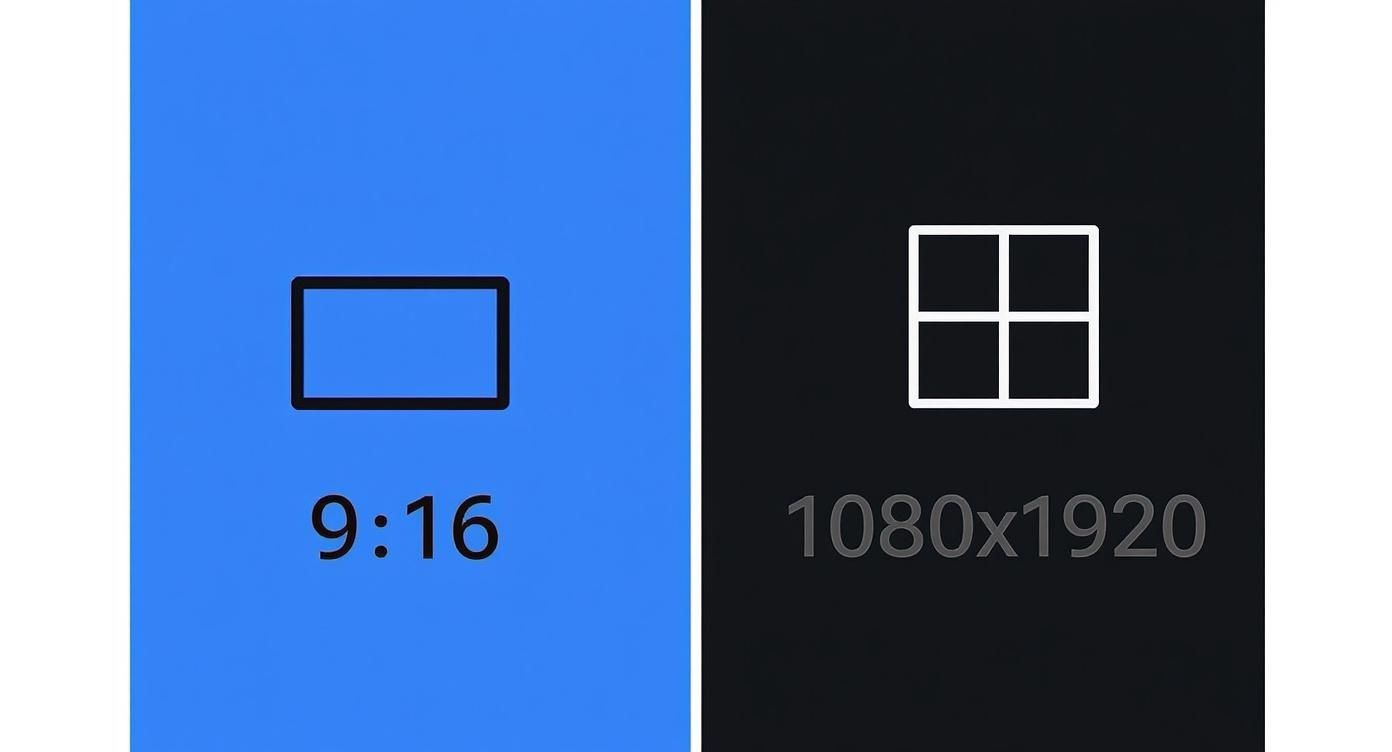
When we talk about vertical video, the gold standard is a 1080×1920 pixel resolution framed in a 9:16 aspect ratio. This specific setup is engineered to perfectly fill a smartphone screen held upright, which is why it’s the native format for platforms like TikTok, Instagram Reels, and YouTube Shorts.
Understanding Vertical Video Dimensions and Aspect Ratios
To really nail vertical video, you have to get a handle on two key terms: aspect ratio and resolution. They’re often mentioned in the same breath, but they mean very different things. Getting both right is the foundational step to creating professional content that looks great and avoids weird distortions or black bars.
Think of it this way: aspect ratio is the shape of your video canvas, while resolution is the density of pixels you pack into it. For vertical video, that shape is always taller than it is wide.
- Aspect Ratio (The Shape): This describes the proportional relationship between the video’s width and its height. For vertical video, that magic number is 9:16. For every 9 units of width, you have 16 units of height, giving you that signature tall rectangle that’s ideal for mobile.
- Resolution (The Quality): This is the total pixel count in the frame, written as width by height. The industry standard, 1080×1920 pixels, hits the sweet spot—it delivers a sharp, high-definition image on modern phone screens without making your file sizes ridiculously large.
Common Vertical Video Resolutions at a 9:16 Ratio
While 1080×1920 is the most common resolution you’ll encounter, it’s helpful to know the other standard vertical resolutions. This table gives you a quick reference for matching the right quality to your project’s needs, from standard definition all the way up to 4K.
| Resolution Name | Pixel Dimensions (Width x Height) | Common Use Case |
|---|---|---|
| SD (480p) | 480×854 | Low-bandwidth environments, older devices, quick previews. |
| HD (720p) | 720×1280 | A good balance for social media, faster uploads. |
| FHD (1080p) | 1080×1920 | The industry standard for social platforms and streaming. |
| QHD (1440p) | 1440×2560 | High-quality ads, professional content on supported devices. |
| 4K (2160p) | 2160×3840 | Premium cinematic content, digital signage, future-proofing. |
Ultimately, choosing the right resolution depends on where your audience is and what kind of quality they expect. For most creators, 1080×1920 remains the safest and most effective choice.
Why 9:16 Is the Standard
The dominance of the 9:16 aspect ratio isn’t an accident; it’s a direct response to how we all use our phones. People naturally hold their devices vertically, and content designed for that orientation creates a seamless, full-screen experience without forcing anyone to turn their phone sideways. This mobile-first thinking has completely changed the game for content creation.
The numbers back this up. In 2024, uploads of vertical HD videos (1080 × 1920 pixels) shot up by a massive 51% year-over-year, leaving traditional horizontal formats in the dust. You can dig into more of these stats and trends over at Wistia. This explosive growth makes one thing clear: mastering vertical dimensions isn’t just a good idea anymore—it’s essential.
Key Takeaway: For authentic vertical video, the 9:16 aspect ratio is non-negotiable. When you pair it with a 1080×1920 resolution, you’re hitting the benchmark for quality on every major social platform. Stray from this, and you risk your video getting awkwardly cropped, stretched, or boxed in by distracting black bars.
Vertical Video Specifications For Major Platforms
While 9:16 is the universal standard for vertical video, every social media platform plays by its own set of rules. Think of it like this: the aspect ratio is the shape of the canvas, but the dimensions, file sizes, and video lengths are the specific requirements of the gallery you’re hanging it in.
Getting these details right is the difference between your content looking crisp and professional versus getting hit with ugly compression or, even worse, awkward cropping that ruins your shot. If you ignore these specs, you risk frustrating upload errors and poor performance. This guide will help you get it right every time.
First, let’s lock in the two most fundamental specs for any vertical video project: the aspect ratio and resolution. These are your non-negotiables.
As the graphic shows, a 9:16 shape and 1080×1920 pixel density are the foundation for high-quality vertical content. Now, let’s see how the platforms adapt this standard.
TikTok Video Requirements
As a platform practically built on vertical video, TikTok sets a clear standard. If you want your videos to feel native to the “For You” page—and you definitely do—your exports need to match these specs perfectly.
- Recommended Dimensions: 1080×1920 pixels
- Aspect Ratio: 9:16 is king.
- Max Video Length: While you can upload videos up to 60 minutes long, the sweet spot for the algorithm is often much shorter, typically between 9 and 15 seconds. You can record up to 10 minutes directly in the app.
- Max File Size: This varies by device: 72 MB for Android users and 287.6 MB for iOS.
Instagram Reels And Stories Specs
Instagram leverages vertical video for both Reels and Stories, but they serve different purposes and have slightly different rules. The dimensions are identical, but the time limits are what you really need to watch.
- Recommended Dimensions: 1080×1920 pixels
- Aspect Ratio: Stick to 9:16.
- Max Video Length: Reels can run up to 90 seconds, giving you more creative room. Stories, on the other hand, are capped at 60-second clips.
- Max File Size: You have a generous 4 GB limit for both formats.
YouTube Shorts Dimensions
YouTube Shorts is YouTube’s answer to the short-form vertical trend, designed from the ground up for mobile viewing. The specs are clean and simple, falling right in line with the competition.
- Recommended Dimensions: 1080×1920 pixels
- Aspect Ratio: 9:16 is the primary format, though you might see a 1:1 square video occasionally.
- Max Video Length: A strict 60-second maximum.
- Max File Size: A massive 256 GB for verified accounts.
Pro Tip: Just because YouTube allows a huge file size doesn’t mean you should use it. Compressing your video to a more manageable size (without trashing the quality) means faster uploads and a much better experience for viewers on spotty connections.
Facebook Reels And Stories Guidelines
Facebook shares a lot of its DNA—and technical specs—with its sibling, Instagram. Knowing these numbers is crucial for getting the most engagement out of your audience on the world’s largest social network. For more on this trend, check out OneStream.Live’s analysis of why vertical video is essential for creators.
- Recommended Dimensions: 1080×1920 pixels
- Aspect Ratio: No surprises here, it’s 9:16.
- Max Video Length: Just like Instagram, Reels can be up to 90 seconds, while Stories are capped at 60 seconds.
- Max File Size: 4 GB.
Platform-Specific Vertical Video Requirements
To make things even easier, here’s a quick-glance comparison of the specs for the top platforms. Use this table as a cheat sheet to ensure your content is always perfectly optimized, no matter where you’re posting.
| Platform | Recommended Dimensions | Max Video Length | Max File Size |
|---|---|---|---|
| TikTok | 1080×1920 | 60 minutes (uploaded) | 72 MB (Android) / 287.6 MB (iOS) |
| Instagram Reels | 1080×1920 | 90 seconds | 4 GB |
| Instagram Stories | 1080×1920 | 60 seconds | 4 GB |
| YouTube Shorts | 1080×1920 | 60 seconds | 256 GB |
| Facebook Reels | 1080×1920 | 90 seconds | 4 GB |
| Facebook Stories | 1080×1920 | 60 seconds | 4 GB |
Bookmark this page or save this table. A quick check before you export can save you a ton of headaches and ensure your video lands with the impact it deserves.
Optimizing for Vertical Video Safe Zones
Nailing your vertical video dimensions is a great start, but it’s only part of the puzzle. To create content that really performs, you have to think about composition, and that means understanding safe zones. Simply put, these are the areas of the screen you can count on to be clear of user interface (UI) elements like usernames, captions, like buttons, and progress bars.
It’s a common mistake to ignore these overlays, and it can tank an otherwise perfect video. When your key message, a product shot, or a crucial facial expression gets hidden behind a platform’s UI, your content loses its punch and engagement suffers. Good composition means making sure every important element stays in plain sight.

Defining The Core Safe Zone
Picture the vertical frame in three parts: top, bottom, and center. The most important real estate is that big block right in the middle. This is your main safe zone, and it’s where your subject and all the primary action needs to live.
Key Insight: As a solid rule of thumb, keep your most vital visual information within the central 75% of the screen. This creates a buffer that protects your content from UI elements, which platforms almost always stick to the very top and bottom edges.
Focusing on this central area ensures that the core of your message is never blocked, no matter which app the video ends up on.
Navigating Platform-Specific UI Overlays
While the center is almost always clear, the exact placement of UI overlays shifts a bit between platforms like TikTok, Instagram Reels, and YouTube Shorts. The differences might seem small, but they can make or break your video’s clarity.
Here’s a general idea of where to expect these UI elements to pop up:
- Top Area (Approx. 10-15%): This zone is usually home to things like platform logos, search bars, or creator profile info. It’s a bad spot for headlines or important text.
- Bottom Area (Approx. 20-25%): This is the busiest part of the screen by far. It’s crowded with the video description, captions, audio details, and all the engagement buttons (like, comment, share). Any text, logos, or subtitles you place down here are at serious risk of being covered up.
- Right Edge: The right-hand side is another active zone, usually showing the creator’s profile icon and shortcuts for likes, comments, and shares.
The best approach is to plan for these overlays from the very beginning. When filming, frame your subject in the center. Later, in editing, make sure all your text, graphics, and subtitles are placed well within that central safe zone. This isn’t just about getting the technical dimensions right; it’s about making smart, strategic choices that guarantee your video is clear and effective on every platform.
Best Practices for Exporting Vertical Video
https://www.youtube.com/embed/n8bgxaFztW0
Getting your vertical video dimensions right is only half the battle. To really make your content stand out and play flawlessly for every viewer, you have to nail the technical export settings. Think of bitrate, frame rate, and video codec as the final polish that turns a good video into a great one, preventing frustrating issues like pixelation or endless buffering.
These settings are all about striking the right balance between visual quality and file size. A pristine, high-resolution video is useless if its massive file size makes it impossible for people on slower connections to watch. On the flip side, a tiny file that uploads in seconds but looks like a blurry mess will kill your engagement. The trick is to find that sweet spot for whatever you’re creating, from a quick, punchy TikTok to a professionally produced brand ad.
Choosing the Right Video Codec
A video codec is essentially the technology that compresses and decompresses your video file. It’s the language your video is packed in. For just about any vertical video you create today, you’ll be choosing between two main players: H.264 and HEVC (H.265).
- H.264 (AVC): This is the king of compatibility. H.264 is the go-to industry standard, and for good reason—it works everywhere, on every device and platform. It offers a solid mix of quality and file size, and it’s what platforms like TikTok officially recommend for uploads.
- HEVC (H.265): As the successor to H.264, HEVC is a much more efficient codec. It can deliver the same visual quality as H.264 but in a file that’s up to 50% smaller. This efficiency is a game-changer for streaming 4K content or when you’re trying to save on bandwidth. If you want to dive deeper, our guide to the HEVC video format has all the details.
So, which one should you use? For most social media content, H.264 is the safest, most reliable choice because of its universal support. But if you’re focused on high-quality streaming or want to future-proof your video library, HEVC is the smarter option.
Setting Your Bitrate and Frame Rate
With your codec picked out, it’s time to dial in the bitrate and frame rate. These two settings have a direct impact on how smooth and clear your video looks.
Bitrate is the amount of data used to create one second of video, measured in megabits per second (Mbps). More data equals higher quality, but it also means a bigger file. A higher bitrate preserves more detail, while a lower one can lead to blocky artifacts, especially in scenes with a lot of motion.
Pro Tip: For a standard 1080×1920 vertical video, aim for a bitrate between 8 to 15 Mbps. This range is the sweet spot for social media, giving you excellent visual detail without making the file too chunky to stream easily.
Frame Rate (FPS) is simply the number of individual images, or frames, shown every second. The standard for most online video is 30 FPS, which delivers smooth, natural-looking motion. If your video features fast action—think sports, dancing, or gaming—bumping this up to 60 FPS will create an even smoother, more fluid experience, though it will also increase your file size.
Here’s a quick-glance export recipe for a typical Full HD vertical video:
- Dimensions: 1080×1920
- Codec: H.264
- Frame Rate: 30 FPS
- Bitrate: 10 Mbps
- Audio Codec: AAC
- Audio Bitrate: 192 kbps
Following these guidelines will ensure your vertical video looks crisp, plays back smoothly, and is perfectly optimized for whatever platform you share it on.
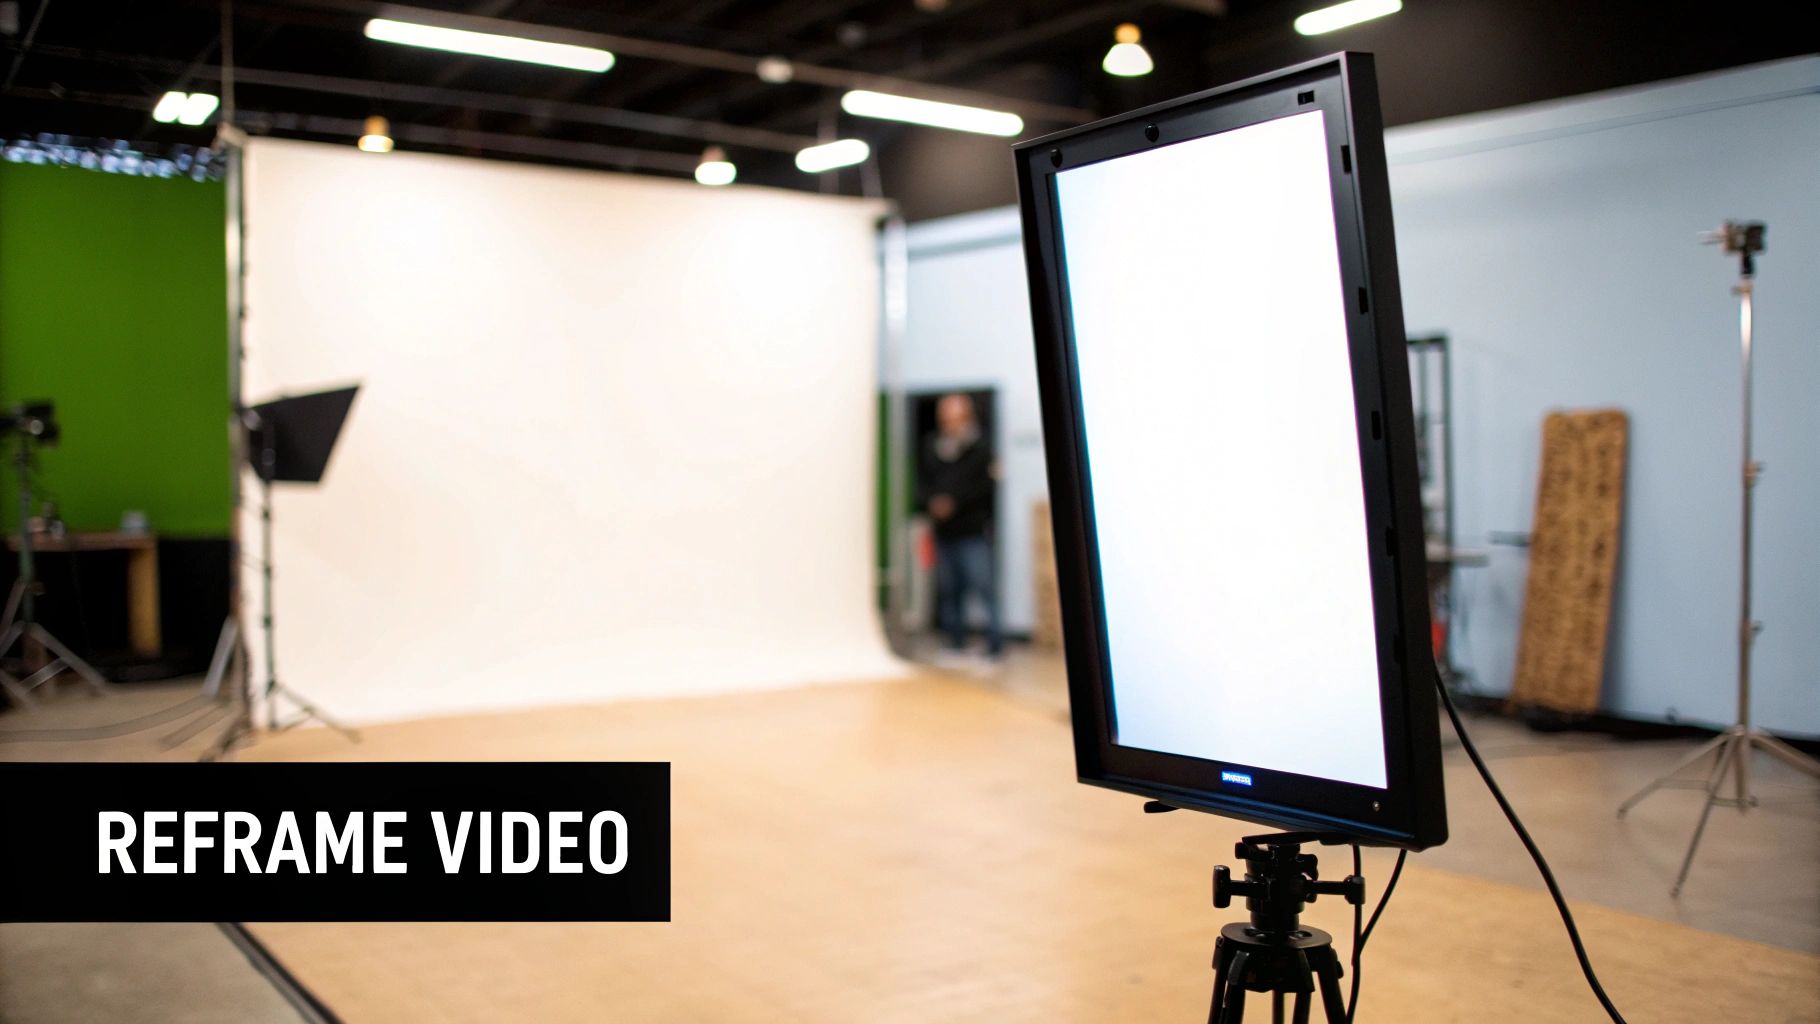
Adapting Horizontal Video for Vertical Formats
Let’s be real—reshooting everything for vertical platforms isn’t always practical. You’ve likely got a library of 16:9 horizontal video, and the challenge is making it work for a 9:16 world. Done right, you can repurpose your widescreen content and make it feel completely at home on vertical-first channels.
The trick is to avoid making it look like a sloppy afterthought. Just dropping a horizontal video into a vertical frame leaves you with massive black bars on the top and bottom (pillarboxing), which immediately screams “unprofessional” and wastes a ton of screen space. Fortunately, there are much better ways to handle it.
Common Reframing Techniques
When you’re converting from wide to tall, your main job is to decide what part of the original frame is most important. Each method below tackles this differently, and the best choice really depends on what’s happening in your shot.
- Center Crop: This is the most straightforward approach. Your editing software simply punches into the middle of the horizontal frame. It works perfectly if your subject is already centered, but you risk chopping off key details or action happening on the sides.
- Pan and Scan: For a more dynamic feel, you can use pan and scan. This involves manually creating camera movements that follow the action across the original wide frame. It’s a great way to keep a moving subject in view, though it does take more editing work to make the pans look smooth and natural.
Pro Tip: If you’re using pan and scan, keep the movements subtle. Quick, jerky pans can be jarring and make the final video feel cheap and disorienting.
Using Background Fillers
Another popular tactic is to place your original horizontal video inside the vertical frame and then get creative with the empty space above and below. This technique lets you keep the original composition intact while still filling the screen.
Here are the two most common ways to fill that space:
- Blurred Background: This is a classic. You take the original horizontal video, scale it up to fill the entire 9:16 background, and apply a heavy blur. Then, you layer the original, un-blurred video right on top. It creates a cohesive look that’s way less distracting than plain black bars.
- Branded or Solid Background: You can also use a custom graphic, your brand colors, or even just a solid color to fill the gaps. This is a fantastic opportunity to add logos, text overlays, or subtitles without cluttering the main video content itself.
Ultimately, adapting horizontal video well requires a bit of thoughtful editing. All of these methods involve some form of processing to create the final file. To get a better handle on the technical side of this, it’s worth understanding what is encoding a video, as this process is what prepares your video for delivery to viewers.
Troubleshooting Common Vertical Video Problems
Even when you’ve nailed the vertical video dimensions, technical glitches can still throw a wrench in your content plan. Things like annoying black bars, ugly pixelation, or even flat-out upload rejections are more common than you’d think. This guide will walk you through how to spot and fix these frequent headaches so your videos always look sharp and play perfectly.
Most of these problems boil down to a simple mismatch: your export settings don’t align with what the platform expects. A tiny error in aspect ratio, bitrate, or file format can cause major display issues. Once you understand the root cause, applying the right fix in your editing software is usually pretty straightforward.
Getting Rid of Black Bars on Your Video
Black bars are probably the most common visual mistake, and they scream “unprofessional.” They pop up when your video’s aspect ratio doesn’t perfectly match the player it’s sitting in. You’ll typically run into two types.
- Pillarboxing (Bars on the Sides): This is what happens when you drop a horizontal (16:9) or square (1:1) video into a vertical (9:16) frame without properly scaling it up to fill the space.
- Letterboxing (Bars on Top and Bottom): While you see this less with vertical video, it can happen if a non-standard aspect ratio gets squeezed into a standard 9:16 player.
Fixing this means going back to your project settings and making sure they’re set for the right vertical dimensions from the start.
Here’s the fix:
- Open your project in your video editor.
- Find your sequence or project settings.
- Change the frame dimensions to 1080×1920 pixels (or another standard 9:16 resolution).
- Select the clip in your timeline and scale it up until it completely fills the vertical frame. No more black bars.
- Export the video again with these corrected settings.
Solving Blurry or Pixelated Video
If your video looks blurry, blocky, or pixelated, the culprit is almost always a bitrate that’s too low for the resolution and action in the shot. When the bitrate can’t keep up, the compression algorithm gets too aggressive and starts throwing away visual detail. This causes those nasty artifacts, especially in scenes with a lot of movement.
Expert Tip: Video quality isn’t just about resolution. Bitrate is the amount of data dedicated to each second of video, and being cheap with it is the quickest way to make a beautiful 1080p recording look terrible.
The solution is to re-export your video with a higher bitrate. For a standard 1080×1920 video at 30 FPS, aiming for a bitrate between 8 to 15 Mbps is a safe bet. This gives you great quality without making the file size unmanageable.
Why Platforms Reject Your Video Upload
That “file not supported” error is incredibly frustrating, but it’s usually just a simple mismatch in file format or codec. Platforms have very specific technical checklists, and if your video doesn’t tick all the boxes, their system will reject it. This is a fundamental part of media delivery, and knowing a bit about what is video transcoding helps explain why platforms are so particular.
Common Causes and Their Fixes:
- Unsupported Codec: You might have exported with a less common codec. The fix is to re-export using the industry standard: H.264. It’s universally accepted.
- Incorrect File Format: While tons of video formats exist, MP4 is the undisputed king for the web. Make sure your filename ends with
.mp4. - Exceeding File Size or Length Limits: This one’s simple but easy to forget. Always double-check the platform’s rules for maximum file size and video length. For example, a 10-minute video is an instant rejection on YouTube Shorts, which has a firm 60-second limit.
Vertical Video Dimensions FAQ
Even after you’ve nailed the basics, a few tricky questions about vertical video dimensions always seem to pop up. Think of this section as a quick-reference guide to tackle those lingering uncertainties and make sure your specs are dialed in perfectly.
What Is the Best Resolution for Vertical Video?
For almost every scenario, the go-to resolution for vertical video is 1080×1920 pixels. This is standard Full HD, just flipped on its side to perfectly fit the 9:16 aspect ratio that dominates modern smartphone screens.
It’s the official recommendation for platforms like TikTok, Instagram Reels, and YouTube Shorts for a reason. Using 1080×1920 ensures your video looks crisp and clear, but the file size remains manageable. That means faster uploads for you and smoother, buffer-free playback for your audience.
Is It Worth Using 4K for Vertical Video?
You absolutely can produce vertical video in 4K (2160×3840 pixels), but honestly, it’s usually overkill for social media. The main hang-up is the file size—4K videos are massive.
Those huge files translate directly into longer upload times and can be a real pain for viewers on slower connections. For pretty much all online content, 1080×1920 hits that sweet spot between excellent quality and practical performance. It’s the smarter choice most of the time.
Key Takeaway: The visual difference between 1080p and 4K on a small phone screen is often barely noticeable, but the performance hit from 4K is huge. Stick with 1080p unless you have a specific reason for ultra-high resolution, like content for a professional digital sign.
How Do I Remove Black Bars from My Vertical Video?
Seeing black bars on the sides of your video? That’s called pillarboxing, and it’s a dead giveaway that your video’s aspect ratio doesn’t match the vertical 9:16 standard. It usually happens when you drop horizontal or square footage into a vertical project without reframing it.
Fixing it is straightforward in any video editor:
- Jump into your project or sequence settings.
- Make sure the frame dimensions are set to 1080×1920 pixels.
- Click on the problematic video clip in your timeline.
- Use the scale and position controls to zoom in on the footage until it fills the entire vertical frame.
- Export your video, and those black bars will be gone for good.
What Is the Difference Between 9:16 and 16:9?
The only real difference is orientation. These two aspect ratios are just mathematical opposites, each designed for a totally different screen.
- 9:16 is the tall, narrow format for vertical video (like 1080×1920 pixels). It’s made to fit a phone held upright.
- 16:9 is the wide format for horizontal video (like 1920×1080 pixels). This is the standard for everything from TVs and computer monitors to traditional YouTube content.
Ready to build powerful video experiences without the complexity? LiveAPI provides the robust APIs and global infrastructure you need to integrate high-quality live and on-demand video into any application. Start building today at https://liveapi.com.