Ready to embed a live stream directly onto your website? All you really need is the embed code from your streaming provider and a way to pop that code into your site’s HTML. It’s a straightforward move that can turn your website from a static brochure into a dynamic, engaging hub for your community.
Why You Should Embed Live Streams on Your Website
It’s tempting to just send your audience to a third-party platform like YouTube or Twitch. It seems easier, right? But doing so means giving up control. When you push viewers away from your own domain, you’re losing more than just traffic—you’re missing a golden opportunity to build a real connection with your audience. The whole point should be to make your website the command center for your brand.
By hosting the stream yourself, you keep people locked into your ecosystem. This has an immediate, positive effect on the website metrics that search engines care about. Viewers stick around longer, which can slash your bounce rates and significantly boost the average time they spend on your page.
Take Full Control of the Viewer Experience
Embedding the stream gives you the final say on the entire viewing environment. You get to decide exactly what your audience sees, free from the distracting clutter of unrelated “recommended videos” or, even worse, a competitor’s ads. This ensures your message stays front and center.
You can design the entire page around your stream to hit your specific goals:
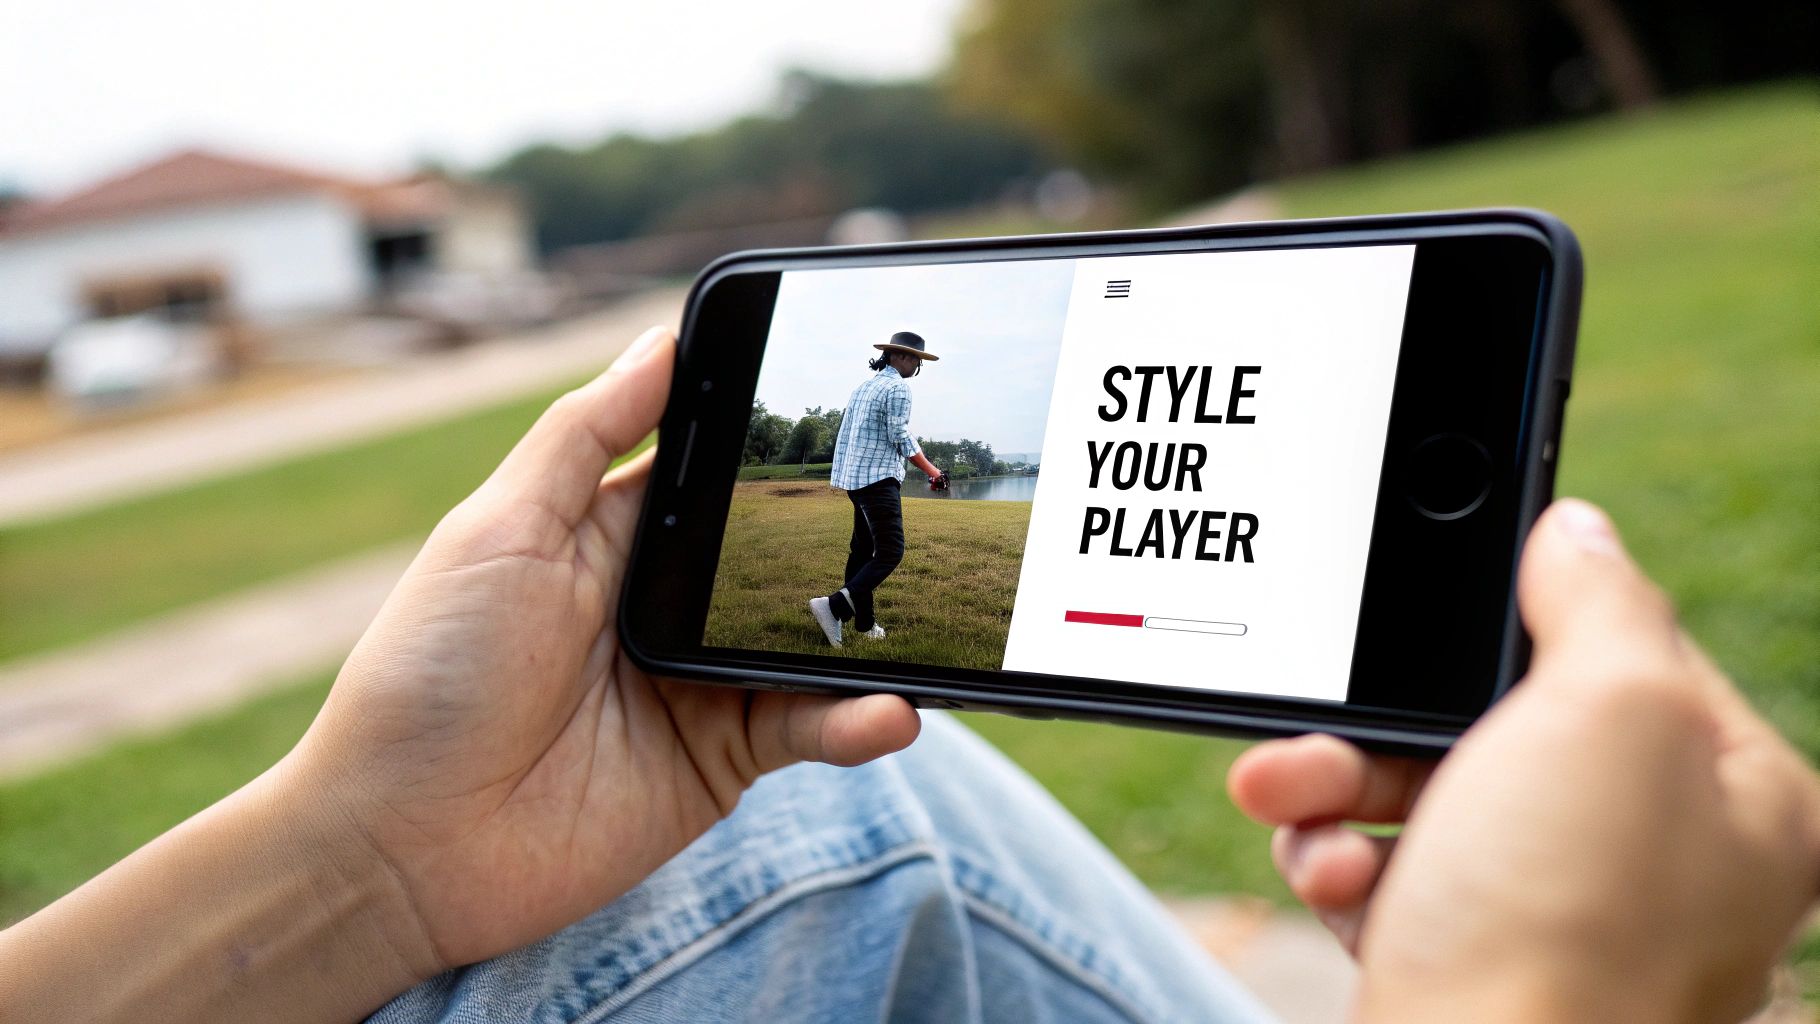
- Brand Consistency: Customize the video player’s colors and the surrounding page elements to perfectly match your brand’s style guide.
- Clutter-Free Viewing: Get rid of annoying ads, random video suggestions, and external links that tempt your viewers to leave.
- Integrated Content: Strategically place relevant articles, product links, or clear calls-to-action right next to the video player.
This level of control elevates a simple broadcast into a fully branded, immersive experience that builds genuine brand loyalty.
Unlock Direct Monetization and Engagement
One of the biggest wins of embedding a stream on your own site is the ability to directly monetize your content. Sure, platforms like YouTube have revenue sharing, but hosting it yourself gives you 100% control over how you make money.
By keeping viewers on your site, you create a direct path to monetization. You’re no longer just a content creator on someone else’s platform; you are the owner of the entire experience, from broadcast to transaction.
This isn’t just a hunch; the numbers back it up. The live streaming market is expected to explode from $99.82 billion in 2024 to a staggering $345.13 billion by 2030. On top of that, a solid 45% of viewers are willing to pay for premium live content from their favorite creators. If you want to dig deeper, these live streaming statistics reveal a massive opportunity for direct sales.
Think about it. You could host a ticketed workshop, a pay-per-view product launch, or an exclusive Q&A session—all without leaving your website. Integrating e-commerce features, like a “Buy Now” button for a product you’re showcasing, becomes incredibly simple. Creating that seamless link between your content and a sale is next to impossible when your audience is on someone else’s turf.
Choosing the Right Live Streaming Platform
Where you host your live stream is one of the most important decisions you’ll make. It affects everything from how many people see your content to how you make money from it. Fundamentally, you have two main options: go with a massive social platform like YouTube Live or Twitch, or choose a dedicated professional service like Castr for maximum control.
There’s no single right answer—it all comes down to your goals. A gamer just starting out will probably find a home on Twitch, tapping into its built-in community. But a business hosting a paid, private conference needs a secure, white-label solution with a powerful API. That’s where a professional platform shines.
Evaluating Key Platform Differences
It’s smart to look at where people are already watching. Globally, 52% of live video viewers are on social media. But in the U.S., it’s a closer race: 43% prefer digital streaming subscriptions, while 40% stick with social platforms. This tells us you really need to know your audience before you commit. You can dig into more of these live streaming trends to get a better feel for the landscape.
To help you decide, let’s compare the core differences head-to-head.
Live Streaming Platform Comparison
Choosing a platform often feels like a trade-off between reach and control. This table breaks down what you can expect from major social platforms versus a dedicated professional service.
| Feature | YouTube Live / Twitch | Professional Service (e.g., LiveAPI) |
|---|---|---|
| Audience & Reach | Massive built-in audience, great for discovery and organic growth. | Best for a known audience you bring to your own site. No built-in discovery. |
| Monetization | Built-in ads and subscriptions, but the platform takes a significant cut of your revenue. | 100% control. You can set up pay-per-view, ticketing, or custom payment integrations. |
| Branding & Control | You’re always on their turf. Their logo, their suggested videos, their rules. | A “white-label” player you can fully customize to match your brand. The experience is entirely yours. |
| Technical Customization | Limited to what the platform offers. Little to no API access for deep customization. | Robust APIs for custom player controls, chat integration, and pulling detailed analytics into your systems. |
Ultimately, social platforms are great for building an audience from scratch, while professional services give you the tools to build a business around that audience.
The Decision Tree: Visualizing Your Choice
Sometimes a visual makes it easier. This chart helps map out your decision based on your technical needs, budget, and audience size.
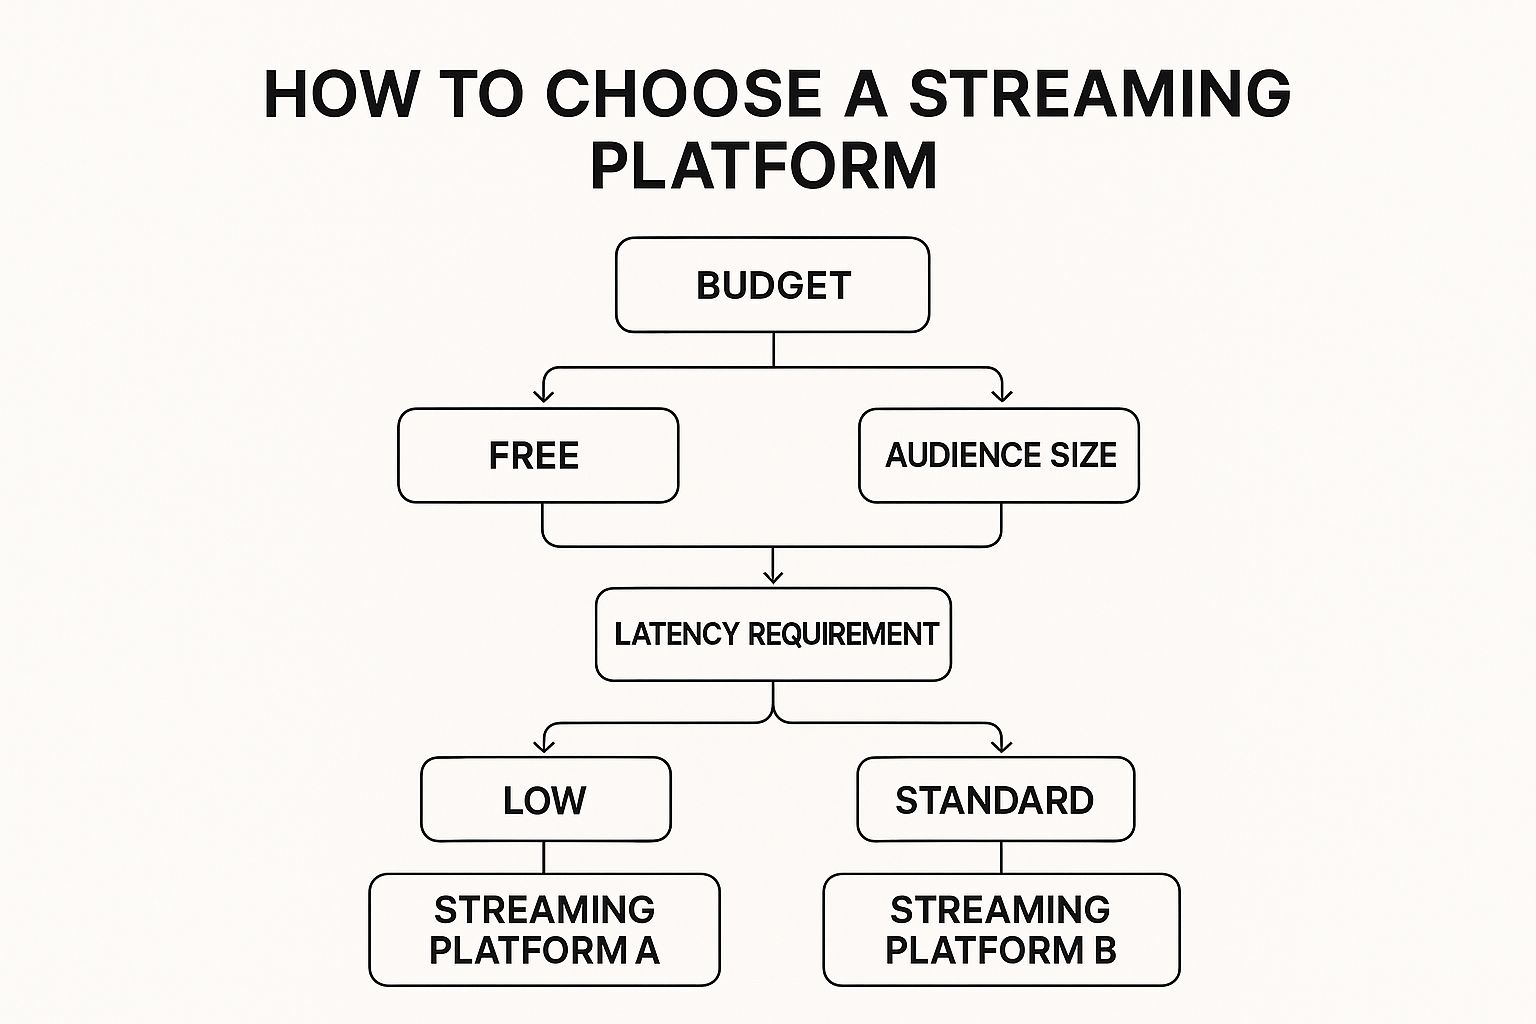
As you can see, the more you need low-latency, high-quality streams for a large audience, the more a professional, paid solution makes sense.
When to Go with a Professional Service
Social platforms are fantastic, but they have their limits. A professional service becomes essential when your stream is tied to specific business outcomes that go beyond just getting views.
A professional streaming service moves you from being a user on a platform to the owner of the entire streaming experience. It’s the difference between renting a booth at a market and building your own flagship store.
You should seriously consider a professional service if you need any of the following:
- Enhanced Security: Hosting a private corporate town hall, a paid workshop, or internal training? You’ll need features like password protection, domain whitelisting, and encrypted streams that public platforms simply don’t offer.
- Guaranteed Quality of Service: For events where quality is non-negotiable—like a live auction or an interactive Q&A—professional platforms deliver. They partner with top-tier CDNs to ensure stable, high-quality, low-latency video feeds.
- Advanced Analytics: If you need to prove ROI, you need data that goes deeper than view counts. Professional services provide detailed analytics on everything from viewer engagement and drop-off points to geographic distribution and playback performance.
How to Get Your Live Stream Embed Code
Okay, so you’ve picked your streaming platform. Now for the fun part: grabbing the code that will actually put your live stream onto your website. This is where the magic happens, and thankfully, professional platforms like LiveAPI have made this process incredibly simple by putting everything you need into one clean dashboard.
What we’re looking for is a small snippet of HTML, almost always an iframe, that acts as a window from your site directly to your live stream. Let’s walk through how to get this code from a professional service first, then we’ll see how it works on a public platform like YouTube.
Generating Your Code in a Professional Dashboard
Professional streaming services are built from the ground up for this exact purpose, so finding your embed code is a core feature, not something buried in a settings menu. You won’t have to go on a treasure hunt.
From my experience, the workflow usually looks something like this:
- First, you create a new live event. This is where you’ll give your stream a name and configure its basic settings. Think of it as creating the “container” for your broadcast.
- Next, you’ll configure the stream itself. This is a crucial step. You can often tweak things like stream latency (the delay between you and your viewers), enable recording for on-demand playback, and lock down security settings.
- Finally, you’ll find the ‘Embed’ option. Once the event is saved, the platform generates all the technical details you need, including that precious embed code. Just look for a button or tab clearly labeled “Embed,” “Share,” or “Player.”
Here’s a great example of what you’ll typically see inside a professional platform’s dashboard.
Notice how clean that is? Generating a stream and grabbing the embed code is a central function, not some afterthought. This design philosophy is what sets professional services apart—they prioritize getting your stream onto your website quickly and easily.
Understanding the Iframe Embed Code
The code you copy is almost always going to be an <iframe> tag. It can look a bit technical at first glance, but it’s actually pretty straightforward when you break it down.
Here’s a typical example of what that code snippet might look like:
<iframe src="https://your-streaming-provider.com/stream/your-unique-id" width="1280" height="720" frameborder="0" allow="autoplay; fullscreen; picture-in-picture" allowfullscreen> </iframe>
Each piece of that code, called an attribute, is just an instruction for the web browser.
src: This is the most important one. It’s the direct link to your live stream player.widthandheight: These set the starting size of your video player on the page, in pixels.allowfullscreen: This is what gives your viewers the little button to make the stream fill their entire screen. A must-have.allow: This attribute grants specific permissions, like letting the video autoplay or pop out into a picture-in-picture mode.
The iframe is your portal. It’s a simple but powerful piece of HTML that lets you place a fully-functional video player, hosted somewhere else, right onto your own webpage so it feels like a native part of your site.
Finding the Code on YouTube
Getting an embed code from YouTube is also pretty easy, though it comes with fewer bells and whistles. For any scheduled live stream (or even a past one), just click the “Share” button below the video player and then choose “Embed.” YouTube will give you a similar <iframe> code to copy and paste.
The biggest difference is the lack of control. Professional services often let you use an API to change player colors, hide controls, and remove branding. With YouTube, you get what you get: their player, their logo, and their links back to YouTube.com. This trade-off between simplicity and brand control is a major reason why businesses running a polished event will embed a live stream on a website using a dedicated solution.
Getting Your Live Stream Onto Your Website
You’ve got the embed code, and now for the fun part: putting your live stream on your actual website. This is where your stream meets your audience, and thankfully, it’s a straightforward process whether you’re working with old-school HTML, a WordPress site, or a modern JavaScript app.
The most direct route is to just paste the <iframe> code straight into your site’s HTML. Find the spot you want the player to show up—maybe inside a <div> in your main content area—and drop it in. This gives you absolute control, which is perfect if you’re comfortable digging into the source code.
But let’s be realistic, most people are using a content management system like WordPress. In that case, the process is even easier and, frankly, a bit safer.
- Just head to the post or page where you want to add the stream.
- Click the “+” icon to add a new block.
- Search for the “Custom HTML” block and select it.
- Paste your
<iframe>code right into that block.
Doing it this way neatly contains the code and stops it from messing with your page’s formatting. It’s the method I’d recommend for pretty much any CMS.
Making Your Stream Player Responsive
Here’s a common pitfall: a fixed-width player looks great on a big desktop monitor, but it completely breaks the layout on a phone. The video either gets cut off or, even worse, forces people to scroll sideways. It’s a terrible user experience.
The fix is a little CSS magic to make the player automatically resize for any screen.
First, you’ll want to wrap your <iframe> in a container <div>. Give this container a unique class, something like video-container, so you can easily target it with your CSS.
Now, pop this little CSS snippet into your website’s stylesheet. It uses a clever trick with padding to maintain a perfect 16:9 aspect ratio, making sure your video scales beautifully.
.video-container { position: relative; padding-bottom: 56.25%; /* This is the key for a 16:9 ratio */ height: 0; overflow: hidden; }
.video-container iframe { position: absolute; top: 0; left: 0; width: 100%; height: 100%; }
With that code in place, your embedded stream is now fully responsive. You can rest easy knowing it looks flawless for every single viewer, no matter what device they’re on.
Advanced Customization with APIs
This is where you can really see the difference between a basic streaming solution and a professional platform like LiveAPI. Simply embedding a player is one thing, but a powerful API gives you programmatic control to make the player look and feel like a native part of your website.
A great API turns the embedded player from a static black box into a dynamic, interactive part of your site. You’re not just showing a video anymore; you’re building a truly integrated video experience.
For instance, you could use JavaScript to control the player. Imagine you have a custom, on-brand “Start Watching” button. Instead of forcing users to click the tiny play icon inside the video, an API call can start the stream when someone clicks your button.
Or think about this: what if your site has a light and dark mode? Using the API, you could detect the user’s theme preference and automatically switch the player’s skin to match. It’s a small touch that makes for a much more cohesive experience.
The possibilities go on—you could programmatically show or hide the chat, pull real-time viewer counts to display elsewhere on the page, or even build entirely custom playback controls. This is the kind of deep customization that creates a polished, professional-grade final product.
Best Practices for a Flawless Live Experience
Getting the player onto your page is a solid start, but making sure your broadcast is a success? That comes down to the quality of the viewer experience. A few smart preparations can mean the difference between a laggy, frustrating stream and a professional event that keeps your audience hooked. Think of it as setting the stage long before the curtain rises.
Before you even think about going live, a full pre-flight check is an absolute must. This goes way beyond just making sure your camera is on. I’m talking about a full technical rehearsal. I always set up a private, unlisted test stream a day or two before the main event to find and fix any little issues.
Here’s what you should be looking at during that test run:
- Audio and Video Quality: Is the sound crisp and clear? Is the video sharp, without any weird pixelation? This is your one chance to fix the lighting, move your microphone, or tweak your encoding settings before anyone sees it.
- Cross-Browser Compatibility: Open that test stream in Chrome, Firefox, Safari, and Edge. You need to be sure the player loads and works perfectly, no matter which browser your audience prefers.
- Mobile Responsiveness: Seriously, pull up the stream on your phone. Your responsive CSS should handle it, but you need to see it with your own eyes to be sure it looks and feels right on a smaller screen.
Optimize Your Website Performance
Look, even a perfect stream will fall flat on a slow, bloated webpage. When you embed a live stream on your website, you have to make sure the page itself is lightning-fast. The player is going to use up resources, so you need to clear the way for it.
A page that loads quickly stops people from bouncing before your stream even has a chance to start. Try to put your stream on a clean, simple landing page. That means no heavy animations, giant uncompressed images, or a dozen scripts running in the background. Your target? A load time under three seconds. That’s the key to giving your audience a smooth entry.
A flawless live experience is built on two things: rock-solid technical checks and smart user engagement. You want people talking about your content, not complaining about buffering.
Drive Engagement During the Broadcast
Once the technical stuff is locked in, you can shift your focus to making the stream interactive and genuinely interesting. Don’t just show a video—create an event. This is where hosting on your own site really pays off.
The amount of live content people are watching is incredible. In the second quarter of 2025 alone, streaming platforms saw over 29.6 billion hours watched. YouTube Live was responsible for more than half of that. To connect with that massive audience, you need to do more than just broadcast; you have to engage. You can dig into more of these global livestreaming trends to get a sense of the scale.
To turn passive viewers into active participants, try putting an interactive chat module right next to your video player. In the days leading up to the event, use a big, bold countdown timer on the page to build some hype. And most importantly, know exactly what your calls-to-action are. Are you sending them to a product page? A newsletter sign-up? A feedback form? These elements are what turn your stream from a simple broadcast into a powerful tool for your business.
Answering Your Live Stream Embedding Questions
Once you’ve got the technical side sorted, a few practical questions almost always come up. I’ve seen these pop up time and time again, so let’s get them answered right away to help you sidestep common hurdles.
Can I Really Embed a Stream on My Wix or Squarespace Site?
You absolutely can. Just about every modern website builder, from Wix and Squarespace to Shopify, is designed to play nicely with custom code.
All you need to do is look for an element they usually call a “Custom HTML Block” or an “Embed Widget.” Grab that iframe code snippet your streaming provider gave you, paste it right in there, and you’re good to go. The player will show up on your page, making the whole process surprisingly simple no matter what platform you’re on.
Is This Going to Wreck My Site’s SEO?
This is a big one, and it’s a valid concern. An embedded player can add to your page’s load time, and we all know page speed is a major SEO factor. The good news is that most professional streaming platforms build their players to be incredibly lightweight to keep this from being a problem.
The real secret here is to avoid autoplay. Forcing the video to load the second someone lands on the page is what really slows things down.
Let your visitors choose to click “play.” This simple change ensures your page loads lightning-fast, which keeps both your users and the search engines happy. You get to offer the engaging video content without sacrificing performance.
How Do I Stop the Embedded Stream from Looking Awful on Mobile?
You’ve probably seen this before—a video player that’s cut off or looks tiny on a phone. That’s usually because a standard iframe has a fixed width and height.
The fix is a little bit of CSS magic. By wrapping the iframe code in a container <div> and applying a few styling rules, you can make the player responsive and maintain its aspect ratio. This ensures the video player automatically scales to fit any screen perfectly, from a huge desktop monitor right down to the smallest smartphone. It’s a non-negotiable step for a professional-looking stream.
Ready to build a seamless, professional live streaming experience right on your own website? LiveAPI gives you a powerful, developer-friendly platform that makes embedding and customizing your streams a breeze. Get started with LiveAPI today and take full control of your video content.