A top-tier live streaming setup really boils down to three things: a clear camera, crisp audio, and clean lighting. Getting these core pieces of hardware right is the single most important investment you can make. It directly shapes how professionally your audience perceives your content.
Choosing Your Core Streaming Gear
The foundation of any great live stream isn’t complicated software or flashy overlays—it’s the gear that captures you and your world. Your camera, microphone, and lighting all have to work in harmony to create the viewer’s entire sensory experience. If you skimp on one, you’ll inevitably drag down the quality of the others, and the whole production can end up feeling amateurish.
Thankfully, putting together a professional-grade setup is more accessible today than ever before. You don’t need a Hollywood budget, but you do need to be smart about where you put your money. Let’s dig into the essential components that form the backbone of a successful live stream.
Your Camera: The Window to Your World
Your camera is arguably the most critical piece of the puzzle. While you can definitely start with a built-in laptop webcam, upgrading your camera is one of the fastest ways to level up your stream’s visual quality.
A solid high-end webcam like the Logitech Brio is a fantastic place to start. It offers 4K resolution and a respectable frame rate, delivering a sharp, clear picture that’s a massive leap from standard, out-of-the-box webcams. It’s a simple plug-and-play solution that packs a lot of punch for the price.
For those who are ready to invest in a truly professional look, a mirrorless camera like the Sony a6400 is the gold standard. Its larger sensor pulls in significantly more light, which means you get a much cleaner image and that beautiful shallow depth of field (the blurry background effect). This creates a cinematic vibe that webcams just can’t touch.
When you’re shopping around, keep these specs in mind:
- Resolution: This is all about clarity. While 1080p is the standard for most platforms, a 4K camera gives you the flexibility to crop your shot later without losing any quality.
- Frame Rate: Measured in frames per second (fps), this dictates how smooth your video looks. You need at least 30 fps, but 60 fps is the sweet spot for any fast-paced content like gaming, as it provides a fluid, lifelike motion.
Audio Quality Is Not Negotiable
Trust me on this: bad audio will make viewers click away faster than anything else. A voice that’s echoey, distorted, or muffled is just plain exhausting to listen to and instantly signals a low-quality production. Investing in a dedicated microphone is non-negotiable.
The most common starting point is a great USB microphone, like the acclaimed Blue Yeti. These mics are incredibly easy to use—just plug it into your computer, select it as your audio source, and you’re off to the races. They offer a huge improvement over headset mics, capturing rich, clear vocals.
For creators chasing that broadcast-level sound, an XLR setup is the next logical step. This involves pairing a professional microphone like the Shure SM7B with an audio interface like a GoXLR. This combination gives you superior noise rejection, greater dynamic range, and far more control over your sound, resulting in that warm, crisp “radio voice” quality.
Key Takeaway: Viewers might put up with a slightly grainy video, but they will not tolerate bad audio. If you have a limited budget, put your money into the microphone before the camera. Every single time.
Lighting: The Secret to a Professional Look
Good lighting is the secret sauce that pulls your whole visual presentation together. It’s what separates a flat, grainy image from a vibrant, three-dimensional scene. Without proper lighting, even the most expensive camera in the world will struggle to produce a clean image.
The goal is to illuminate yourself clearly while getting rid of any harsh shadows, and a basic three-point lighting setup is the classic way to do it. You can start with simple ring lights, but dedicated key lights give you much more control and, frankly, better results.
Products like the Elgato Key Light are popular for a reason. They provide soft, diffused light that’s flattering on camera, and you can adjust the brightness and color temperature right from your computer. Placing one or two of these correctly will instantly make your video feed look more professional, defined, and engaging. Your live streaming setup simply isn’t complete without dedicated, high-quality lighting.
Mastering Your Streaming Software
If your hardware is the body of your live streaming setup, then your software is its central nervous system. This is your digital command center—the place where you blend your camera feed, audio, graphics, and gameplay into a single, polished broadcast that goes out to the world. It’s where the real production magic happens.
Most creators land on one of two industry-standard options: OBS Studio or Streamlabs. OBS Studio is the open-source original; it’s lightweight, incredibly customizable, and completely free. On the other hand, Streamlabs is built on the OBS framework but adds a slicker interface and integrated tools like alerts and themes, which makes it a fantastic starting point for beginners.
No matter which you choose, the core concepts are the same. Your goal is to graduate from a single, static camera shot and start thinking like a producer, using scenes and sources to build a dynamic and engaging show.
Building Dynamic Scenes and Sources
The foundation of any professional-looking broadcast is your ability to manage scenes. A scene is simply a specific layout of different elements—or sources—that you can switch between instantly during your stream. Think of each scene as a different camera angle or set in a TV production.
You don’t want to just have one scene showing your gameplay and webcam. A well-prepared streamer has multiple scenes cued up and ready to go.
- Starting Soon Scene: This builds anticipation before you go live. Use a countdown timer, your social media handles, and some good background music.
- Main Gameplay/Content Scene: This is your bread and butter—the layout featuring your game or screen capture, your webcam feed, and any branded overlays.
- Full-Screen Camera Scene: Perfect for when you want to connect directly with your chat, have a serious discussion, or just take a break from the main content.
- Be Right Back (BRB) Scene: A simple screen that lets your audience know you’ve stepped away for a moment. This is far more professional than showing an empty chair on camera.
- Interview/Guest Scene: A layout designed to feature both your webcam and a guest’s video feed, often arranged side-by-side or in a picture-in-picture format.
Within each scene, you add sources like your camera, microphone, images, and browser windows. Services like StreamElements or Streamlabs provide custom browser source URLs for alerts (like new followers or subscribers) and overlays. You just drop these into your scenes to create a branded, interactive experience that responds to your audience in real-time.
Pro Tip: Set up hotkeys for your most-used scenes. Being able to switch from gameplay to a full-screen camera with a single button press makes your stream feel incredibly fluid and professional. It’s one of the easiest ways to eliminate awkward pauses.
Decoding Your Encoding Settings
With your scenes built, the final crucial step is getting your encoder settings right. This is where many streamers get tripped up, but understanding the basics is essential for a stable, high-quality broadcast. The encoder is what compresses your video and audio into a format that can be sent over the internet.
Your most important setting here is the video bitrate. Think of bitrate as the amount of data you’re dedicating to your video stream every second. More data means a sharper, cleaner image. But there’s a catch: setting it too high for your internet connection will cause your stream to buffer and drop frames, creating a miserable viewing experience for everyone.
Balancing quality and stability is the name of the game. For this, your internet upload speed is the only metric that matters. Run a speed test and aim to set your bitrate to no more than 75% of your available upload speed. This leaves a healthy buffer for any network hiccups.
For example, if your upload speed is 10 Mbps (which is 10,000 Kbps), a safe bitrate would be around 6,000 to 7,500 Kbps. That’s more than enough for a stable, high-quality 1080p 60fps stream on platforms like YouTube or Twitch.
Here’s a quick reference I’ve put together based on common platform recommendations.
Recommended Bitrate Settings for Major Platforms
| Resolution & FPS | Recommended Video Bitrate (Kbps) | Platform Notes |
|---|---|---|
| 1080p @ 60fps | 4,500 – 9,000 | Twitch caps non-partners at 6,000 Kbps; YouTube allows for higher bitrates. |
| 1080p @ 30fps | 3,000 – 6,000 | A good balance for slower connections or less action-heavy content. |
| 720p @ 60fps | 3,000 – 5,000 | Ideal for fast-paced games on a more limited internet connection. |
| 720p @ 30fps | 1,500 – 4,000 | A reliable baseline for getting started without demanding too much from your upload speed. |
These numbers are great starting points, but always remember to test your stream before a long broadcast to ensure everything is running smoothly.
Your software sends this encoded data to your platform using a specific protocol. To get a deeper look at the tech making this possible, you can learn more about what the RTMP protocol is and how it powers most live streams today. A little background knowledge goes a long way in troubleshooting issues down the road.
Making the Connection: Your Network and Platform
https://www.youtube.com/embed/n-EdUHNK9UI
Now that your gear is ready and your scenes are set up in your software, it’s time to tackle the final technical piece of the puzzle: getting your stream from your computer to your viewers. This connection is the digital highway for your content. If there are any traffic jams or potholes along the way, your audience will feel it immediately, no matter how good your production is.
The two things that matter most here are your network’s stability and how you connect to the streaming platform itself. This is where your perfectly crafted, high-bitrate stream collides with the realities of the internet, so getting it right will save you a world of frustration.
Linking Your Software to the Platform
To get your broadcast from a program like OBS to a platform like Twitch or YouTube, you’ll need something called a stream key. Think of it as the unique, private password for your channel. When you plug that key into your streaming software, you’re telling the platform’s servers, “Hey, the video data coming from this specific computer? That belongs on my channel.”
You can almost always find this long string of characters in your channel’s dashboard—look for sections named “Creator Dashboard” or “Live Control Room.” It’s absolutely critical that you guard this key. If someone gets their hands on it, they can broadcast directly to your channel as if they were you.
Pro Tip: Never, ever share your stream key or show it on screen. If you think it might have leaked, go to your platform’s dashboard right away and hit the “reset” or “generate new key” button. It’s a simple click that will instantly secure your channel again.
Why You Absolutely Need a Wired Connection
Let’s talk about the number one cause of dropped frames and laggy streams: the local network connection. Wi-Fi is fantastic for browsing the web or watching Netflix, but it’s a nightmare for the kind of constant, heavy data upload that streaming demands. Wireless signals are easily disrupted by everything from your microwave to your neighbor’s router.
For a stable stream, an ethernet connection isn’t just a recommendation—it’s a must. Plugging a cable directly from your computer into your router creates a solid, dedicated pipeline for your video data. This one simple step dramatically cuts down the risk of packet loss and is often the single most effective thing you can do to improve your stream’s reliability.
Understanding Your Internet Speed
Before you even think about hitting that “Go Live” button, you need to know what your internet can handle, specifically your upload speed. The download speed your internet provider brags about is irrelevant here. What truly matters is how fast you can send data out to the world.
Run a speed test from a reliable site like Speedtest.net and pay close attention to the “upload Mbps” result. This number is your ceiling. A solid rule of thumb is to set your video bitrate in your streaming software to no more than 75% of your total upload speed. For instance, if you have a 10 Mbps upload speed, a safe and stable bitrate would be around 6,000 Kbps (which is 6 Mbps), leaving a 4 Mbps buffer to handle any random network hiccups.
The live streaming market has exploded, growing nearly four times in just five years—from about $25 billion in 2020 to almost $100 billion in 2024. Viewers expect a high-quality, stable broadcast, and with the gaming audience alone projected to hit 1.4 billion by 2025, you need a solid network foundation to stand out. You can see more on this incredible growth in these live streaming statistics.
A strong local connection ensures your stream reliably reaches the platform’s intake servers. From that point, a Content Delivery Network (CDN) takes over, distributing your stream to viewers all over the world. To get a better handle on how that global distribution works, take a look at our guide on choosing the best CDN for video streaming.
Designing Your Streaming Environment
Your streaming setup is more than just a camera and a mic; it’s your stage. The physical space you broadcast from sets the tone for your entire stream and is a massive part of your personal brand. A cluttered, distracting, or just plain boring background can instantly make an otherwise high-quality stream feel amateur.
Think of it this way: your background is the set for your show. It tells your audience a story about who you are before you even say a word. It’s worth putting some real thought into what you want that story to be.
Nailing the Visuals: Your Background
You’ve got a few solid options when it comes to creating a background that looks great on camera. Most successful streamers mix and match these ideas to create something that feels authentic to them.
- The Real-Deal Physical Set: This is all about decorating the actual space behind you. We’re talking shelves lined with collectibles, cool posters, some plants for a touch of life, or dynamic RGB lighting to set the mood. A physical set feels grounded and gives viewers a genuine glimpse into your world. A gamer might deck out their space with Funko Pops and neon signs, while a business coach might go for a clean bookshelf and minimalist art.
- The Power of a Green Screen: If you want total creative control, a green screen is your best friend. It lets you digitally swap out your real-world background for literally anything you can imagine—a slick branded graphic, a dynamic video loop, or even footage from the game you’re playing. It’s an incredible tool for a polished, professional look, but be warned: it requires really good, even lighting. Without it, you’ll get that choppy, pixelated effect that screams “beginner.”
- The Minimalist Vibe: Sometimes, simple is better. A clean, decluttered room with a single piece of art on the wall can look incredibly sharp and modern. This approach puts all the focus squarely on you, the creator. It’s often the easiest to get right—just make sure the space is tidy and free of any personal clutter you don’t want the world to see.
Don’t Let Bad Audio Ruin Your Stream
You can have the most expensive microphone on the market, but it won’t save you from bad room acoustics. If you’re in a room with a lot of hard surfaces—like bare walls, a wood floor, and big windows—your voice is going to bounce around, creating an annoying echo or reverb. This makes your audio sound hollow and distant.
The good news? You don’t need to build a professional recording studio to fix it. The goal is just to introduce soft surfaces that absorb sound instead of reflecting it.
My Go-To Trick: Stand in the middle of your room and clap your hands once, loud. If you hear a clear ringing or a fluttery echo right after, you’ve got some work to do. Soft surfaces are the answer.
Here are a few simple things that make a huge difference:
- Throw a large rug on the floor.
- Hang some curtains over the windows.
- Place a bookshelf against a bare wall—the books themselves are fantastic at breaking up sound waves.
- Mount some decorative acoustic panels on the walls. They’re designed for this exact purpose and can actually look really cool.
Also, pay attention to where you place your microphone. Get it close to your mouth and away from your keyboard and mouse to cut down on all those clicks and clacks. A mic with a cardioid pickup pattern is ideal here, as it’s designed to capture sound from directly in front of it while rejecting noise from the sides and back.
Your Comfort Matters, Too
Finally, let’s talk about you. Streaming can involve sitting for hours at a time, and if you’re uncomfortable, it’s going to show. A proper live streaming setup has to be ergonomic, or you risk burnout and pain.
Your chair and your monitor are the two biggest things to get right. Invest in a chair with good lumbar support and make sure your feet can rest flat on the floor. Position your monitor so that the top of the screen is at or just below your eye level. This simple adjustment prevents you from hunching over, saving your neck and back from a world of hurt and letting you focus on what really matters: creating awesome content for your audience.
Your Pre-Stream Checklist for a Flawless Broadcast
Those last few moments before you hit the ‘Go Live’ button are your final chance to hunt down any technical gremlins lurking in your live streaming setup. I can’t stress this enough: a consistent, repeatable pre-flight checklist is the single best way to eliminate nasty surprises and build your confidence so you can focus on your content, not your tech.
Treat the last 15-30 minutes before you go live as a sacred, non-negotiable ritual. This is your time to methodically poke and prod every component, from audio levels to scene transitions. Get this right, and you’ll start every broadcast looking and sounding like a pro.
This quick visual breaks down the core environmental factors we’ve covered. You should be giving these a final once-over during your pre-stream routine.
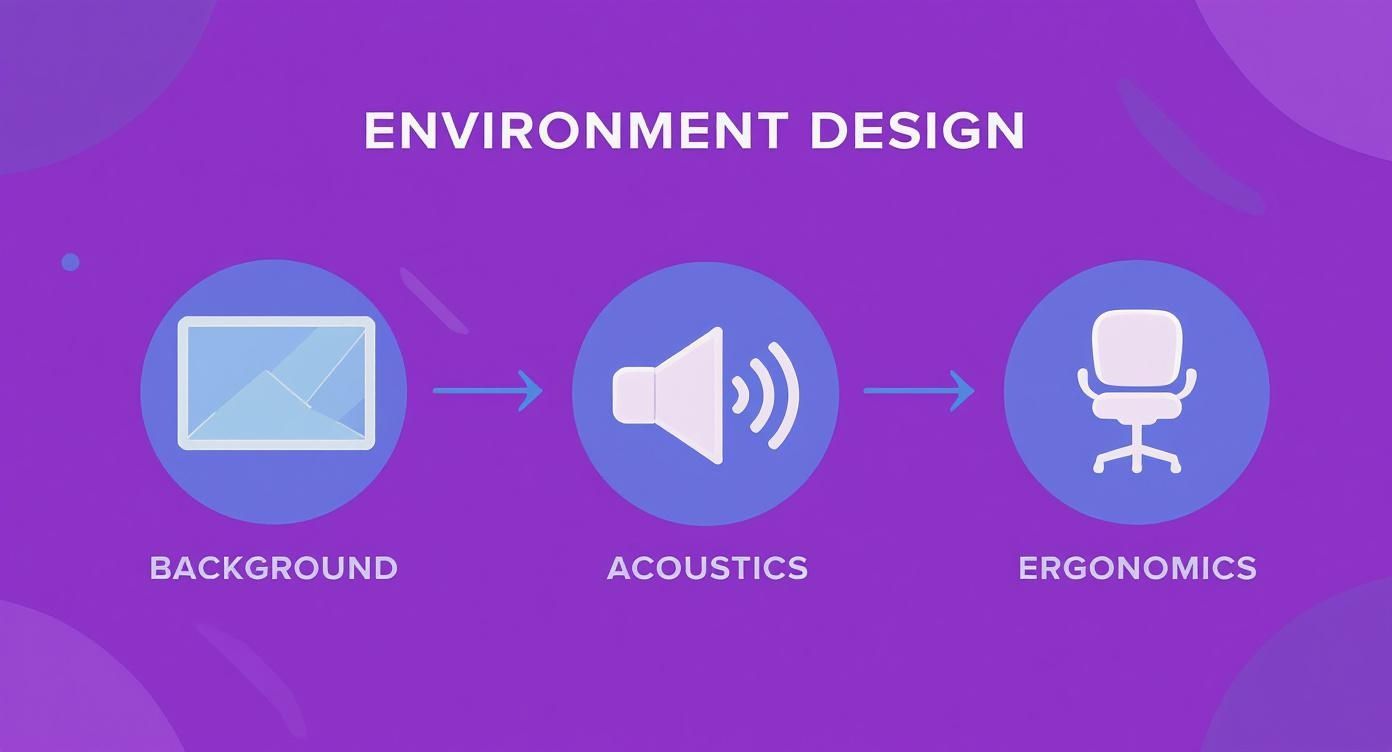
Think of this as the flow from what your audience sees, to what they hear, and finally, to how comfortable you are delivering the content.
The Technical Pre-Flight Check
Before you even think about the show, you have to run through the nuts and bolts. These are the absolute pass/fail items that can completely torpedo a stream if they aren’t dialed in.
- Audio Levels Check: Do a quick soundcheck. Don’t just look at the meter—hit the record button in your software and capture a few seconds of you talking. Listen back. Is your voice peaking into the red? Is it too quiet? Tweak your filters and gain until your voice sits comfortably in the yellow zone. This gives you clear audio without any harsh digital distortion.
- Scene and Transition Verification: This one gets people all the time. Click through every single scene you plan to use during the stream. Do your transitions fire correctly? Are all your sources—webcam, game capture, browser windows, overlays—actually visible and positioned where they should be? A classic mistake is building a new scene and forgetting to add your microphone or camera to it.
- Alerts and Overlays Test: If you’re using a service like Streamlabs or StreamElements, use their built-in testing features. Trigger a test follower, a test subscriber, a test donation. Do the graphics and sounds pop up on screen like they’re supposed to? This little step confirms that the API connection to your streaming platform is alive and well.
- Stream Key and Platform Connection: It sounds basic, but you’d be surprised how often this is the culprit. Double-check that your stream key is correctly pasted into your software and that you’ve selected the right service (e.g., YouTube, Twitch). An old or incorrect key is a guaranteed way to stream to a black screen.
Engaging Your Audience from Minute One
Once the tech is squared away, you can shift your brain to what really matters: your community. How you kick off your stream sets the entire vibe for the next few hours.
A welcoming atmosphere makes all the difference. As people trickle into the chat, greet them by name. I highly recommend using a “Starting Soon” screen with some chill background music and a countdown timer. This builds a little anticipation and gives everyone a chance to settle in before you jump into the main event. It’s also the perfect time to drop a quick reminder about your schedule or tease any special plans for the stream.
A successful live streaming setup is more than just hardware and software; it’s a commitment to a two-way conversation. Your job isn’t just to broadcast—it’s to host a live event. Tools like polls, channel point redemptions, and dedicated Q&A segments are your best friends for building an active, engaged community.
The magic of live content is its interactivity. In fact, over 28.5% of global internet users watch live streams weekly, and this type of content pulls in about 10% more engagement than pre-recorded videos. There’s a reason viewers stick around for an average of 25.4 minutes per session—they get to comment, vote, and feel like they’re part of the show as it unfolds. You can dive deeper into these engagement metrics over on Gyre.pro.
By making this pre-stream checklist a non-negotiable routine, you turn a potentially stressful scramble into a calm, controlled launch. This consistency frees you from worrying about technical failures and lets you pour all that energy into creating an awesome experience for your audience.
Common Questions About Live Streaming Setups
Even with all the right gear, getting into live streaming can feel like you’re trying to solve a puzzle with a million pieces. Technical terms get thrown around, and everyone seems to have a different opinion. It’s totally normal to have questions as you put together your live streaming setup.
We’re going to cut through the noise and tackle the most common questions head-on. My goal is to give you clear, practical answers to help you build a better broadcast, without all the guesswork.
One PC or Two: The Great Debate
This is probably one of the biggest arguments you’ll see online. A single-PC setup is the straightforward, budget-friendly route. One solid machine handles your game, your encoding, and everything in between. For most streamers, especially if you’ve invested in a modern CPU and GPU, this works just fine without a huge hit to performance.
But if you’re serious about performance, a dual-PC setup is the professional standard. One PC is dedicated to nothing but running your game at peak performance. The second machine takes on all the demanding work of encoding and sending your stream out to the world. This setup completely separates the two workloads, so your game never stutters because your stream is working hard.
Key Insight: If you’re a competitive gamer or want to push for the absolute best stream quality without sacrificing a single frame, investing in a two-PC setup is a smart long-term move. For everyone else, a powerful single PC is more than enough to get the job done well.
CPU vs. GPU Encoding: Which Is Better?
This is all about how your computer actually processes the video for your stream. You have two main options: use your processor (CPU, which uses the x264 encoder) or your graphics card (GPU, which uses NVENC for NVIDIA or AMF for AMD).
Years ago, CPU encoding was the king of quality, but it put a massive strain on your processor. Times have changed. Modern GPU encoders, especially NVIDIA’s NVENC, have become incredibly good. They now produce video that looks almost identical to what a CPU can do, but with a tiny fraction of the performance impact.
For the vast majority of streamers today, GPU encoding (NVENC) is the clear winner. It lets your CPU focus on what it does best—running your game—which leads to a much more stable and smooth experience for both you and your viewers.
Which Platform Should I Stream On?
Choosing a home for your stream really comes down to your content and who you’re trying to reach. The old days of Twitch being the only real option for gamers are long gone. The live streaming world has shifted massively.
In Q2 2025, YouTube Live became the giant in the room, pulling in over 50% of all hours watched across major platforms. Meanwhile, a newcomer, Kick, has exploded onto the scene, crossing 1 billion hours watched in a quarter and joining YouTube Live, Twitch, and TikTok Live in the new ‘Big Four’ of global streaming. You can dive deeper into these trends in the full Q2 2025 global report.
A quick breakdown:
- YouTube Live: Amazing for getting discovered. Its search and VOD features are second to none.
- Twitch: Still the heart of many dedicated gaming communities, with great monetization tools for partners.
- Kick: Turning heads with its very generous revenue split, attracting creators focused on monetization.
- TikTok Live: The go-to for vertical, mobile-first content and connecting with a younger, super-engaged audience.
Why Is My Stream Buffering or Lagging?
Ah, the dreaded buffering wheel. Lag and buffering are the ultimate stream killers, and they almost always circle back to your network. The most common culprit is an unstable internet connection or trying to push a bitrate that’s too high for your upload speed.
First things first: a wired ethernet connection isn’t a suggestion, it’s a requirement for a stable stream. If you’re still hitting snags, it’s time to dig into your network and encoder settings. To finally squash this frustrating issue, take a look at our detailed guide on how to stop buffering when streaming.
FAQ Quick Answers
To make things even easier, here’s a quick summary of the most common questions and my direct recommendations.
| Question | Core Recommendation | Key Consideration |
|---|---|---|
| One or Two PCs? | Start with one powerful PC. | Upgrade to two PCs for competitive gaming or max quality. |
| CPU or GPU Encoding? | Use GPU (NVENC) for 99% of cases. | It offers the best balance of quality and performance. |
| Best Platform? | It depends on your audience. | YouTube for discovery, Twitch for gaming community, Kick for money. |
| Why is my stream laggy? | Check your internet upload speed and bitrate. | A wired connection is essential for stability. |
Hopefully, these answers clear up some of the biggest hurdles you might face when setting up your stream.
At LiveAPI, we build the powerful infrastructure that developers use to create incredible, scalable video applications. Stop worrying about the complexities of encoding and delivery and focus on what you do best: building amazing user experiences. Start building with LiveAPI today.