A DVR for streaming video puts viewers in the driver’s seat, letting them pause, rewind, and replay live events just like they would with a traditional cable box. This isn’t happening on a physical device in their home, though. It’s all done in the cloud, where the live stream is recorded on remote servers. This “cloud DVR” technology makes the content instantly available on any device, and frankly, it’s become a non-negotiable feature for any serious streaming service.
Why Cloud DVR Is a Must-Have for Modern Streaming
The era of appointment television—where everyone had to tune in at the exact same time—is long gone. Today’s viewers expect flexibility. They want to shape their “live” experience into something that fits their schedule, turning a broadcast into an interactive, on-demand session. Cloud DVR is the engine that powers this shift.
The numbers back this up. Back in May 2025, streaming video hit a massive milestone, capturing 44.8% of all television viewership in the United States. According to the full viewership report on Nielsen.com, this was the first time streaming’s share officially surpassed broadcast and cable TV combined. This wasn’t an accident; it was driven by platforms that put user-centric features like DVR front and center.
It’s All About Viewer Engagement and Control
The real magic of cloud DVR is the power it hands to the audience. Imagine a fan tuning into a live soccer match a few minutes late. With DVR, they can hit a “start-over” button and catch the game from the opening kickoff. Did they miss a game-winning goal? No problem—they can rewind and see it again. This isn’t a luxury anymore; it’s a baseline expectation.
For streaming platforms, baking this functionality into your service delivers some serious wins:
- Keeps Viewers Around Longer: When users can mold their viewing experience to their liking, they naturally spend more time on your platform.
- Boosts Viewer Retention: Features like pausing a live show to grab a snack or saving it for later make your service feel essential, which helps keep churn low.
- Gives You a Competitive Edge: A smooth, reliable DVR experience can be the very thing that makes a viewer choose your service over a competitor with a bare-bones live feed.
A well-built cloud DVR isn’t just another feature on a list. It’s a fundamental part of a modern streaming strategy that shows you respect your viewers’ time and how they want to watch.
Key DVR Concepts at a Glance
Before we dive into the technical side, it’s helpful to understand the core concepts that make cloud DVR work. These terms pop up all the time when you’re building out a streaming pipeline.
| Concept | Description | Primary Benefit |
|---|---|---|
| Time-Shifted Playback | The ability for viewers to pause, rewind, and fast-forward a live stream that is currently in progress. | Gives users immediate control over the live viewing experience. |
| Retention Window | The specific duration (e.g., 4 hours, 7 days) for which the recorded live content is stored and available. | Balances user convenience with storage costs and content rights. |
| Start-Over Function | A feature allowing viewers who join mid-stream to begin watching from the very beginning of the event. | Prevents viewers from missing crucial opening moments. |
| Catch-Up TV | Allows users to watch previously aired programs for a set period after the original broadcast has ended. | Provides a library of recent content without requiring manual recording. |
These features work together to create the seamless, on-demand feel that viewers now expect from live content.
Modern tools like LiveAPI have made what was once a monumental engineering task much more straightforward. By using a powerful API, developers can enable full DVR capabilities without having to build and manage the complex recording and storage infrastructure themselves. It’s all handled in the cloud, giving you reliability and the ability to scale. Of course, this is all backed by a solid delivery network—choosing the best CDN for video streaming is crucial for getting that content to your viewers without a hitch.
Getting Your Live Stream Ready for DVR
Before you can even think about offering DVR for your video streams, you have to get the technical foundation right. This is your pre-flight check. Getting these core pieces in place first is what makes sure time-shifting features like pausing and rewinding actually work for your viewers. It all starts with a stable video source and a properly configured encoder.
Your encoder is really the workhorse of your live stream, taking your raw camera feed and packaging it up for its journey across the internet. For DVR to work, the encoder has to be set up to produce segmented streams like HLS (HTTP Live Streaming) or DASH (Dynamic Adaptive Streaming over HTTP). These protocols are key because they break the video into small, manageable chunks, which is the magic that makes rewinding possible.
Dialing in Your Encoder Settings
The specific settings you choose in your encoder directly affect the quality and reliability of your DVR playback. It’s not just a matter of hitting a “start stream” button; you need to be deliberate about a few critical parameters.
Here’s what I always tell people to focus on:
- Keyframe Interval: A keyframe is a complete video frame. Think of it as a reference point. You need to set a consistent keyframe interval—2 seconds is the industry standard and for good reason. This creates predictable entry points in the stream, letting the player jump to a specific moment in the DVR timeline without a long wait.
- Segment Duration: This is how long each of those video chunks is. A good range is usually between 2 to 6 seconds. Shorter segments can lower your latency, but they can also add a bit of overhead. Longer ones might delay playback startup. From my experience, a 4-second segment duration is a great sweet spot for most live events.
- Ingest Protocol: You need a rock-solid way to get your stream from the encoder to the cloud. The Real-Time Messaging Protocol (RTMP) has been the go-to for this first-mile delivery for years. If you’re not familiar with it, our guide on what is the RTMP protocol breaks down how it works and why it’s so trusted for live stream ingest.
Pro Tip: Nailing your encoder settings from the get-go is the single most important thing you can do to prevent a frustrating viewer experience. An inconsistent keyframe interval, for instance, is a classic cause of buffering and stuttering when people try to scrub through the timeline.
A Practical Configuration Example
Let’s put this into a real-world context. Say you’re streaming a live panel discussion. A viewer tunes in 30 minutes late and wants to rewind to catch the introduction. For that to happen smoothly, your encoder needs a solid profile.
Here’s a configuration I’d use for that exact scenario:
- Resolution & Bitrate: 1080p at a 4500 Kbps bitrate for crisp, clear video.
- Keyframe Interval: A strict 2-second interval. No exceptions.
- Segment Duration: Set to 4 seconds.
- Protocol: RTMP ingest pointing to your LiveAPI endpoint.
This setup ensures that when your viewer hits rewind, the player can instantly find the nearest keyframe within a 4-second chunk and start playing back immediately. By building this strong foundation first, you’re setting yourself up for a successful and reliable DVR implementation before you write a single line of code.
Getting Your Cloud DVR Up and Running
Alright, with your stream’s foundation in place, let’s get to the fun part: flipping the switch on your cloud DVR. If you’re using a platform like LiveAPI, what used to be a complicated setup is now just a single, clean API call. No more guesswork. I’ll walk you through exactly how it’s done.
The heart of enabling your DVR for streaming video is simply telling the API two things: “start recording” and “how long should you keep it?” This is all handled through a key parameter in your API request: retention_window_seconds.
Nailing the Retention Window
This one value is the cornerstone of your entire DVR experience. It sets the length of your time-shifted buffer, telling the system how much of the live stream to hold onto for playback. Getting this right is a delicate dance between giving your viewers a great experience and managing your storage costs.
Let’s think through a couple of real-world situations:
- Live Concert (4-Hour Window): Imagine a three-hour concert. A four-hour retention window (14400 seconds) is the sweet spot. Anyone who joins late can easily rewind to the beginning, but you’re not paying to store hours of dead air after the show wraps up.
- Weekend Conference (72-Hour Window): For a bigger, multi-day event like a tech conference, a 72-hour window (259200 seconds) makes a lot more sense. This lets attendees jump back and re-watch sessions from previous days, which adds a ton of value to their virtual ticket.
This whole process—from choosing a service to setting that window—is the first crucial step before your stream even goes live.
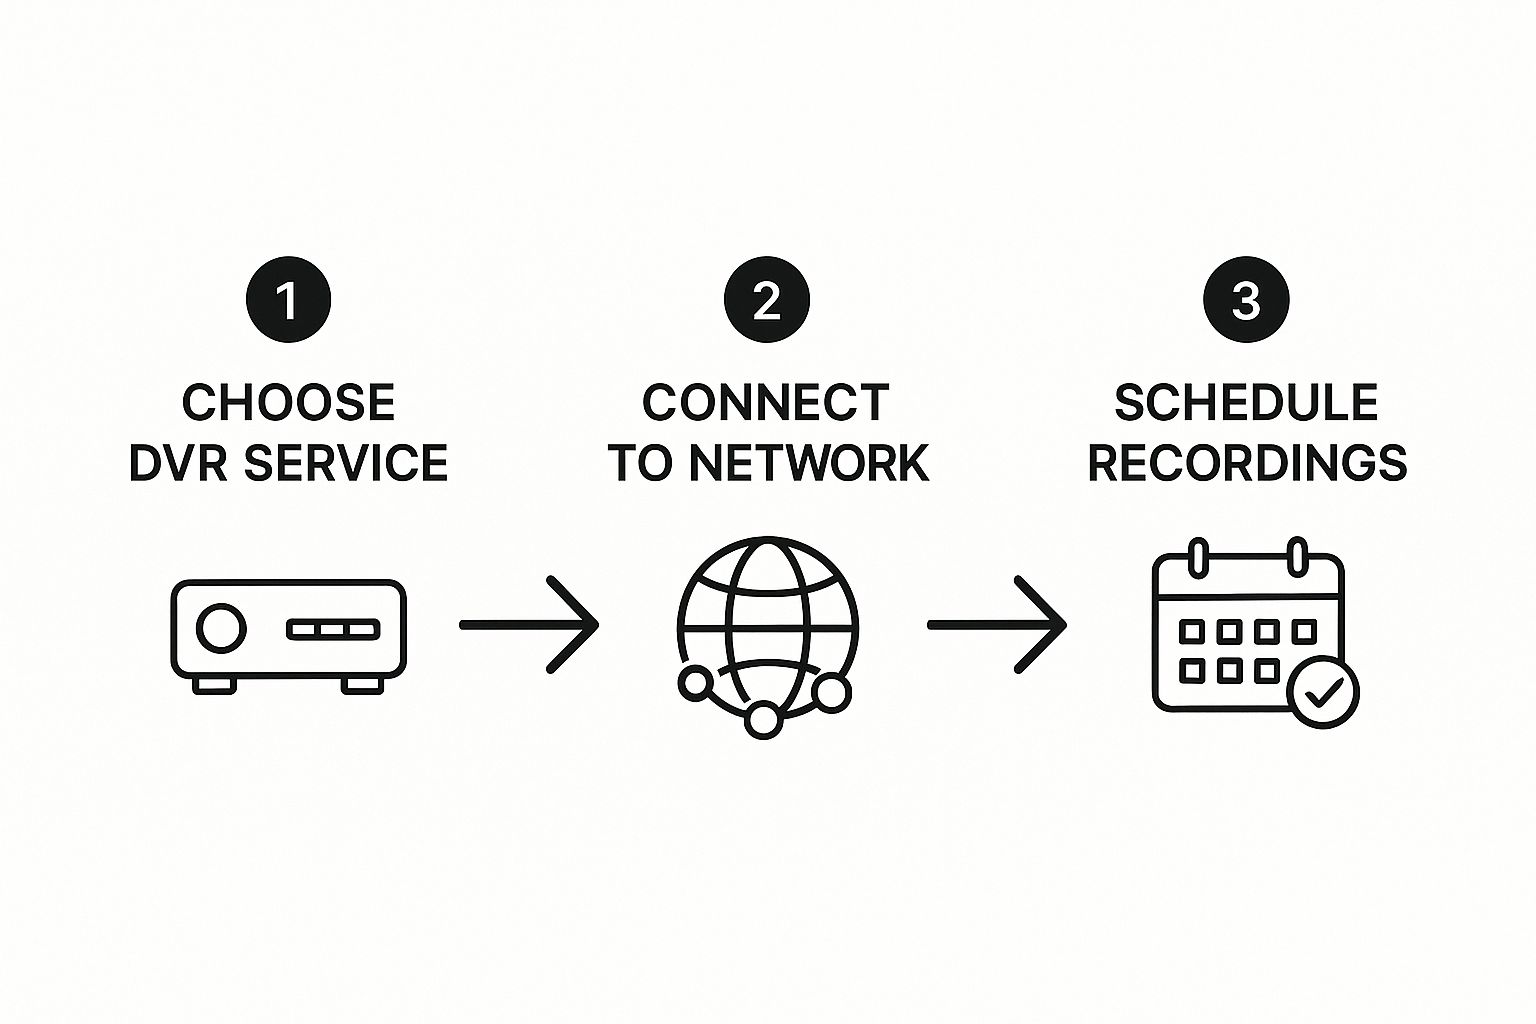
As you can see, thinking about retention isn’t an afterthought; it’s part of the initial planning.
Making the API Call
Here’s a practical cURL example of how you’d enable DVR on an existing live stream. Pay close attention to how we define the retention_window_seconds.
curl -X PATCH “https://api.liveapi.com/v1/streams/your_stream_id”
-H “Authorization: Bearer YOUR_API_KEY”
-H “Content-Type: application/json”
-d ‘{ “dvr”: { “enabled”: true, “retention_window_seconds”: 14400 } }’
This request targets a specific stream by its ID and simply updates its configuration. In this case, we’re enabling DVR with a 4-hour (14,400 seconds) window. It’s that straightforward.
This magic is made possible by the underlying streaming protocols, especially HLS, which breaks the video into small chunks perfect for recording and playback. If you want to get into the weeds on how that works, our guide on what HTTP Live Streaming is is a great place to start.
Key Takeaway: A successful API call is your green light. The backend immediately starts archiving your stream segments, making them available for time-shifted playback right away. You don’t have to wait—the DVR is active the moment your stream is live.
When you send that request, you’ll get a confirmation back from the API. A 200 OK response will include a JSON object showing your new settings, like "enabled": true and your chosen retention window. This is your proof that everything is working and your viewers are all set for a much more flexible live experience.
Features like this are no longer a “nice-to-have.” They’re essential. In fact, North America held the largest global video streaming revenue share at 31.3% in 2024, driven in part by the widespread adoption of these powerful, user-focused features.
Generating Time-Shifted Playback URLs
So, you’ve got your DVR active and recording. What now? The whole point is to give your viewers access to that archived content, and this is where the magic really happens. We’re not talking about creating a separate VOD asset; instead, you’ll be adding simple parameters to your standard live playback URL.
This is a far more elegant and efficient way to handle time-shifted viewing. You’re simply telling the player where to start watching within the continuous recording. This technique is the backbone of popular features like “start-over” functionality or creating a scrubbable timeline that lets people jump back to any point inside your retention window.
Pinpointing a Specific Start Time
The most precise way to control playback is by telling the player the exact moment to start. You can do this by adding the utc_start_time parameter to your HLS or DASH manifest URL. The key here is that the value must be a Unix timestamp in UTC. Using UTC is non-negotiable—it ensures every viewer, no matter their time zone, starts at the correct, globally synchronized moment.
For instance, if your event began at 4:30 PM UTC on October 14, 2024, you’d find its Unix timestamp, which is 1728865800.
Your playback URL would then look like this: https://your-stream-url.m3u8?utc_start_time=1728865800
This is the perfect way to implement a “start-over” button. Your app just needs to grab the Unix timestamp when the stream first went live. When a viewer clicks that button, you generate this URL on the fly and feed it to their player. Simple.
Jumping Back from the Live Edge
Sometimes, absolute precision isn’t necessary. A viewer might just want to quickly jump back to catch something they missed. For that, the playback_offset parameter is your best friend. It tells the player to start streaming from a point a certain number of seconds before the live broadcast.
This is incredibly useful for building quick-rewind or “jump back” features right into your player UI.
- Want a 10-second rewind button? Just append
?playback_offset=10to the URL. - Need to jump back 5 minutes? That’s
?playback_offset=300.
This approach is much simpler than constantly calculating timestamps, especially for user actions that are relative to what’s happening right now. If a viewer misses a critical moment in a sports game, they can hit a “rewind 30s” button without your application needing to do any complex time math.
Once you get comfortable with these two query parameters—
utc_start_timefor absolute time andplayback_offsetfor relative time—you have complete control over the DVR timeline. It’s all you need to build a rich, interactive player that lets viewers watch how they want.
Putting It All Together: HLS and DASH Examples
Let’s walk through a real-world scenario. Your live stream has been running for an hour, and you’ve set a four-hour retention window.
Here’s how you could generate different playback URLs for that single stream:
| Desired Feature | Parameter to Use | Example URL Suffix | Common Use Case |
|---|---|---|---|
| Watch Live | (None) | .../playlist.m3u8 |
The standard, up-to-the-second live experience. |
| Start Over | utc_start_time |
?utc_start_time=1728862200 |
Takes the viewer to the very beginning of the broadcast. |
| Rewind 30s | playback_offset |
?playback_offset=30 |
Powers an “instant replay” button in your player. |
| Join 15 Min Late | playback_offset |
?playback_offset=900 |
Starts a latecomer 15 minutes behind the live action. |
These small URL modifications are the fundamental building blocks for a professional DVR experience. They empower developers to create sophisticated playback controls with surprisingly little effort, letting the cloud DVR infrastructure do all the heavy lifting.
Optimizing Your DVR Strategy and Costs
Running a DVR-enabled service at scale is about more than just flipping a switch. You’re constantly walking a tightrope, trying to balance a fantastic user experience with operational costs that don’t spiral out of control. Your retention window is the biggest lever you can pull here, as every extra hour of stored video adds directly to your cloud storage bill.
This is where a content-aware approach really pays off. Let’s be honest: not every stream needs the same retention period. A short, one-time product launch might only need a 24-hour lookback, while a 24/7 news stream could be much more valuable with a rolling 7-day archive. Thinking through these details is the first real step toward building a smart, cost-effective DVR for your streaming video service.
Tailoring Retention Windows for Different Content
If you want to make a serious dent in your storage costs, you need to think strategically about your retention windows. The simple trick is to match the window’s length to how long the content stays relevant.
A great way to start is by bucketing your live streams:
- Short-Term Events: Think sports games, concerts, or live Q&A sessions. A window of 4 to 24 hours is usually plenty. It gives viewers enough time to catch up but avoids storing content that loses its value almost immediately.
- Episodic Content: For things like a weekly web series, a 7-day window just makes sense. Viewers can easily catch up on the latest episode before the next one airs, which is exactly the kind of experience they expect from a modern catch-up service.
- Always-On Streams: For continuous channels like news or weather, a longer window of 72 hours to 7 days can be a killer feature, allowing people to scrub back through recent coverage to find what they missed.
Getting this right is a big deal in a competitive space. The global video streaming market was valued between $130 billion and $674 billion in 2024 and is on a trajectory to hit as high as $866 billion by 2030. Industry research shows this growth is tightly linked to the adoption of advanced features like cloud DVR, making optimization a key to staying profitable. You can dig into some of these market projections on grandviewresearch.com.
Pro Tip: Please, don’t set a single, universal retention policy for your entire platform. Your best tool for managing costs without degrading the user experience is to use your API to dynamically configure the
retention_window_secondsfor each individual stream. That kind of granular control is a game-changer.
To help visualize this, let’s compare a few common strategies and see where they shine.
Retention Window Strategy Comparison
| Retention Window | Ideal Use Case | User Experience Benefit | Storage Cost Impact |
|---|---|---|---|
| 4-24 Hours | Live sports, concerts, breaking news events | Allows immediate catch-up for those who missed the live broadcast. | Low. Ideal for content with a short shelf-life. |
| 72 Hours (3 Days) | Continuous news channels, multi-day conferences | Viewers can rewind through recent events over a long weekend. | Medium. A good balance for always-on content. |
| 7 Days | Weekly episodic shows, web series | Creates a “catch-up TV” feel, encouraging weekly tune-in. | High. Best reserved for premium or high-engagement content. |
| 30+ Days | Premium subscription channels | Offers a deep archive, acting as a major selling point for subscribers. | Very High. Requires significant storage and a clear business case. |
Ultimately, a blended approach is often the most effective. By applying different windows to different content tiers, you can offer a premium experience where it counts and save money where it doesn’t.
From DVR Archive to Permanent VOD
Your DVR archive isn’t just a temporary buffer—it’s a goldmine of potential content. With a simple API call, you can slice up segments of your recorded stream and turn them into permanent Video-on-Demand (VOD) assets. This is absolutely perfect for saving highlights, creating full-length replays, or clipping out memorable moments to share on social media.
The process is straightforward: you just specify the start and end timestamps from within the DVR window, and the API generates a new, standalone file. For instance, after a three-hour live event, you could programmatically create:
- A 10-minute highlight reel from the most exciting parts.
- The full three-hour event replay for anyone who wants to watch it later.
- Several 30-second clips to push out to your marketing channels.
By turning your DVR into a content creation engine, you squeeze every last drop of value out of your live streams. This not only beefs up your VOD library but also gives your content team a powerful, automated workflow. You end up with a reliable and feature-rich DVR for streaming video that practically pays for itself.
Common Questions About Implementing DVR
Even with the best documentation, adding a feature like DVR to your live streams often brings up a few practical questions. Over the years, I’ve seen developers run into the same handful of concerns about how it works, what it costs, and what you can really do with it. Let’s walk through some of the most common ones.
What’s the Real Difference Between Cloud DVR and Local DVR?
The main distinction here is simple: where does the video actually live? A local DVR is what you’d find in an old-school cable box. It’s a physical hard drive inside the device that records content, which means storage is limited and you can only watch it on that specific box.
A cloud DVR, on the other hand, records your live stream to remote servers managed by your streaming provider. This is a game-changer. Viewers don’t need any special hardware, and they can access the recordings from pretty much any device with an internet connection. For any modern streaming service aiming for scale, cloud DVR is the only way to go.
Cloud DVR completely decouples the recording from the viewer’s device. This is what gives you a massively flexible and scalable way to deliver time-shifted content, powering features like “start-over TV” or “catch-up” across all your apps at once.
How Does the Retention Window Impact My Bill?
Your retention window is the single biggest knob you can turn to control your DVR storage costs. This is simply the length of time your stream is kept available for playback.
Think of it this way: a seven-day window is fantastic for viewers who want to catch up on a whole week of content, but it means you’re archiving a lot more video data, which directly translates to higher cloud storage fees. A much shorter window, maybe just four hours for a live concert, dramatically cuts those costs but limits how far back someone can rewind. Finding the right balance is always a strategic call between the user experience you’re aiming for and the budget you have to work with.
Can I Snip VOD Clips Out of My DVR Archive?
Yes, and this is where things get really powerful. A good DVR system isn’t just for live playback; it’s also a content factory. Most modern streaming platforms, including LiveAPI, let you programmatically create permanent Video-on-Demand (VOD) assets from segments of your DVR archive.
This opens up a ton of possibilities:
- Saving highlights: Instantly clip out the best moments from a live sports broadcast.
- Creating full replays: Convert an entire two-hour webinar into a VOD asset for later viewing.
- Generating social media content: Quickly snip short, engaging moments to share online.
The workflow is usually straightforward. You make an API call with the start and end timestamps from a segment within your active DVR window, and the system generates a brand new, standalone video file for your VOD library.
Ready to add powerful, scalable DVR functionality to your live streams? With LiveAPI, you can enable cloud DVR with a single API call, giving your viewers the control they expect. Start building with LiveAPI today.