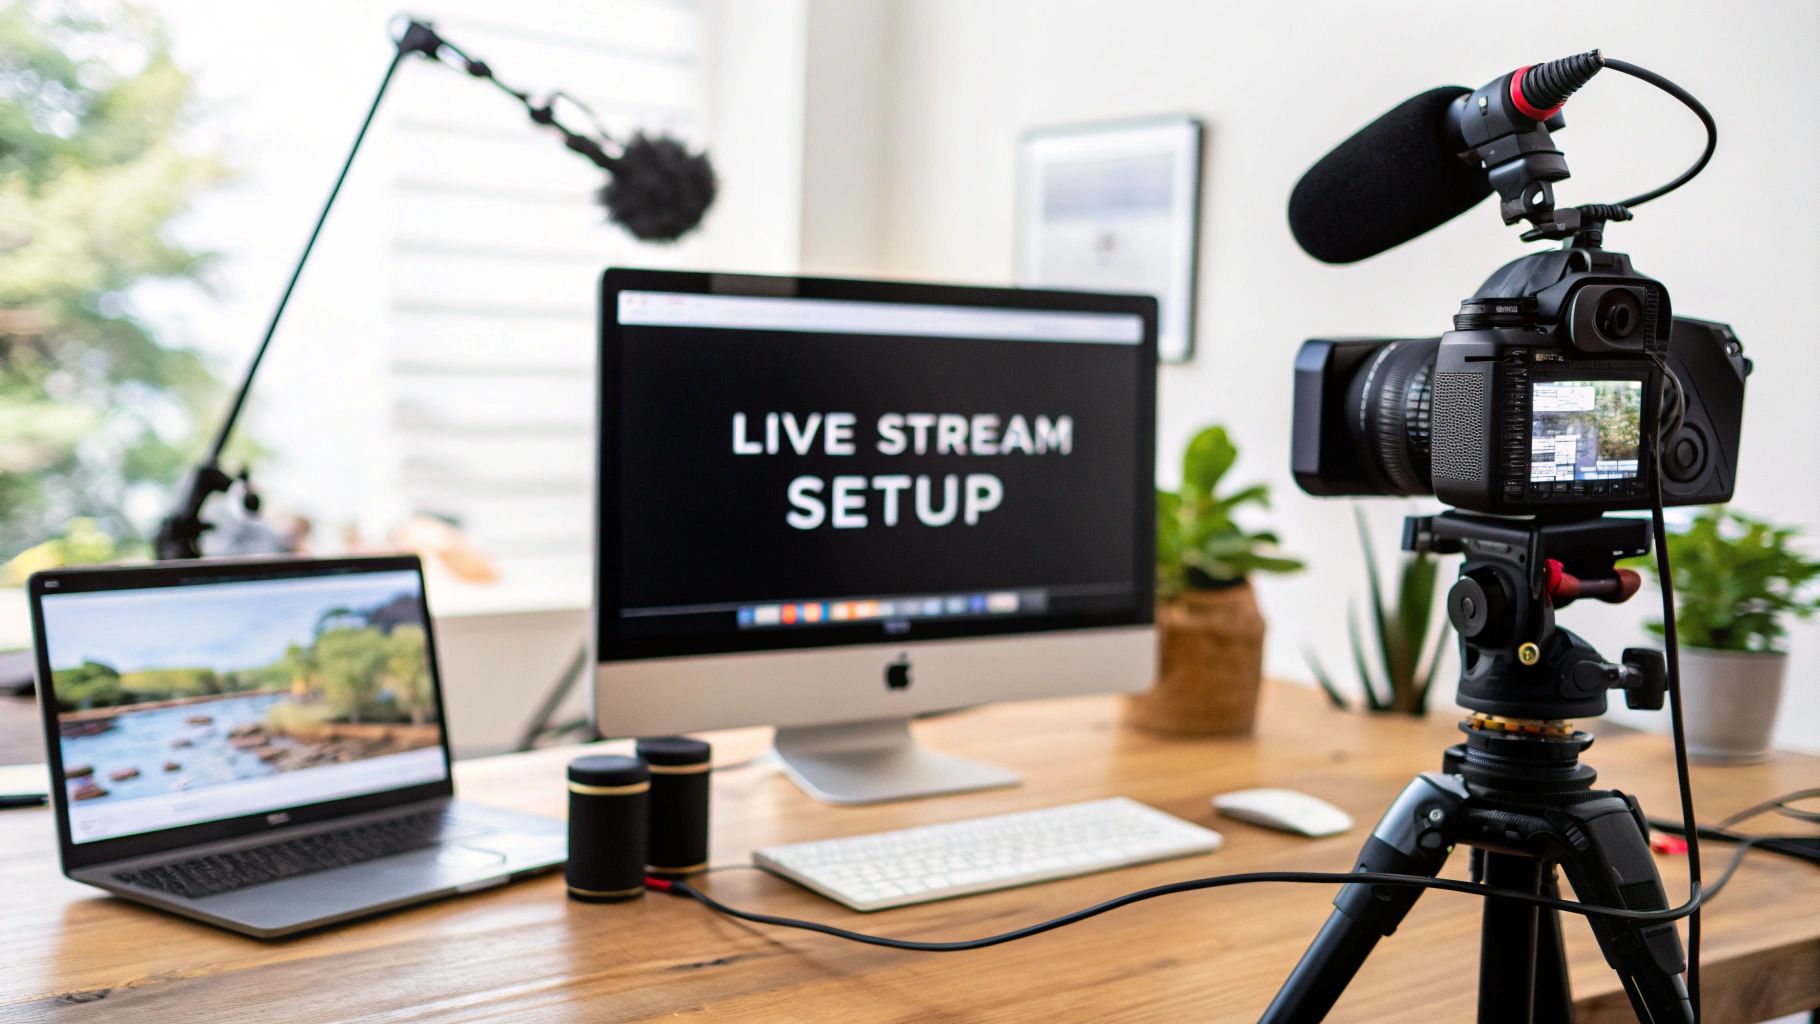
Welcome to your definitive guide for creating the best setup for streaming. In today’s competitive landscape, professional-grade quality isn’t just a luxury, it’s a necessity. A high-quality stream immediately builds credibility and captures audience attention, setting you apart from the vast sea of content creators and businesses vying for engagement. The right combination of hardware and software can transform your broadcast from amateur to authoritative.
This roundup cuts through the noise, offering a curated selection of 10 essential components that form the backbone of a successful broadcast. We have assembled a comprehensive list that caters to various needs and budgets, ensuring you can find the perfect fit. Whether you’re a developer demonstrating a new API, a media company producing live events, or a gamer building a community, the tools you use directly impact your message’s effectiveness.
We will explore everything from crystal-clear audio with microphones like the Audio-Technica AT2020USB+ to DSLR-quality video using a Sony Alpha a6000 series camera. You’ll learn how to integrate these components seamlessly with powerful software like OBS Studio and control your entire production with tools like the Elgato Stream Deck. This article provides more than just a list; it delivers actionable insights and specific implementation details for each piece of gear.
Get ready to build a streaming setup that not only looks and sounds incredible but also streamlines your workflow, allowing you to focus on what truly matters: delivering exceptional content. Let’s dive into the components that will unlock your ultimate broadcast.
1. The Strategic Upgrade: Sony Alpha a6000 Series Camera
When you’re ready to elevate your stream beyond the limitations of a standard webcam, the Sony Alpha a6000 series is a game-changing step. This lineup of mirrorless cameras, including the a6000, a6100, a6400, and a6600, provides a significant leap in video quality without the prohibitive cost of high-end cinema cameras. Its core strength lies in combining a large APS-C sensor with interchangeable lenses, delivering a sharp, cinematic look with a shallow depth of field that makes you stand out from the background.
This camera series is a cornerstone of a professional best setup for streaming because it provides a clean HDMI output. This feature allows you to send a video signal to your capture card without any of the on-screen display information (like battery life or settings), ensuring a polished, broadcast-ready feed for your audience.
Why It’s a Top Choice for Streamers
The a6000 series is exceptionally versatile. Tech reviewers on YouTube rely on its sharp autofocus and clarity for detailed product showcases. IRL (In-Real-Life) streamers favor its compact size and excellent image quality for on-the-go broadcasting. Even in corporate settings, it’s used to give executives a professional, high-quality appearance during webinars and virtual keynotes, far surpassing any integrated laptop camera.
Actionable Tips for Implementation
To get the most out of your a6000 series camera for streaming, follow these key steps:
- Ensure Continuous Power: Long streams will drain standard batteries quickly. Invest in a “dummy battery,” an AC power adapter that fits into the battery compartment, to provide uninterrupted power.
- Choose the Right Lens: While the kit lens is a good start, a prime lens with a wide aperture (like f/1.8) will dramatically improve low-light performance and create a more professional-looking blurred background (bokeh).
- Lock in Your Focus: Use manual focus to prevent the camera from “hunting” or refocusing during your stream. Find your ideal focal point and lock it in for a consistent, sharp image.
- Configure Clean HDMI Output: Before going live, navigate to the camera’s setup menu. Find the HDMI settings and ensure “HDMI Info Display” is turned off. This guarantees your stream only shows the clean video feed.
2. OBS Studio (Open Broadcaster Software)
At the heart of nearly every professional broadcast is a powerful software encoder, and OBS Studio is the undisputed industry standard. This free, open-source application is the central nervous system for your stream, allowing you to combine video sources, audio inputs, graphics, and more into a single, polished output. Its power lies in its limitless customization, giving you complete creative control over your broadcast’s look and feel.
OBS Studio is an essential component of the best setup for streaming because it handles the critical task of encoding your video feed into a format suitable for platforms like Twitch, YouTube, or a custom RTMP server. It provides professional-grade features like real-time video/audio mixing, unlimited scene creation, and robust configuration options, all without any cost.
Why It’s a Top Choice for Streamers
The versatility of OBS Studio is unmatched. It’s the go-to software for the vast majority of top-tier gamers and content creators for its stability and extensive plugin support. Educational institutions have widely adopted it for creating dynamic remote learning environments and virtual lectures. Similarly, corporations rely on OBS to produce high-quality webinars and professional virtual events that go far beyond a simple screen share, incorporating multiple camera angles, lower-thirds, and branded overlays.
Actionable Tips for Implementation
To harness the full potential of OBS Studio, integrate these practices into your workflow:
- Organize with Scene Collections: Create separate scene collections for different types of content (e.g., gaming, interviews, tutorials). This keeps your workspace clean and allows you to switch between complex layouts with a single click.
- Leverage Filters for Polish: Use built-in audio filters like noise suppression and compressors to dramatically improve your microphone quality. Apply video filters like color correction to match cameras or add a specific mood to your stream.
- Master Hotkeys for Efficiency: Configure keyboard shortcuts (hotkeys) for essential actions like switching scenes, muting your mic, or starting/stopping your stream. This allows for seamless, professional control without fumbling with your mouse.
- Use the Studio Mode: Enable Studio Mode to preview changes to a scene before pushing it live to your audience. This feature is invaluable for preventing on-air mistakes and ensuring smooth transitions. You can learn more about how to stream live video and integrate these advanced techniques.
3. Audio-Technica AT2020USB+ Microphone
Your stream’s audio is just as crucial as its video, and the Audio-Technica AT2020USB+ microphone delivers studio-quality sound with plug-and-play simplicity. This professional-grade condenser mic captures crisp, clear vocals that instantly elevate your production value. It plugs directly into your computer via USB, bypassing the need for complex audio interfaces and making it a cornerstone for a streamlined yet powerful best setup for streaming. Its high-quality analog-to-digital converter ensures your voice is reproduced with exceptional fidelity.

This microphone is a popular choice because it offers the clarity of Audio-Technica’s renowned studio mics in a user-friendly package. The built-in headphone jack with volume control allows for zero-latency monitoring, so you can hear your audio in real time without any distracting delay.
Why It’s a Top Choice for Streamers
The AT2020USB+ is a workhorse across various content creation fields. Professional podcasters and voice-over artists rely on it for its rich, articulate sound in home studio environments. Music streamers favor its ability to capture vocal performances with warmth and detail. Its blend of professional performance and accessible setup makes it an industry standard for creators who demand pristine audio quality without a steep technical learning curve.
Actionable Tips for Implementation
To maximize the performance of your AT2020USB+ and achieve broadcast-quality sound, follow these steps:
- Optimal Positioning: Place the microphone 6 to 12 inches from your mouth and slightly off-axis to avoid direct breath sounds. This proximity captures the full richness of your voice.
- Invest in a Boom Arm: A quality boom arm isolates the microphone from desk vibrations and handling noise, ensuring a clean audio signal. It also allows for perfect positioning.
- Use a Pop Filter: Attach a pop filter in front of the microphone to eliminate “plosives,” the harsh popping sounds created by letters like ‘p’ and ‘b’.
- Set Your Levels Correctly: Adjust the input gain on your computer or in your streaming software so your audio peaks around -6dB to -12dB. This prevents “clipping” (distortion) while maintaining a strong signal. For complex setups, you may need to learn how to merge audio sources effectively.
4. The Strategic Upgrade: Sony Alpha a6000 Series Camera
When you’re ready to elevate your stream beyond the limitations of a standard webcam, the Sony Alpha a6000 series is a game-changing step. This lineup of mirrorless cameras, including the a6000, a6100, a6400, and a6600, provides a significant leap in video quality without the prohibitive cost of high-end cinema cameras. Its core strength lies in combining a large APS-C sensor with interchangeable lenses, delivering a sharp, cinematic look with a shallow depth of field that makes you stand out from the background.
This camera series is a cornerstone of a professional best setup for streaming because it provides a clean HDMI output. This feature allows you to send a video signal to your capture card without any of the on-screen display information (like battery life or settings), ensuring a polished, broadcast-ready feed for your audience.
Why It’s a Top Choice for Streamers
The a6000 series is exceptionally versatile. Tech reviewers on YouTube rely on its sharp autofocus and clarity for detailed product showcases. IRL (In-Real-Life) streamers favor its compact size and excellent image quality for on-the-go broadcasting. Even in corporate settings, it’s used to give executives a professional, high-quality appearance during webinars and virtual keynotes, far surpassing any integrated laptop camera.
Actionable Tips for Implementation
To get the most out of your a6000 series camera for streaming, follow these key steps:
- Ensure Continuous Power: Long streams will drain standard batteries quickly. Invest in a “dummy battery,” an AC power adapter that fits into the battery compartment, to provide uninterrupted power.
- Choose the Right Lens: While the kit lens is a good start, a prime lens with a wide aperture (like f/1.8) will dramatically improve low-light performance and create a more professional-looking blurred background (bokeh).
- Lock in Your Focus: Use manual focus to prevent the camera from “hunting” or refocusing during your stream. Find your ideal focal point and lock it in for a consistent, sharp image.
- Configure Clean HDMI Output: Before going live, navigate to the camera’s setup menu. Find the HDMI settings and ensure “HDMI Info Display” is turned off. This guarantees your stream only shows the clean video feed.
5. The Go-To Audio Workhorse: Blue Yeti USB Microphone
When it comes to crystal-clear audio, the Blue Yeti USB Microphone is an undisputed icon in the streaming world. For years, it has been the entry point for creators moving beyond headset mics, offering broadcast-quality sound with a simple plug-and-play USB connection. Its legendary status is built on a foundation of reliability, versatility, and studio-grade performance that democratized professional audio for everyone.
The Blue Yeti is a crucial component of any best setup for streaming because it delivers exceptional clarity and richness to your voice. Its multiple polar patterns (cardioid, bidirectional, omnidirectional, and stereo) allow it to adapt to various recording scenarios, from solo commentary to multi-person interviews, making it a flexible tool that grows with your content needs.
Why It’s a Top Choice for Streamers
The Yeti’s appeal is universal. Gaming streamers favor it for its ability to capture their voice with precision while minimizing keyboard and mouse clicks when set up correctly. Podcast creators, from beginners to seasoned professionals, rely on its consistent, warm vocal reproduction. Even high-profile creators like PewDiePie built their early empires using the Yeti, proving its capability to power top-tier content without a complex audio interface.
Actionable Tips for Implementation
To unlock the full potential of your Blue Yeti and achieve professional-sounding audio, follow these essential steps:
- Select Cardioid Mode: For solo streaming, always use the cardioid pattern (the heart-shaped symbol). This setting captures sound directly in front of the mic while rejecting noise from the sides and rear, isolating your voice effectively.
- Speak Into the Side: A common mistake is speaking into the top of the Yeti. It’s a side-address microphone, so position it vertically and speak into the front face (the side with the Blue logo) for the best sound quality.
- Invest in a Boom Arm: Mounting the Yeti on a boom arm with a shock mount isolates it from desk vibrations and allows you to position it perfectly near your mouth. This drastically improves audio quality by reducing bumps and background rumble.
- Manage Your Gain: Start with the gain dial set low and gradually increase it until your voice peaks at a healthy level (around -12dB to -6dB in your software). Setting it too high will introduce hiss and pick up unwanted room noise.
6. The Essential Bridge: Elgato Cam Link 4K
Once you have a high-quality camera, the Elgato Cam Link 4K is the essential device that bridges the gap between your professional camera and your computer. This compact capture device allows you to easily connect a DSLR, mirrorless camera, or camcorder to your PC or Mac, transforming it into a powerhouse webcam. It simplifies the process, making broadcast-quality video accessible without requiring a complex, multi-component setup.
The Cam Link 4K is a critical component of the best setup for streaming because it captures your camera’s clean HDMI signal and sends it directly to your software via USB. This plug-and-play functionality means your computer recognizes your high-end camera just as it would a standard webcam, allowing for seamless integration with OBS, Streamlabs, Zoom, and other platforms. It takes raw, uncompressed video and makes it instantly usable for your stream. For a deeper understanding of how this video data is processed for different platforms, you can learn more about video transcoding.
Why It’s a Top Choice for Streamers
The Cam Link 4K is a favorite among top-tier creators and professionals for its reliability and simplicity. Tech reviewers like MKBHD rely on it to achieve crisp video quality for their streams and high-stakes video calls. Similarly, corporate executives use it to elevate their virtual presentations, ensuring a professional image that a built-in laptop camera could never match. It’s the go-to solution for anyone combining a premium camera with their streaming setup.
Actionable Tips for Implementation
To integrate the Cam Link 4K smoothly into your workflow, consider these key steps:
- Confirm Clean HDMI Output: Before purchasing, verify that your camera model supports a “clean” HDMI output. This is crucial to avoid sending on-screen display data like battery life to your stream.
- Use High-Quality Cables: A poor-quality or overly long HDMI cable can cause signal degradation or connection drops. Invest in a short, high-speed HDMI cable for a stable and reliable video feed.
- Update Camera Firmware: Ensure your camera’s firmware is up-to-date. Manufacturers often release updates that improve compatibility and performance with capture devices like the Cam Link.
- Test Your Setup: Always run a test recording or a private stream before going live. This allows you to check for any audio sync issues, video flickering, or other potential problems.
7. Streamlabs Desktop (formerly Streamlabs OBS)
For creators seeking a powerful yet intuitive broadcasting solution, Streamlabs Desktop offers an all-in-one package that simplifies the technical side of streaming. Built on the open-source foundation of OBS Studio, it integrates a vast library of widgets, alerts, and monetization tools directly into the software. This consolidation removes the need for multiple browser sources and third-party services, creating a streamlined workflow from a single application.
Streamlabs Desktop is a foundational element of the best setup for streaming because it lowers the barrier to entry for producing a professional-looking broadcast. It provides a user-friendly interface that guides new streamers through setup, while its integrated features like themed overlays, donation goals, and alert boxes allow for immediate brand personalization and audience interaction.
Why It’s a Top Choice for Streamers
The software’s appeal is broad, making it a go-to for various creators. Many mid-tier Twitch streamers rely on its integrated chat management and alert system to foster community engagement without cluttering their setup. Similarly, YouTube Gaming creators appreciate the built-in super chat and membership features. For those just starting, Streamlabs offers an approachable platform to learn the fundamentals of scene composition and source management before diving into more complex configurations.
Actionable Tips for Implementation
To maximize the potential of Streamlabs Desktop in your streaming setup, focus on these practical steps:
- Start with the Free Version: Explore the core functionality and vast library of free themes and widgets before committing to a premium subscription. This allows you to understand the workflow and determine which paid features might benefit your stream.
- Backup Your Collections: Regularly use the built-in cloud backup feature for your scene collections and profiles. This protects your work from data loss and makes it easy to transfer your setup to a new computer.
- Optimize Performance: If you experience performance issues, navigate to the settings and disable any widgets or sources you are not actively using. High-motion video overlays or complex widgets can consume significant CPU resources.
- Customize Alerts: Go beyond the default sounds and graphics. Create custom alerts that reflect your channel’s personality and brand. This small touch makes your stream more memorable and encourages audience interaction.
8. The Essential Starting Point: Logitech C920 HD Pro Webcam
For aspiring and established streamers alike, the Logitech C920 HD Pro Webcam is the quintessential starting point. It has earned its place as the gold standard for streaming webcams by offering reliable 1080p video quality at an incredibly accessible price. While high-end mirrorless cameras provide a cinematic look, the C920 delivers a crisp, clear, and dependable image that is more than enough to build a professional-looking stream without a significant financial investment.
This webcam is a foundational component of the best setup for streaming for anyone on a budget. Its plug-and-play simplicity means you can get a high-quality video feed running in minutes, without the technical complexities of capture cards or advanced camera settings. Its wide compatibility with software like OBS Studio and Streamlabs makes it a seamless addition to any creator’s toolkit.
Why It’s a Top Choice for Streamers
The C920’s reputation is built on consistency and value. It’s the camera countless successful streamers used to build their initial audience, proving you don’t need expensive gear to create engaging content. Beyond the streaming world, corporate professionals rely on the C920 to maintain a polished appearance in remote meetings and video calls, making it a versatile tool for both work and play. Its widespread adoption is a testament to its solid performance.
Actionable Tips for Implementation
To maximize the quality of your Logitech C920, consider these simple but effective adjustments:
- Prioritize Good Lighting: The C920 performs best with ample light. Position a key light, like a ring light or softbox, facing you to eliminate shadows and create a bright, clear image. Avoid having strong light sources behind you.
- Set the Camera at Eye Level: Placing the webcam directly at eye level creates a more natural and engaging connection with your audience. Avoid low or high angles, which can be unflattering.
- Lock Your Focus: In your streaming software or Logitech’s G HUB, disable autofocus. This prevents the camera from “hunting” for focus and blurring your face during movement, ensuring a consistently sharp picture.
- Use an External Microphone: While the C920 has built-in microphones, a dedicated external mic will offer a significant upgrade in audio quality, which is just as important as video for a professional stream.
9. Razer Kiyo Webcam
For streamers who need an all-in-one solution to video and lighting, the Razer Kiyo is an innovative and highly practical choice. This webcam was designed specifically to solve one of the biggest hurdles for new creators: poor lighting. It integrates an adjustable multi-step ring light directly around the camera lens, providing a soft, even light source that dramatically improves your on-screen appearance without the need for separate, bulky lighting equipment.
The Kiyo is a key component in a beginner’s best setup for streaming because it combines a 720p/60fps or 1080p/30fps camera with a functional light source. This simple yet brilliant design choice makes it a powerful plug-and-play device, offering an immediate and noticeable upgrade over standard webcams, especially in less-than-ideal lighting conditions.
Why It’s a Top Choice for Streamers
The Kiyo’s compact, integrated design makes it exceptionally popular. Streamers with limited desk space or those who frequently change their streaming location, like mobile content creators, choose the Kiyo for its convenience. It eliminates the complexity of setting up a three-point lighting system, making it perfect for laptop users or anyone in a small apartment. Gaming streamers often use it to ensure their face is clearly visible and well-lit against the glow of their monitors.
Actionable Tips for Implementation
To maximize the effectiveness of your Razer Kiyo, focus on these practical adjustments:
- Adjust Ring Light Brightness: Don’t just turn it on full blast. Experiment with the different brightness levels by rotating the bezel. Find the most flattering setting that illuminates your face without washing out details.
- Minimize Glare on Glasses: If you wear glasses, position the camera slightly higher and angle it down. This changes the angle of reflection and can significantly reduce the distracting glare from the ring light.
- Use as a Fill Light: In a more advanced setup, the Kiyo’s ring light can serve as an excellent fill light. Use a larger key light as your main source and set the Kiyo’s light to a lower intensity to soften shadows on your face.
- Test Camera Distance: The effectiveness of the ring light changes with distance. Test different positions to find the sweet spot where the light is soft and even, typically within arm’s length of the camera.
10. The Illumination Powerhouse: Godox SL-60W LED Video Light
Poor lighting is the fastest way to undermine an otherwise high-quality stream. The Godox SL-60W is a powerful, budget-friendly continuous LED light that brings professional-grade illumination to your setup. This light provides a significant upgrade from basic ring lights or desk lamps, offering the brightness, consistency, and color accuracy needed to create a truly professional video feed. Its core value is providing a high-output, daylight-balanced light source that you can shape and control.
This LED video light is a critical component of the best setup for streaming because it separates you from the background and ensures your camera sensor captures a clean, low-noise image. Proper lighting allows your camera to use a lower ISO, resulting in a crisper, more detailed picture that looks polished and professional, regardless of the time of day.
Why It’s a Top Choice for Streamers
The Godox SL-60W is a favorite among a wide range of creators. Professional YouTubers rely on it to achieve consistent, flattering lighting for their studio recordings. Corporate streamers use it to ensure executives look sharp and well-lit during important virtual presentations. Even photography and product streamers use the SL-60W to accurately showcase colors and details, thanks to its high Color Rendering Index (CRI).
Actionable Tips for Implementation
To maximize the impact of your Godox SL-60W for streaming, apply these essential techniques:
- Diffuse for Softness: Use a softbox or an umbrella attachment to diffuse the light. This creates a larger, softer light source that produces even, flattering illumination and reduces harsh shadows on your face.
- Master the 45-Degree Angle: Position the light at a 45-degree angle to your side and slightly above eye level. This classic “key light” position creates dimension and depth, preventing a flat, washed-out look.
- Maintain Color Consistency: The SL-60W is daylight-balanced (5600K). Ensure other lights in your room are either turned off or match this color temperature to avoid mixed, unnatural-looking lighting.
- Start Low, Adjust Up: Begin with the light at a lower power setting and gradually increase it until you are properly exposed. This prevents overexposure and helps your camera perform optimally.
- Invest in a Solid Stand: A sturdy light stand is non-negotiable for both safety and flexible positioning. It allows you to place the light exactly where you need it for the best possible effect.
Top 10 Streaming Setup Components Comparison
| Item | Implementation Complexity 🔄 | Resource Requirements ⚡ | Expected Outcomes 📊 | Ideal Use Cases 💡 | Key Advantages ⭐ |
|---|---|---|---|---|---|
| Elgato Stream Deck | Moderate – requires setup & learning | Moderate – desk space and budget | Streamlined control of streaming actions | Streamers managing scenes, audio, lighting | High customization, tactile feedback |
| OBS Studio | High – steep learning curve | High – demands decent hardware | Professional-grade streaming & recording | Professional streamers, educational & corp uses | Free, highly customizable, no limits |
| Audio-Technica AT2020USB+ Mic | Low – plug-and-play | Low – USB powered | Studio-quality audio capturing | Content creators needing clear audio | Exceptional clarity, headphone monitoring |
| Sony Alpha a6000 Series Camera | High – needs additional gear | High – camera, capture card, lenses | DSLR-quality video streaming | Streamers upgrading from webcams | Superior image quality, fast autofocus |
| Blue Yeti USB Microphone | Low – plug-and-play | Low – USB powered | Versatile and professional audio capture | Streamers, podcasters needing flexible mic | Multiple pickup patterns, onboard controls |
| Elgato Cam Link 4K | Low-Moderate – plug-and-play but needs compatible camera | Moderate – USB & HDMI camera | High-quality webcam from HDMI cameras | Streamers using DSLR/mirrorless cameras | Ultra-low latency, broad compatibility |
| Streamlabs Desktop | Moderate – easier than OBS | High – resource-intensive | All-in-one streaming and monetization | Growing streamers wanting integrated tools | User-friendly, built-in alerts & donations |
| Logitech C920 HD Pro Webcam | Low – plug-and-play | Low – USB powered | Reliable HD streaming webcam | Beginner streamers, budget-conscious | Consistent quality, wide compatibility |
| Razer Kiyo Webcam | Low – plug-and-play | Low – USB powered | Webcam with integrated lighting | Streamers needing built-in lighting | Built-in adjustable ring light |
| Godox SL-60W LED Video Light | Moderate – setup & lighting knowledge | Moderate – power & space needed | Professional streaming lighting | Serious creators needing high-quality illumination | Silent, daylight balanced, dimmable |
Bringing It All Together: Your Next Steps to Streaming Success
Navigating the landscape of streaming hardware and software can feel overwhelming, but as we’ve explored, creating a professional broadcast is an achievable goal built upon a series of deliberate choices. The journey to crafting the best setup for streaming isn’t about acquiring the most expensive gear; it’s about selecting the right components that align with your specific content goals, technical comfort level, and budget. Each piece of equipment we’ve covered, from the accessible quality of the Logitech C920 webcam to the cinematic potential of a Sony Alpha a6000, serves as a crucial building block in your production toolkit.
The true power of a high-quality setup emerges when these individual components work in harmony. It’s the combination of crisp, well-lit video from a Godox SL-60W, the rich and clear audio captured by an Audio-Technica AT2020USB+, and the seamless scene transitions managed by an Elgato Stream Deck that elevates a broadcast from amateur to professional. This synergy is what captivates an audience and keeps them engaged.
Key Takeaways for Your Streaming Journey
As you move forward from this guide, keep these core principles at the forefront of your strategy:
- Audio is Non-Negotiable: Poor video quality can sometimes be forgiven, but poor audio will cause viewers to leave almost immediately. Prioritizing a quality microphone like the Blue Yeti or the AT2020USB+ is one of the most impactful investments you can make.
- Lighting Creates the Mood: Proper lighting is the secret ingredient that makes good cameras look great. A key light source like the Godox SL-60W fundamentally transforms your visual presence, adding depth, clarity, and professionalism that a camera alone cannot achieve.
- Software is Your Production Hub: Your choice between the powerful, open-source customizability of OBS Studio and the user-friendly, all-in-one ecosystem of Streamlabs Desktop will define your workflow. Experiment with both to discover which platform best suits your style and technical needs.
- Control Unlocks Creativity: Tools like the Elgato Stream Deck are more than just convenient gadgets. They are command centers that free you from fumbling with keyboard shortcuts, allowing you to focus on your content and interact with your audience in real time.
From Blueprint to Broadcast: Your Actionable Next Steps
With this knowledge in hand, your path forward is clear. It’s time to transition from learning to doing. Start by auditing your current setup. Identify the single weakest link in your production chain, whether it’s subpar audio, grainy video, or harsh lighting.
Use the recommendations in this article as a blueprint. If your audio is lacking, consider one of the recommended microphones. If your webcam isn’t cutting it, evaluate whether an upgrade to a Razer Kiyo or a move to a mirrorless camera via an Elgato Cam Link 4K is your next logical step. The process is iterative; a perfect setup is built over time, not bought all at once.
Remember, the ultimate goal is to create a seamless experience where the technology becomes invisible, allowing your personality and your content to take center stage. The best setup for streaming is the one that empowers you to connect with your audience effortlessly and authentically. Your unique voice, combined with a polished and reliable technical foundation, is the true formula for success in the dynamic world of live streaming.
Ready to move beyond a personal setup and build professional-grade streaming features directly into your own platform or application? LiveAPI provides a powerful, developer-friendly infrastructure to handle video ingestion, encoding, and global delivery at scale. Integrate the power of a world-class streaming backend with your unique vision by exploring our robust tools at LiveAPI.